92
MBOX® USER MANUAL
The Stencil
To explain the Drawmodes other than “Light” requires an explanation of the “Stencil” and what it means to cut it, draw
onto it and draw through it. The Stencil is an imaginary layer that can be cut, as if cutting holes in a piece of cardboard.
The stencil can then be used as a tool to tell other layers how their textures are applied: either onto the areas where the
stencil is whole or the areas where the stencil has holes in it - a bit like adding a label to a roadcase by spray-painting
through a cardboard stencil.
There are two important things to note:
1) When using a layer to cut the stencil, the holes that it makes in the stencil can only affect higher numbered layers.
For example, if Layer 3 is used to make cuts to the stencil, those cuts will never affect Layer 1 or 2 no matter what
Drawmode those layers are set to.
2) For useful results, the layer used to cut the stencil must be a 3D object and/or have some transparency. A 3D object
or gobo can be used for cuts similar to static masking. Alternately, a movie with some transparency - use a texture
effect like Key - Black or Edge Work on the layer to give it transparency in some areas - can be used to cut animated
holes in the stencil. If rectangular image or movie clip with no transparency is used to cut the stencil, it will only create
a rectangular hole in the stencil.
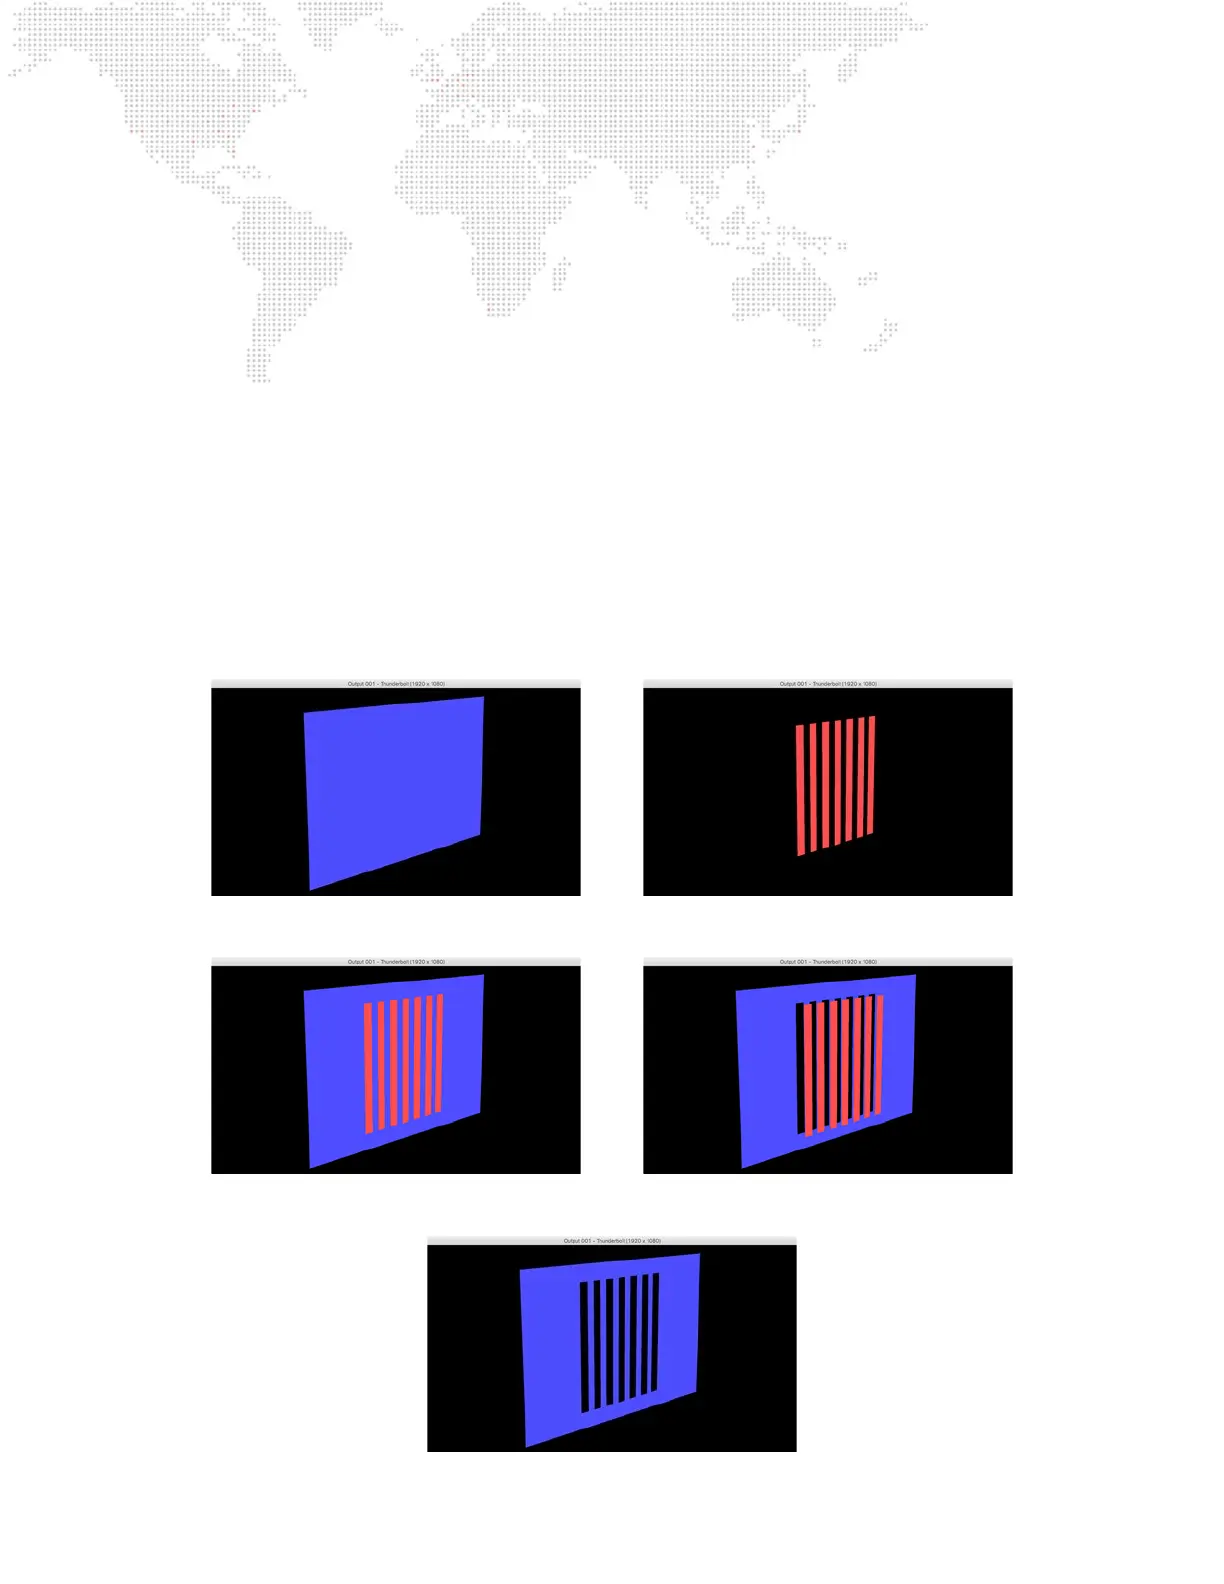
The following example images illustrate the process of cutting the stencil. The blue rectangle represents the imaginary
stencil and the red digital gobo is the object that will cut the stencil:
The following images rst shows the two together and then shows the holes being cut into the stencil by the gobo:
Finally, the following image shows the stencil on its own showing the holes cut into it: