104©2006 Sunrise Medical
SEATING SECTION
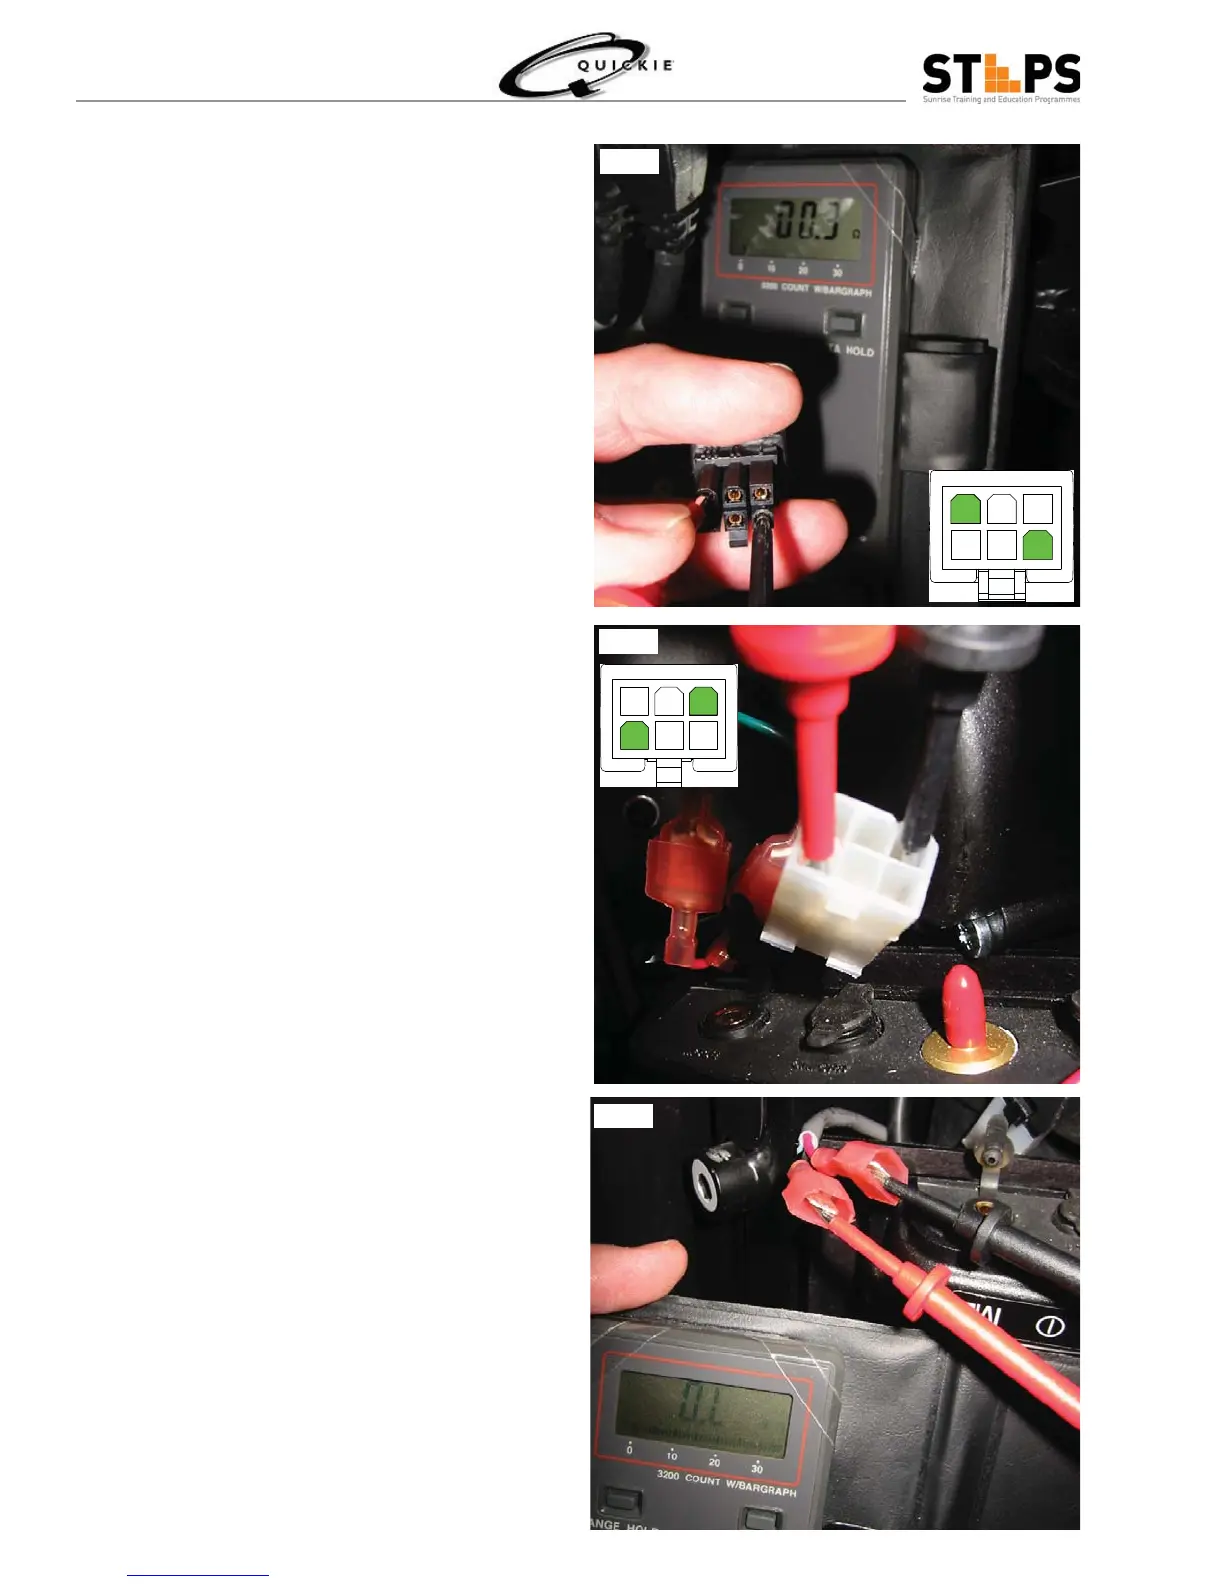
Connect a meter to the 2 pins indicated in the 5.
photo (Fig 3.93).
Check continuity through the switch by pressing 6.
in on the Recline CRS plunger. Note, when the
seat-back is in the full upright position the switch
should open. When the seat reclines the switch
should close.
If the switch does not change state, trace the ca-7.
ble from the QMAC to the other end and another
6-pin cable leading to the actuator.
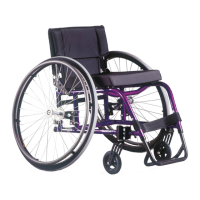
Disconnect the 6-pin connector. 8.
Check continuity through the 6-pin male connec-9.
tor leading to the Recline CRS by pressing in on
the Recline CRS plunger. Refer to the photo to
determine the correct pins to measure continuity
(Fig 3.94).
If the switch changes state, replace the cable with 10.
the two, 6-pin female connectors leading to the
QMAC.
If the switch does not change state, locate a 2-11.
wire cable leading from the Recline CRS to the
recline actuator.
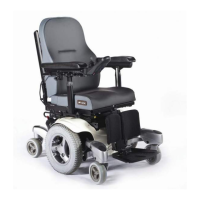
Disconnect the 2 lug connectors. 12.
Check operation of the Recline CRS by measur-13.
ing continuity through the actuator (Fig 3.95) and
by pressing on the CRS plunger.
Replace the recline actuator if the switch changes 14.
state. Refer to Recline Actuator Removal section
in this manual.
Replace the Recline CRS assembly if the switch 15.
does not change state. Refer to Recline CRS
Replacement section in this manual.
Replace the QMAC if the switch does change 16.
state and no switch or wiring errors were found.
Refer to Recline Actuator section in the manual to
replace the QMAC.
Fig 3.95
Fig 3.94
Fig 3.93