98©2006 Sunrise Medical
SEATING SECTION
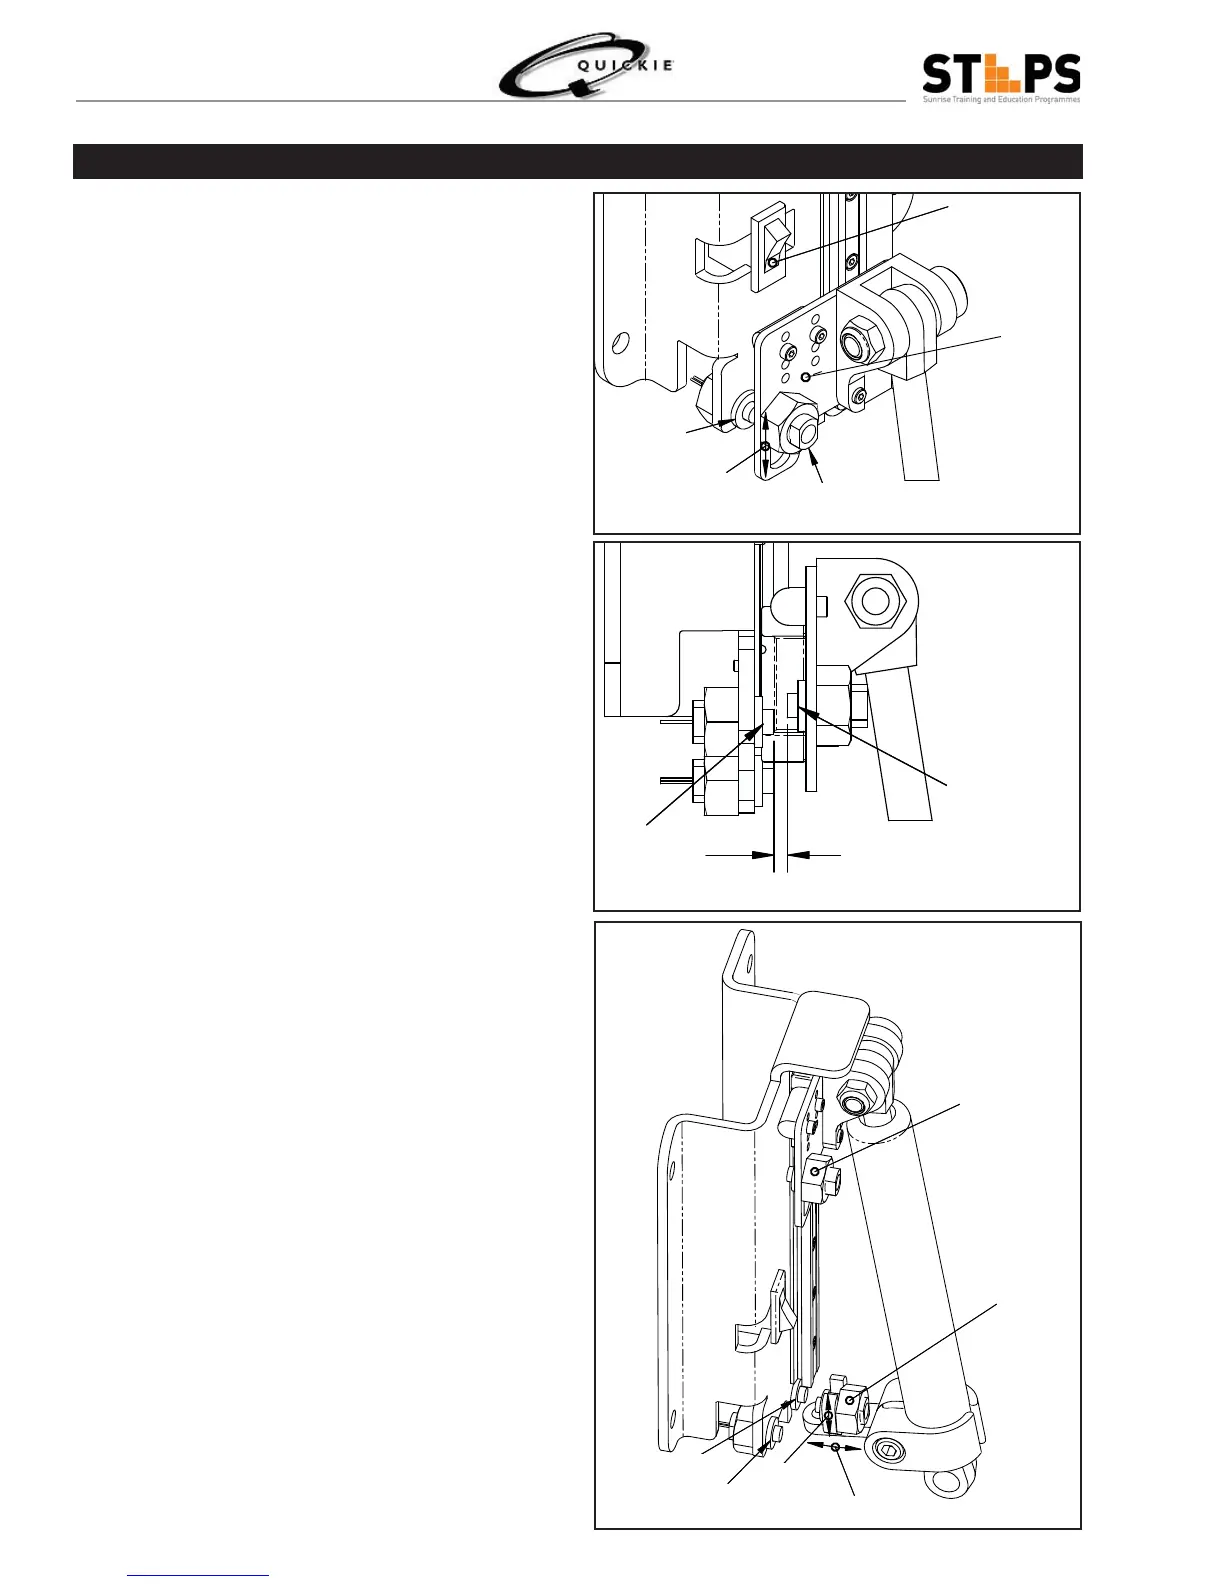
With the back pan set at 95° ±1° with respect 1.
to the seat pan, the Actuator Magnet (B) should
activate Reed Switch “A”.
Actuator Magnet (B) may be moved vertically as 2.
shown by arrow (C) to accomplish this set up.
Rocker Switch MUST be in the down position as 3.
shown, during initial set-up, and be activated with
the back pan set at 107°±2.5° with respect to
seat pan.
Hole pattern in Actuator Bracket provides 2.5° 4.
incremental adjustments.
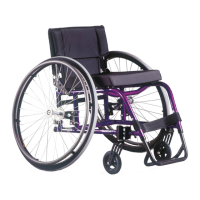
Gap between the Reed Switch (A) and Actuator 5.
Magnet “B” to be 1-3 mm (3mm maximum).
Actuator Magnet (B) is depth adjustable by loos-6.
ening hex nut, pushing mount in, then rotating it
90°, and re-tightening hex nut.
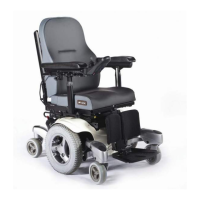
With the back pan set at 171° ±1° with respect to 7.
the seat pan, (Gas Spring fully compressed), the
Actuator Magnet (E) should activate Reed Switch
(D).
Actuator Magnet (E) may be moved vertically as 8.
shown by arrow (F) and horizontally as shown by
arrow (G) to accomplish this set up.
Rocker Switch
Actuator
Bracket
Actuator
Magnet B
C
Reed Switch
A
Reed Switch
A
3mm Maximum
Actuator
Magnet B
Actuator
Magnet B
Actuator
Magnet E
Reed Switch
A
Reed Switch D
F
G
Reed Switch Adjustment
Fig 3.76
Fig 3.77
Fig 3.78