EasyManuals Logo
Home>QuickLabel Systems>Label Maker>pronto! 486

QuickLabel Systems pronto! 486 User Manual

Default Icon
256 pages
To Next Page IconTo Next Page
To Previous Page IconTo Previous Page
Page #195 background imageLoading...
Page #195 background image
Pronto! 482/486/682/863 11-11
Installing the printhead
1 Attach plug connections (2, 3).
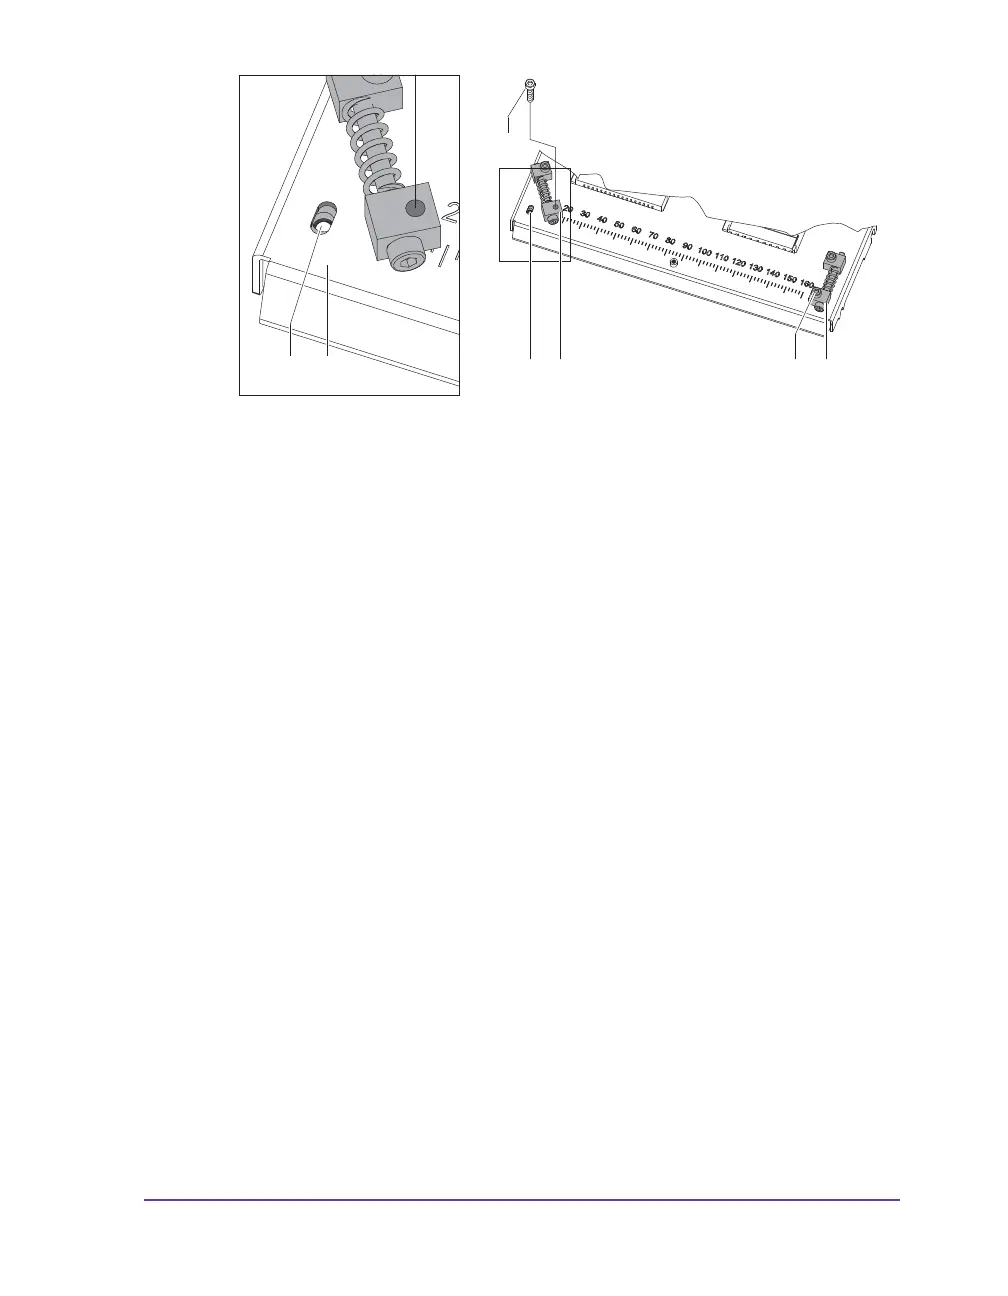
2 Swing the adjustment elements (11) sidewards to uncover the slots (10) in
the printhead carriage.
3 Put in the printhead into the printhead carriage and swing down the
printhead assembly by hand and hold it.
4 Position the printhead in such a way that the threaded holes of the
printhead are centered into the slots (10) of the printhead carriage.
5 Swing back the adjustment elements (11) to the home position.
6 Insert and tighten the screws (6).
7 Reload labels and transfer ribbon (see Chapter 6: Loading media).
10 7
10 11
6
116

Table of Contents

Questions and Answers:

Question and Answer IconNeed help?

Do you have a question about the QuickLabel Systems pronto! 486 and is the answer not in the manual?

QuickLabel Systems pronto! 486 Specifications

General IconGeneral
BrandQuickLabel Systems
Modelpronto! 486
CategoryLabel Maker
LanguageEnglish

Related product manuals