Kiaro! 200 Maintenance Utility
78 Kiaro! 200 User Guide
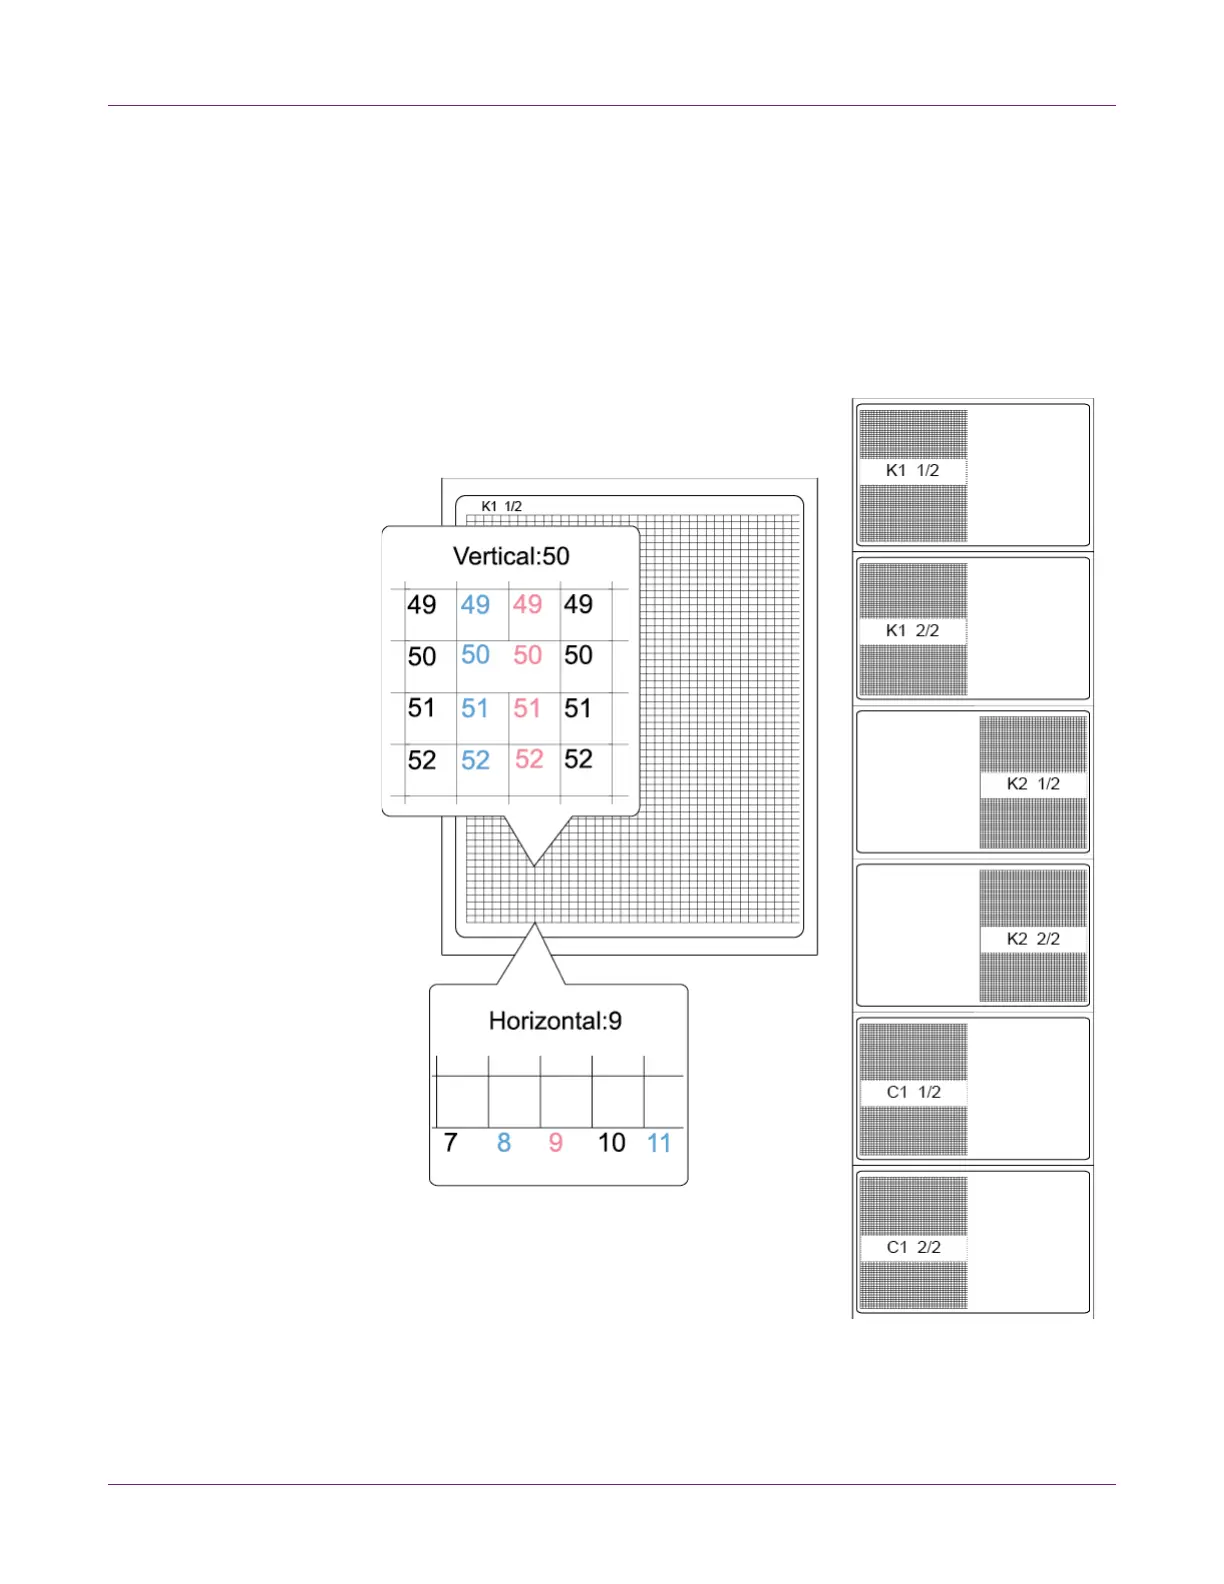
6 Examine the pattern for missing lines within the grids. Note the locations of any
missing lines for each color grid.
The printhead (left or right) is indicated after the color abbreviation for each pattern.
The left printhead is indicated as 2, and the right printhead is indicated as 1. For
example, K1 indicates the black pattern printed by the right printhead.
In the following example of the black pattern for the right printhead, the missing line
is located in the vertical (x) coordinate of 50, and the horizontal (y) coordinate of 9
on the grid.
7 To read the adjustment list from the printer and populate the adjustment list
accordingly, choose Refresh List.
8 Enter an adjustment for each missing line.