Kiaro! 200 Maintenance Utility
Kiaro! 200 User Guide 83
6 Use a magnifying glass or loupe to examine the pattern closely. Determine the best
matched left/right pair of colors and note the adjustment value.
7 Enter the adjustment value for each color in the Density Adjustment window.
8 Choose Save to Printer. The density adjustment settings will be saved.
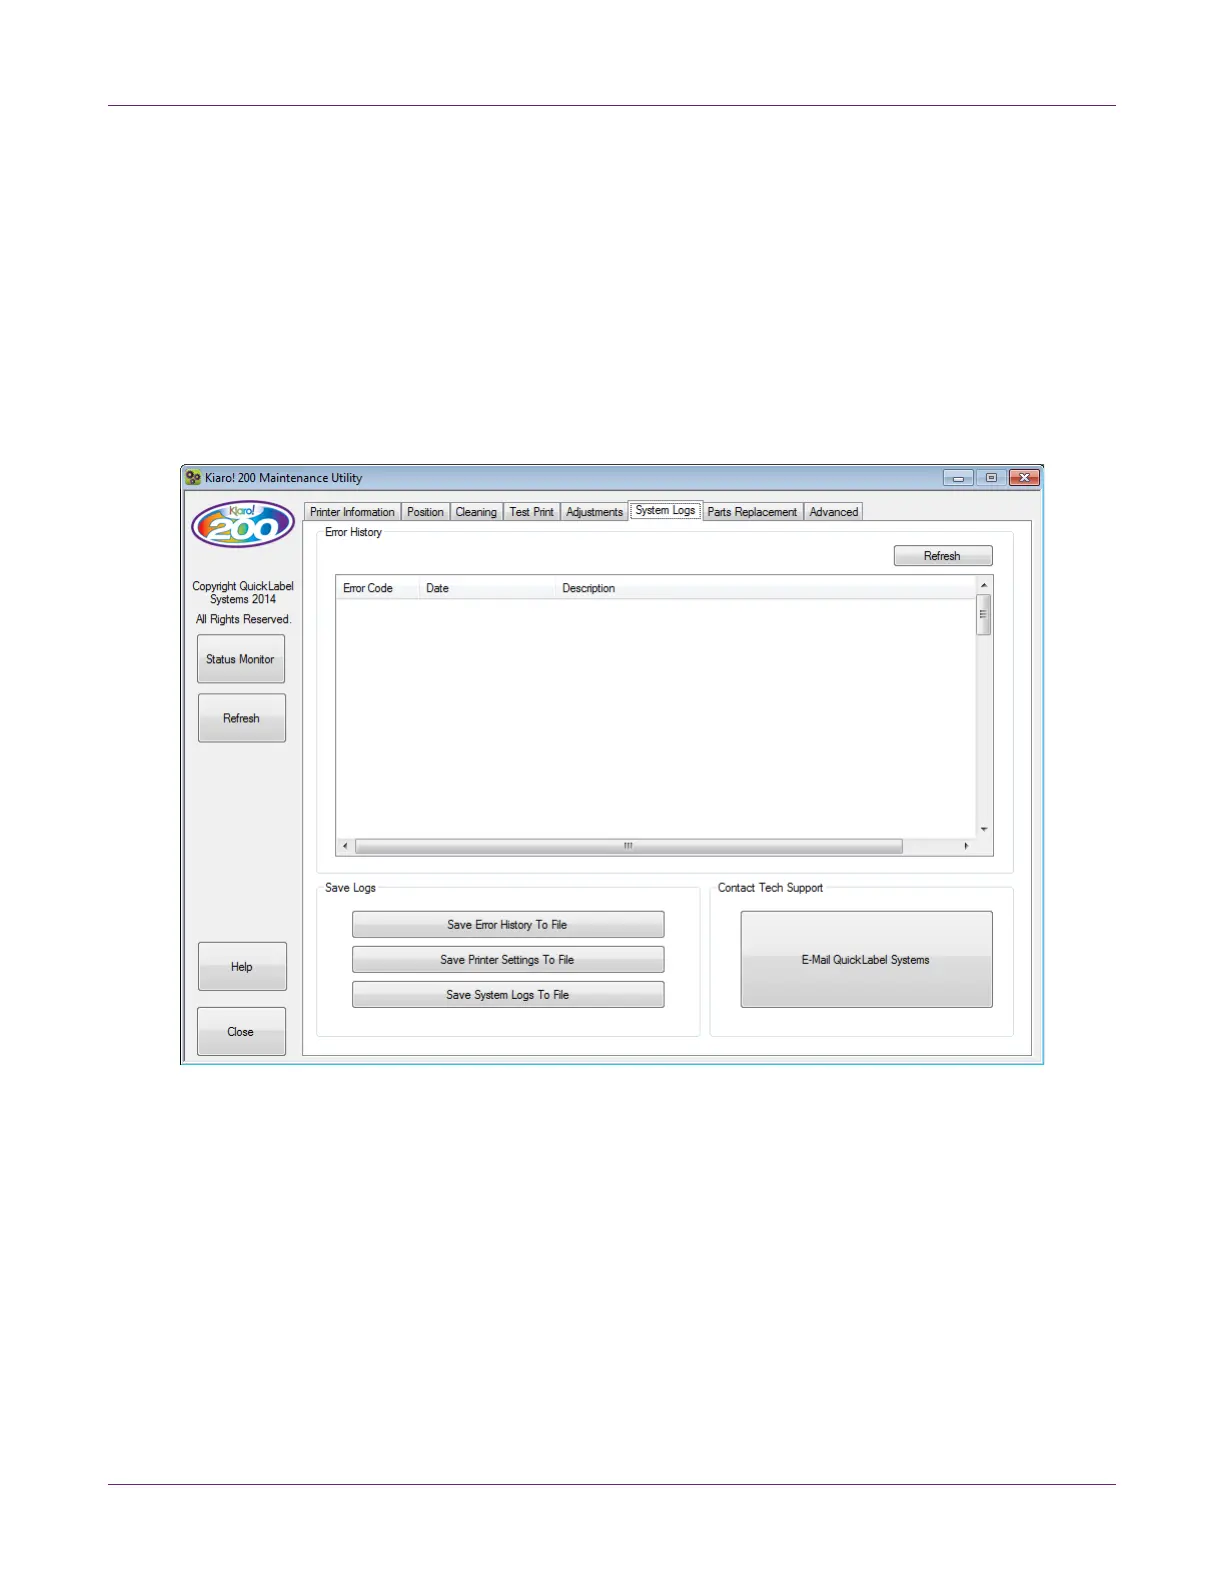
System Logs Tab
Use the System Logs tab to view the error history and save log files. It also provides
a convenient way to e-mail QuickLabel Support.
Viewing the Error History
1 Launch the Kiaro! 200 Maintenance Utility.
From the Windows Start Menu, choose Start > All Programs > QuickLabel
Kiaro! 200 > Kiaro! 200 Maintenance Utility. A language and printer prompt will
open.
Select a display language and the Kiaro! 200 printer you want to connect to.
Choose OK.
2 Choose the System Logs tab.
3 Use the scroll bars to browse the error history of the printer.
4 To refresh the error list, choose Refresh.