Alternatively, you can also configure your XT Series to block video input from your local endpoint by
default at the start of each call. For more information, see Blocking Video Input by Default on page 86.
Procedure
Block your video during a videoconference as follows:
•
Press and hold the Mute key on the XT Remote Control Unit.
•
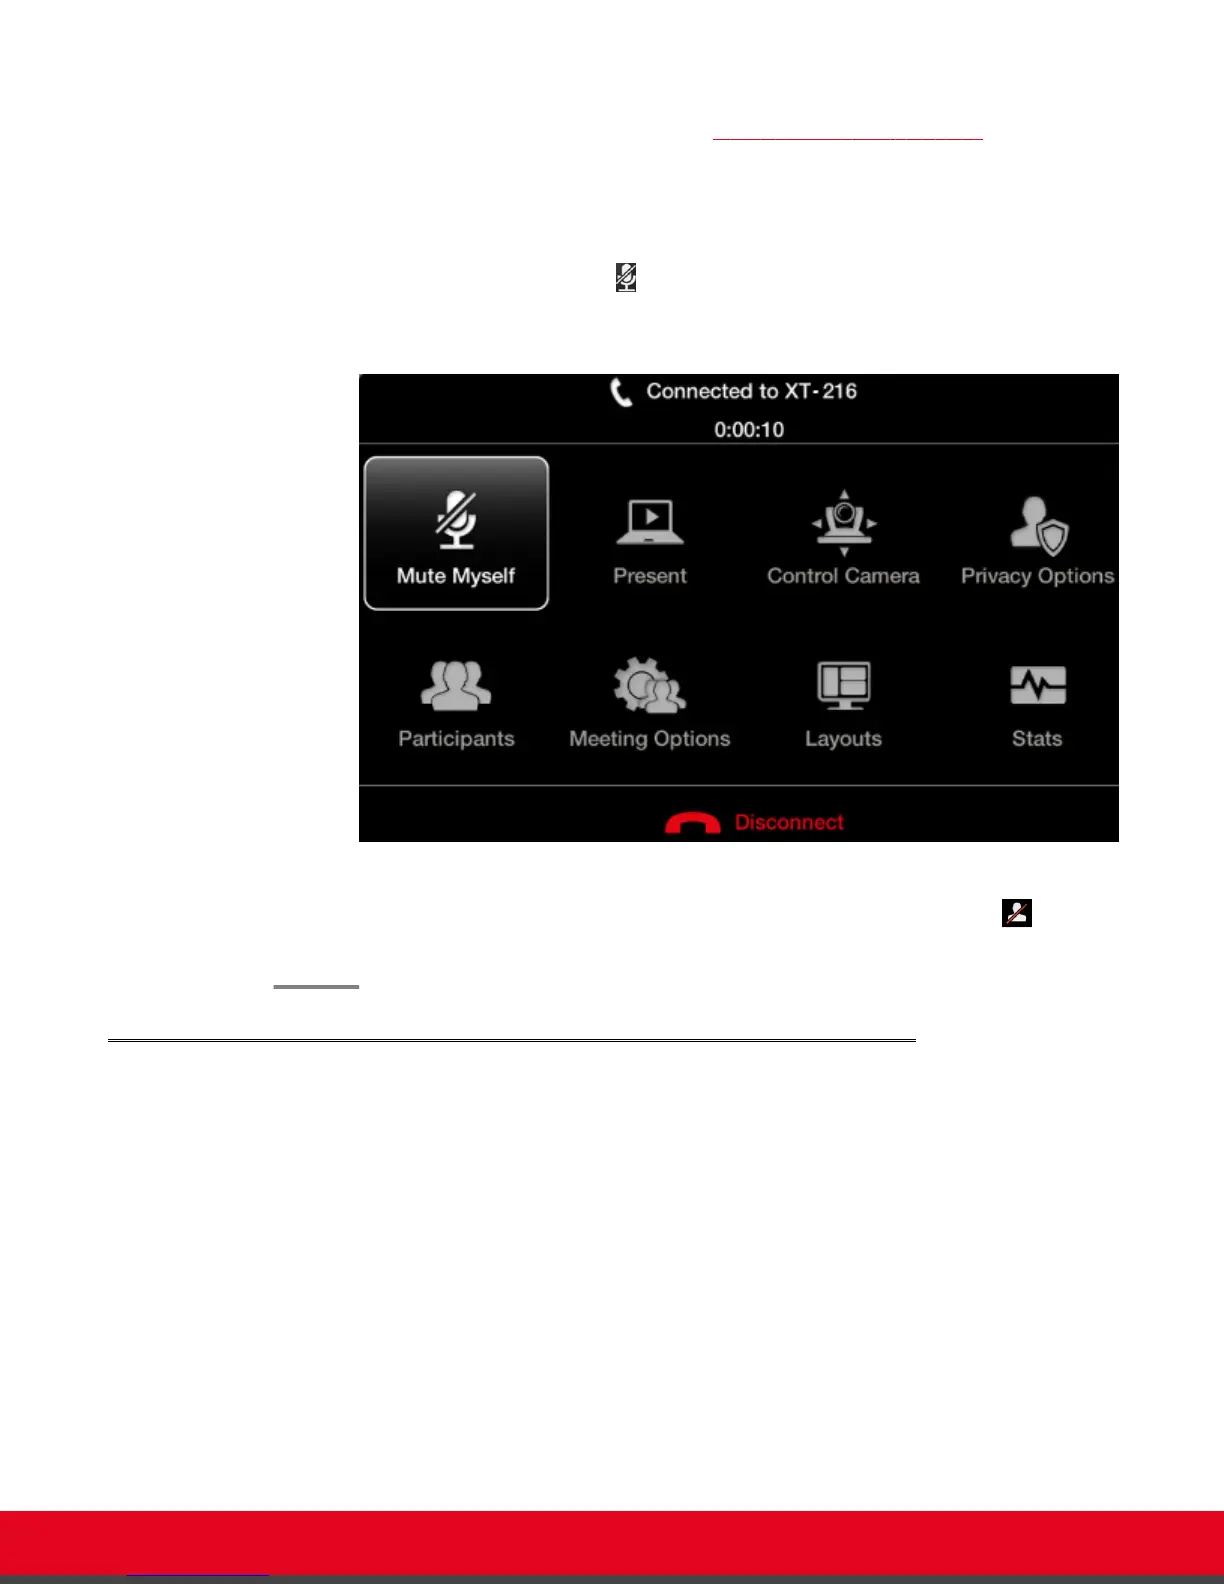
Press ok/menu to access the In-call menu, and select Privacy Options > Privacy:
Figure 36: In-call menu
The system sends a pre-defined image to the remote endpoint, indicated by the icon on
your display.
Moving the Camera's Position
About this task
This procedure describes how to position your camera's angle and zoom, to include all people present in
the room in the video. You can do this procedure from the endpoint itself or from the XT Series web
interface.
You can control and include more than one HDMI camera in your video by connecting them to the
Scopia XT Camera Switch (purchased separately). Multiple cameras are typically used for larger
meeting rooms or auditoriums. For example, you may want to zoom one camera to focus on the
speaker, and use another camera for the audience. Connecting the Scopia XT Camera Switch also
allows you use multiple cameras while still keeping the DVI port open to connect a computer and share
content. For more information about connecting the Scopia XT Camera Switch, see Installation Guide for
Scopia XT Series.
User Guide for Scopia XT5000 Series Version 3.2 During Your Videoconference | 52