By default, the system stores the last camera position and retrieves this position the next time the
camera is switched on. You can store multiple camera positions for future use, as described in
Administrator Guide for Scopia XT Series.
For information about connecting the Scopia XT Camera Switch, see the Installation Guide for Scopia
XT Series.
Before you begin
Configure your camera settings, as described in Installation Guide for Scopia XT Series.
Procedure
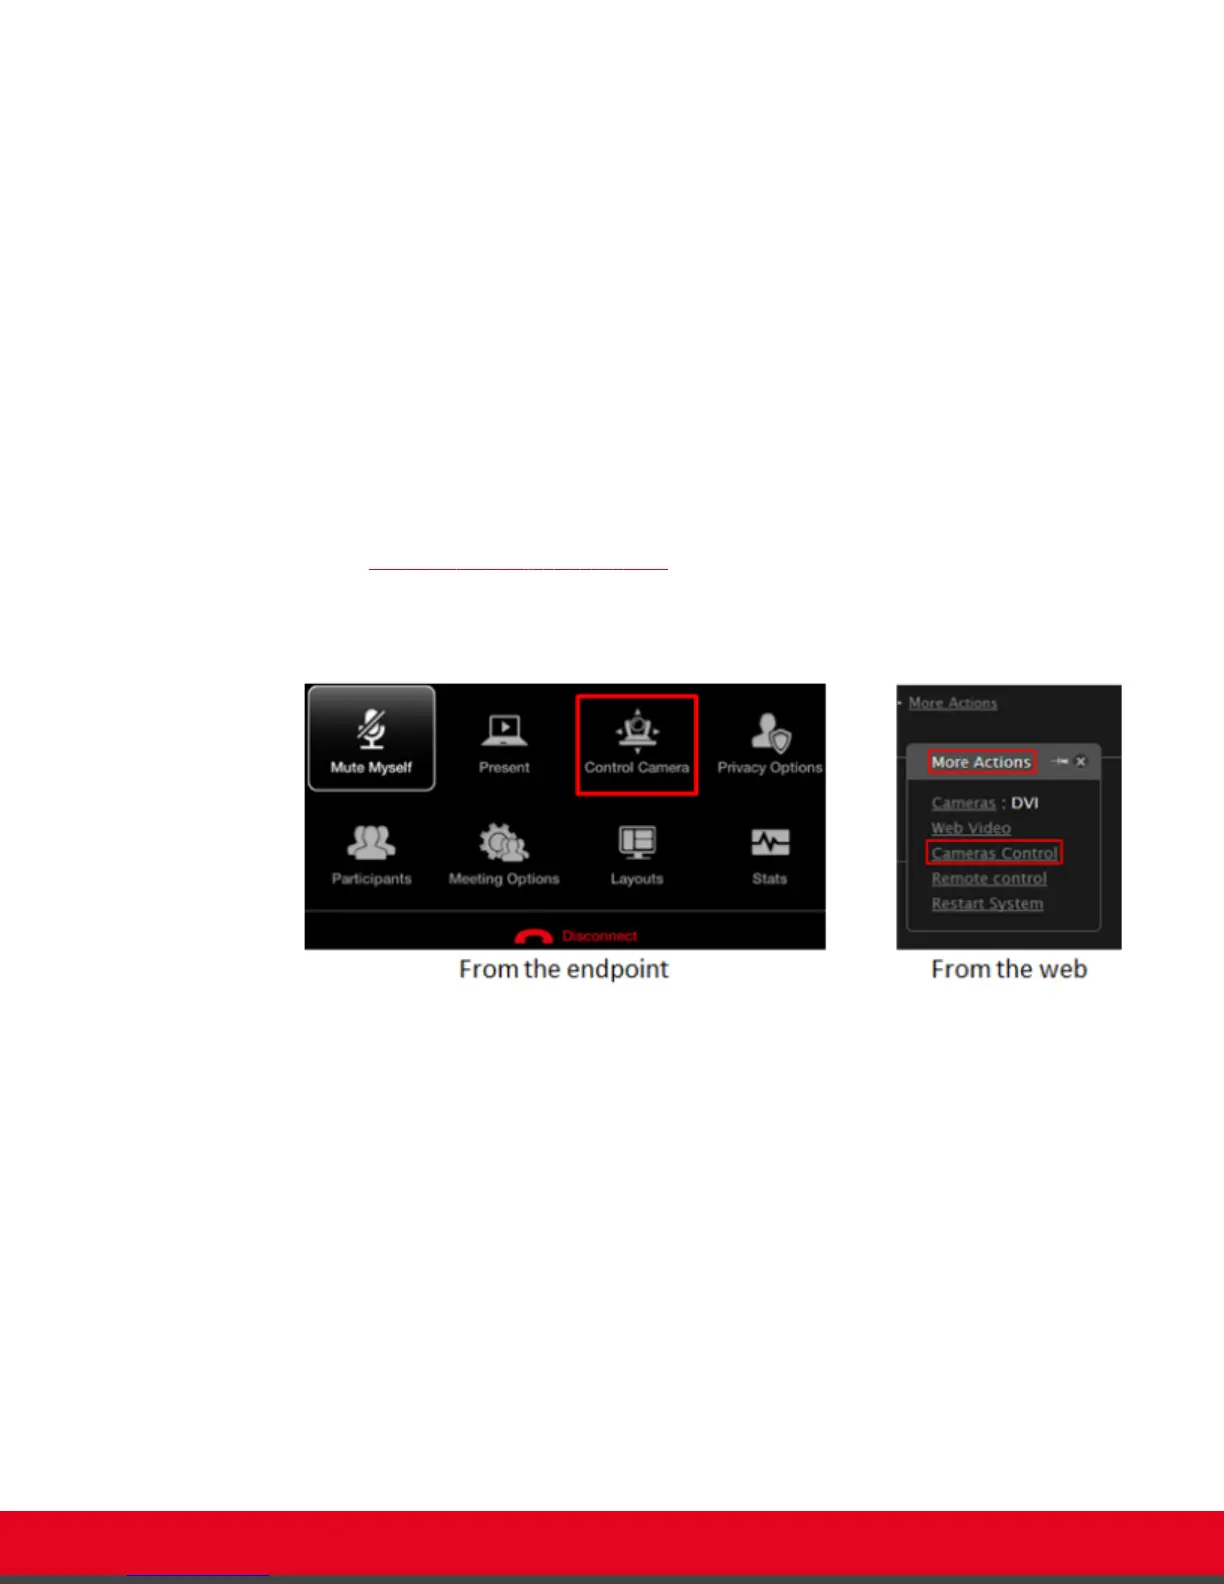
1. Access the camera control menu as follows:
•
From the XT Series web interface, select More Actions > Cameras Control.
•
From the endpoint's main menu, select Control Camera and press ok/menu.
During a videoconference, press ok/menu to access the videoconference menu
(Figure 37: Controlling your camera on page 53), and then select Control Camera.
You can now move the camera that you configured to be the default. For details on setting
your default camera, see Installation Guide for Scopia XT Series.
Figure 37: Controlling your camera
2. To move a camera other than the default camera, first select it:
•
From the endpoint's main menu, press ok/menu and select Video Source. Press
ok/menu repeatedly to switch between cameras.
•
From the XT Series web interface, select the camera type icon next to Cameras to
switch between different cameras.
User Guide for Scopia XT5000 Series Version 3.2 During Your Videoconference | 53