24 | Gilat Satellite Networks | Confidential and Proprietary Information
4. Mount the antenna on the metal legs installed on the roof.
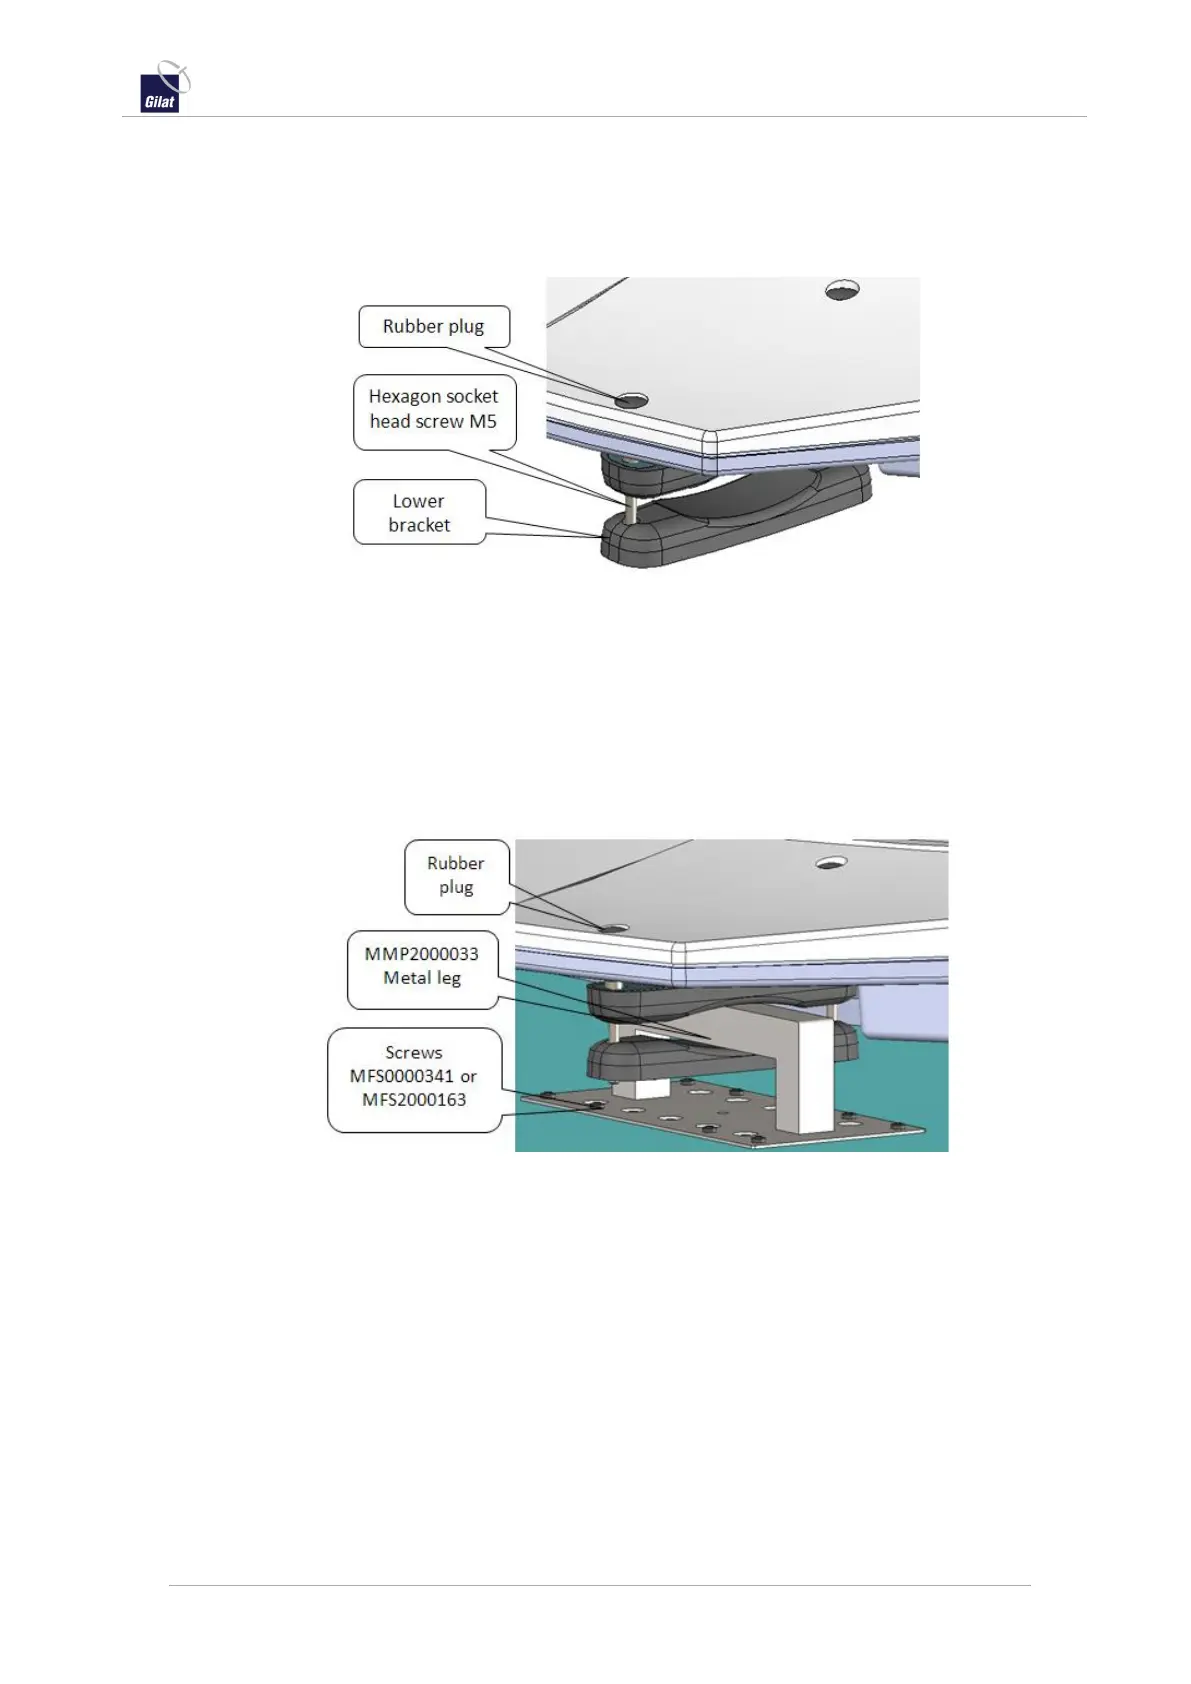
a. Remove the rubber plugs from the access holes on the top of the antenna.
b. If the lower brackets of the brackets are already installed, uninstall them by
unscrewing the head screws through the access holes.
Figure 25: Preparing the antenna for mounting
c. With the upper brackets still installed, place the antenna on top of the
already mounted metal legs.
d. Verify that the antenna upper brackets are properly positioned on the legs
and perform corrections as needed.
See Notes About Clamp Installation, on page 16.
e. Mount the lower bracket under the metal leg.
See Notes About Clamp Installation, on page 16.
Figure 26: Antenna mounted on leg
f. Put the rubber plugs back in place.
5. Route the cables from the antenna to the indoor equipment.
a. Preferably, route the cable from the antenna to the indoor equipment
through existing openings on the roof for other cables (for example, air
conditioning, covers, ventilation hatch).
b. If this is not possible drill at a convenient place on the roof a hole with
diameter Ø15mm (for the cable with the TNC connector).
c. Seal the hole for cable with silicone RTV.
For complete information about routing cables in different circumstances, see
Routing Cables Into the Vehicle, on page 30.
 Loading...