65
(1) Objectlling(0-100%)
Werecommendobjectllingof10%to40%.
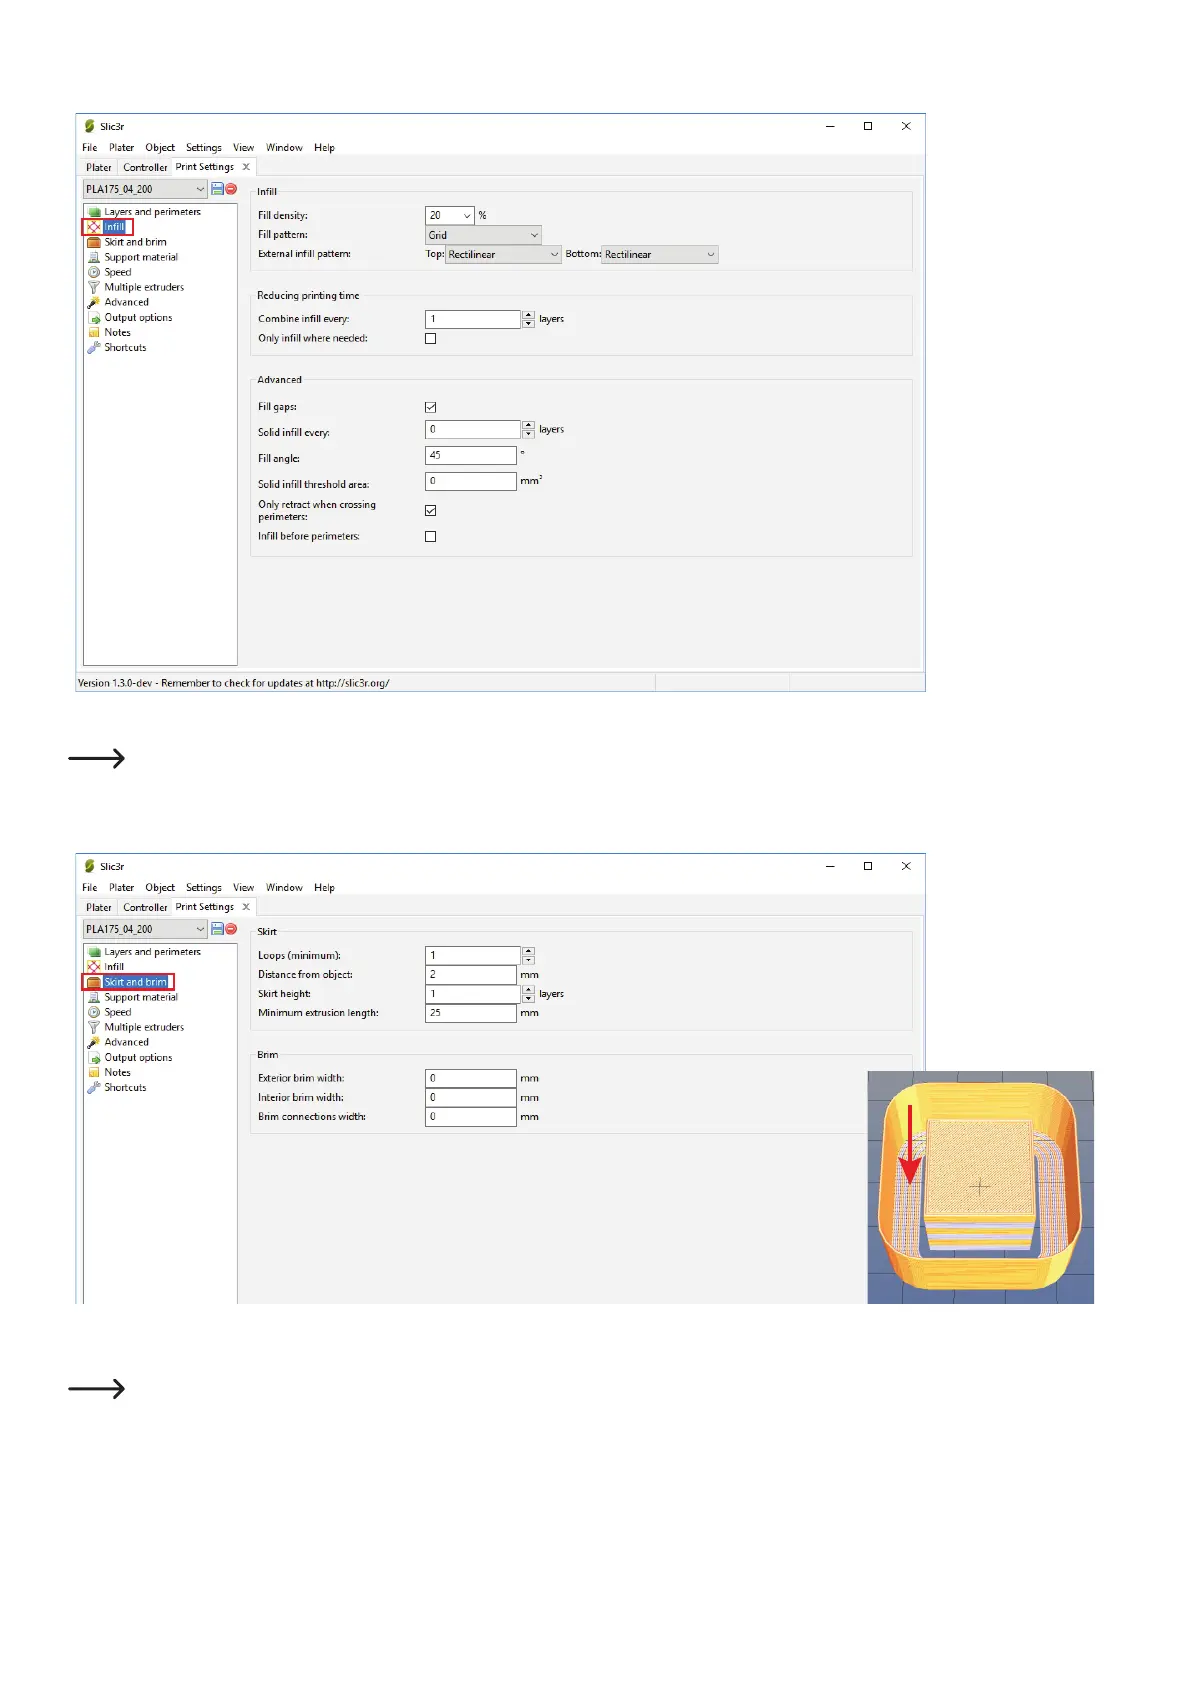
(2) Fillingpatternoftheobjectandtherstandlastlayer
(1) Loopsarecircles,thataredrawnaroundtheobjectwhenprintingstarts,stabilisethelamentowbeforetheactualobjectisprinted.Here,
number,distancefromtheobject,heightandminimumlengtharespecied.
For 2-coloured printing objects, a wall will be drawn around the object that is used to wipe off the extruders. The bottom-most layer
isbroaderthanthewallhere(seeredarrowinthesmallpicture).Thelengthofthislayerisspeciedinthesetting"Minimum extru-
sion length". A value of approx. 25 mm is enough for a printed object with a diameter of up to approx. 50 mm. If you want to print
larger 2-coloured objects, increase the value accordingly. Proceed with caution for this, since the layer may otherwise reach to below
the printing object.
(2) "Brim" is a thin edge that is placed right around the object to increase the footprint and thus adhesion to the printing plate. Here, the width
ofthebrimisspecied.
2
1
2
1