74
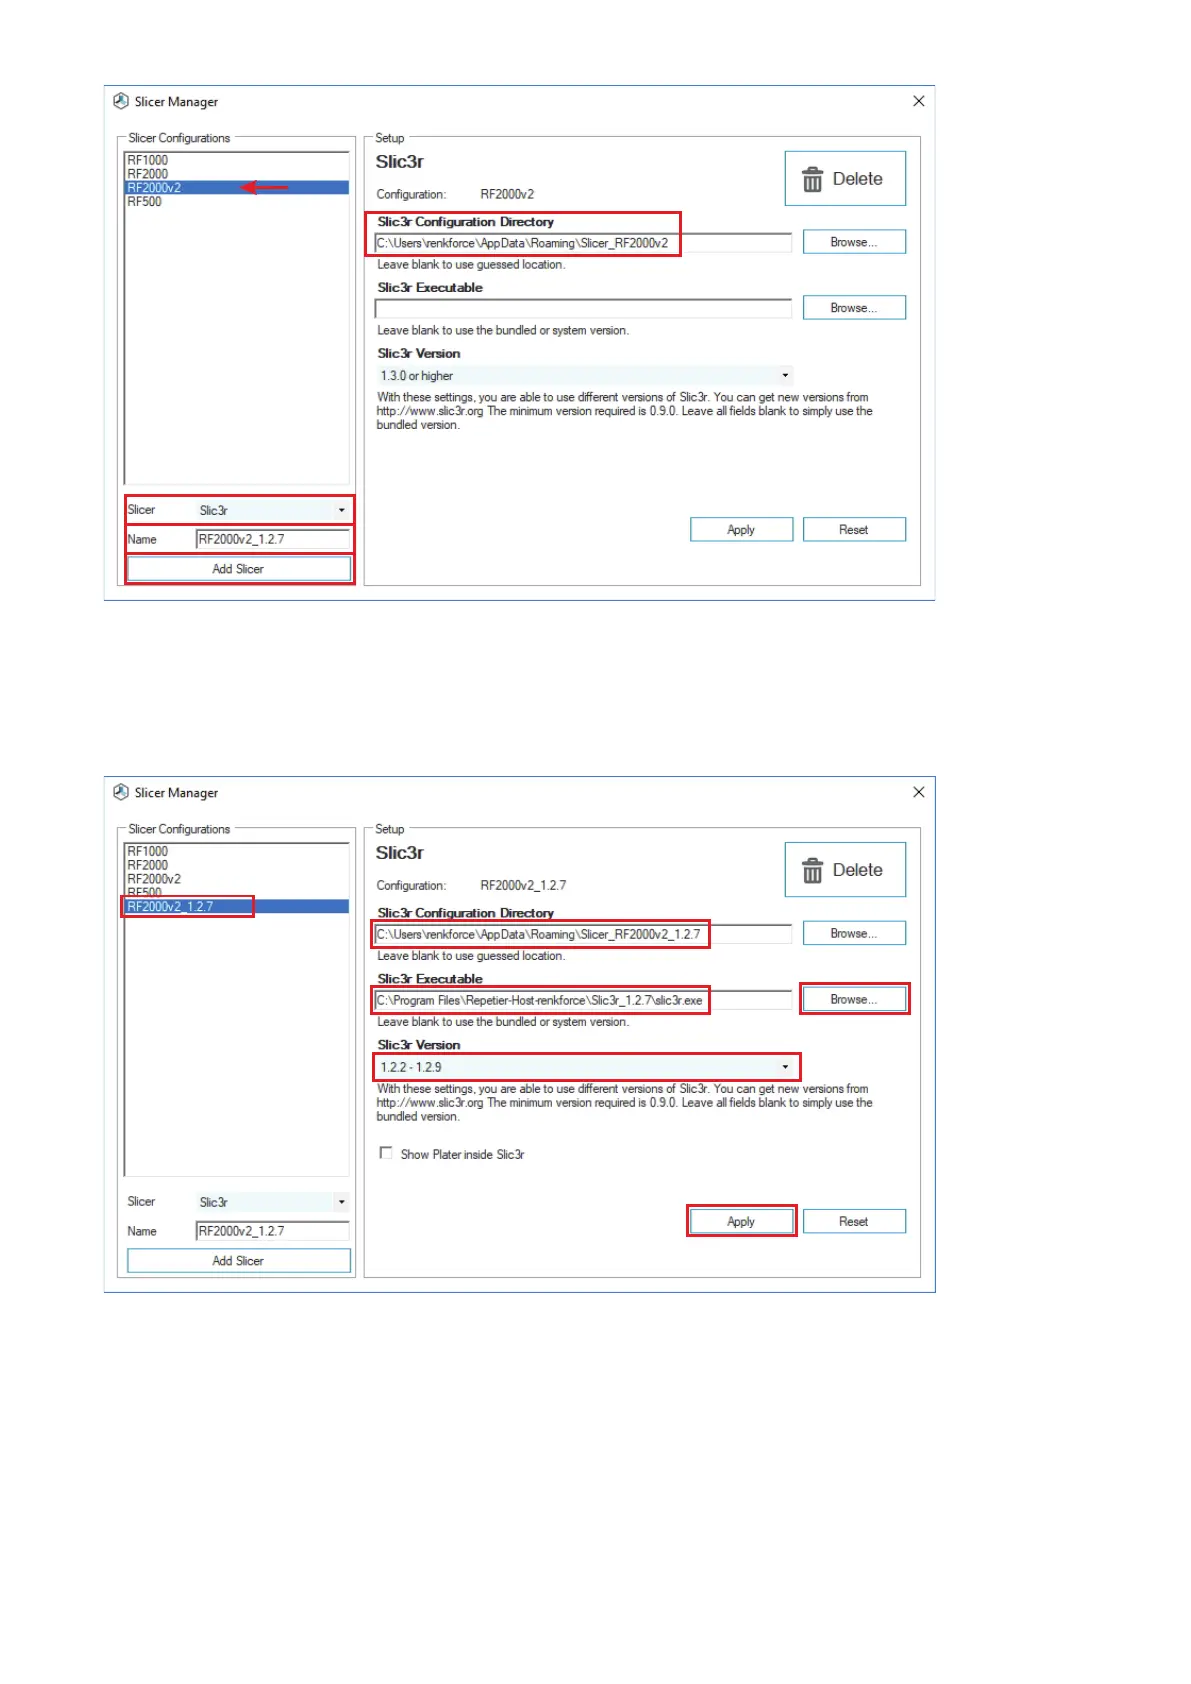
• Firstclicktheslicerofyourprinterandwritedownorcopythepathofthecongurationdirectory.
• Inthemenu"Slicer", now choose the desired Slicer that you want to integrate. In our example, this would be "Slic3r".
• Intheeld"Name”, enter the desired name (e.g. "RF2000v2_1.2.7")andconrmbyclicking"Add Slicer". When choosing the name, observe
that the newly set-up slicer is also only for one printer.
• SelectthenewlyaddedSlic3rbyclickingit(1).
• Right-click"Browse..." (2).
• NavigatetothenewSlic3rprogramdirectoryinthewindowthatopensandselectthestartingle,inourexample"slic3r.exe", by double-
clicking (3).
• Picktheright"Slic3r" version (4).
• Insertthepathofthepreviouslyrecordedorcopiedcongurationdirectory(5)andchangeitaccordingtoyourwishes.Werecommendnam-
ingthecongurationdirectorylikethenewlycreatedSlicer.Thestoragesitegenerallydoesnotmatter.
• Conrmwith"Apply"(6).ClosethewindowwiththeXintheupperrightcorner(7).
1
3
2
4
6
5