82
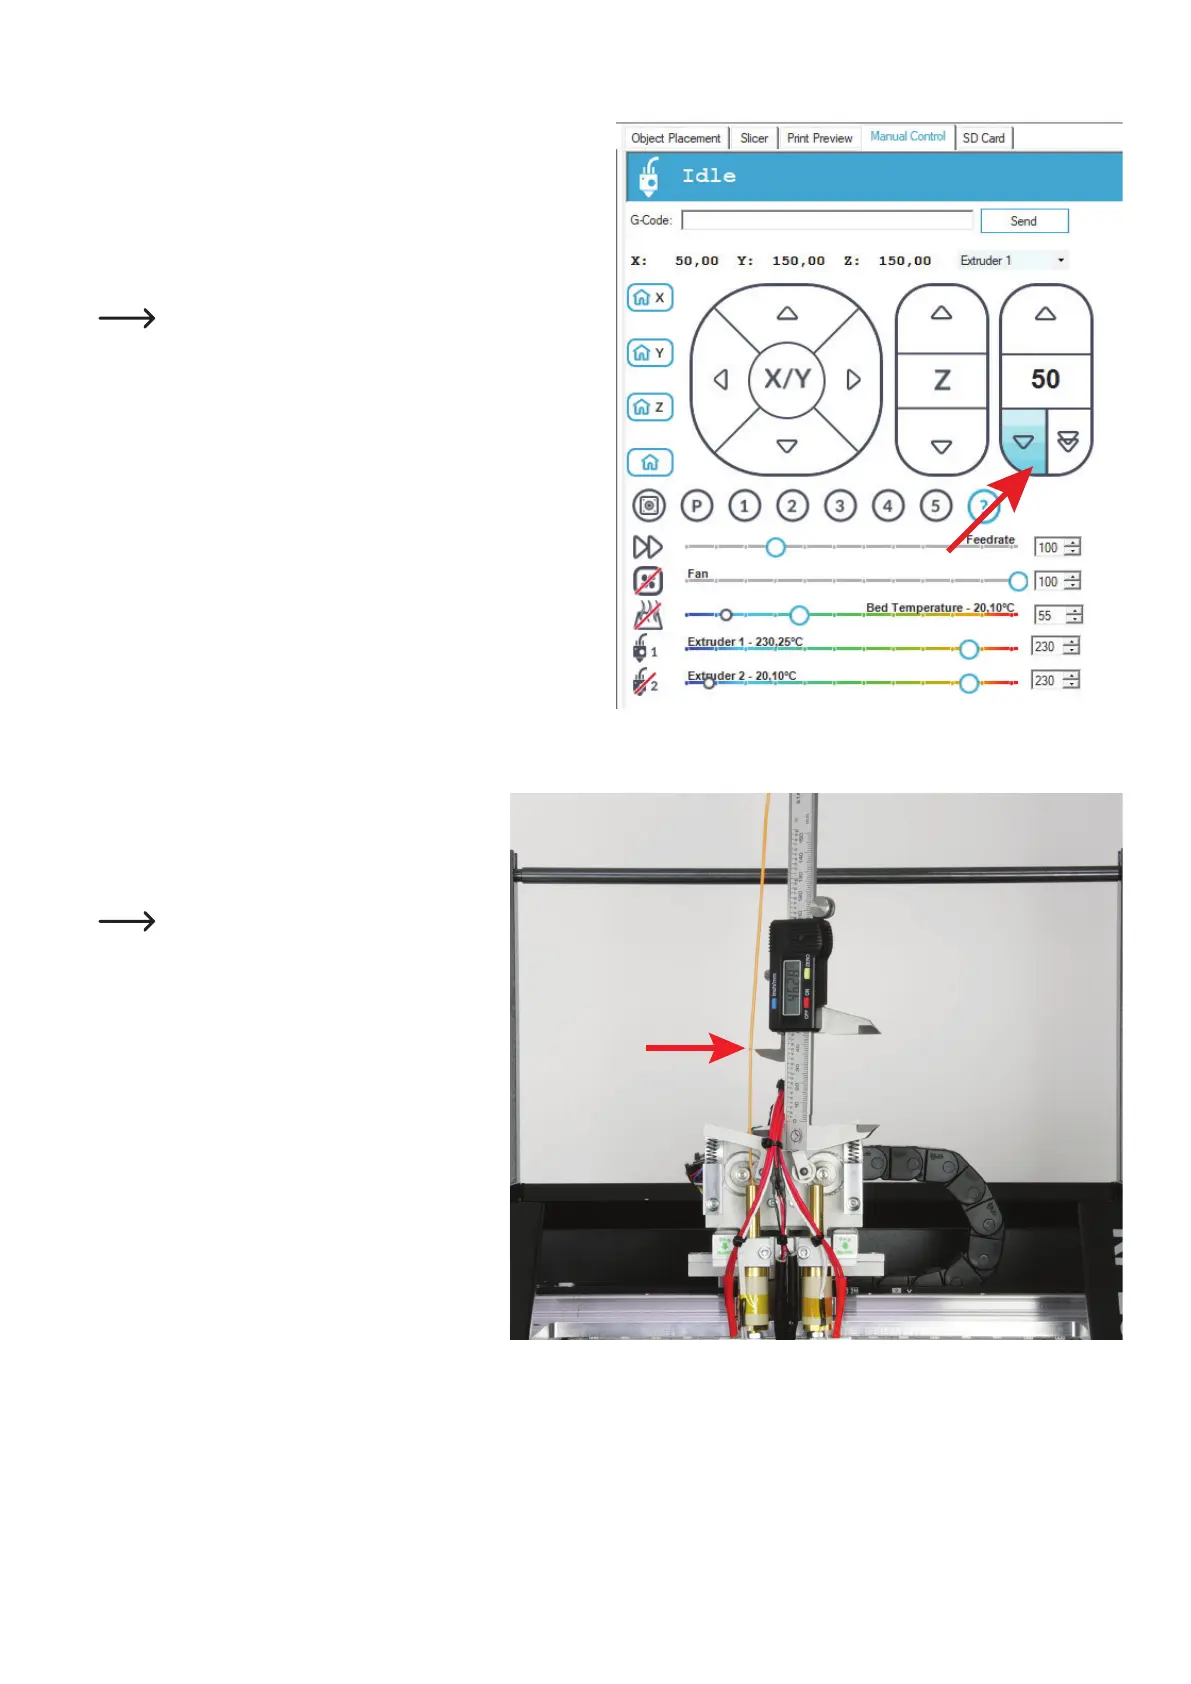
• Whenthelamentismarked,feedinprecisely50mm.Forthis,
move the mouse over the arrow at the lower left in the right control
(see red arrow). When the mouse pointer is all the way at the bot-
tom (see arrow tip of the red arrow) and the middle shows 50, click
precisely once.
• The lament motor now conveys precisely 50 mm lament and
then stops again.
If the infeed does not react when you click the arrow, send
the command "G92 E0" to the printer (enter the command
intheeld"G-Code" and click "Send"). Then try it again.
• Nowmeasuretheremainingdistancebetweenthe
ball bearing holder and the mark just as you did
when marking before.
• Inourexample,46.28mmareleft.
To make the calculation example on the
next page more easily comprehensible, we
round down the value to 46 mm. When you
perform the calibration, use the precise
value for the calculation, however.