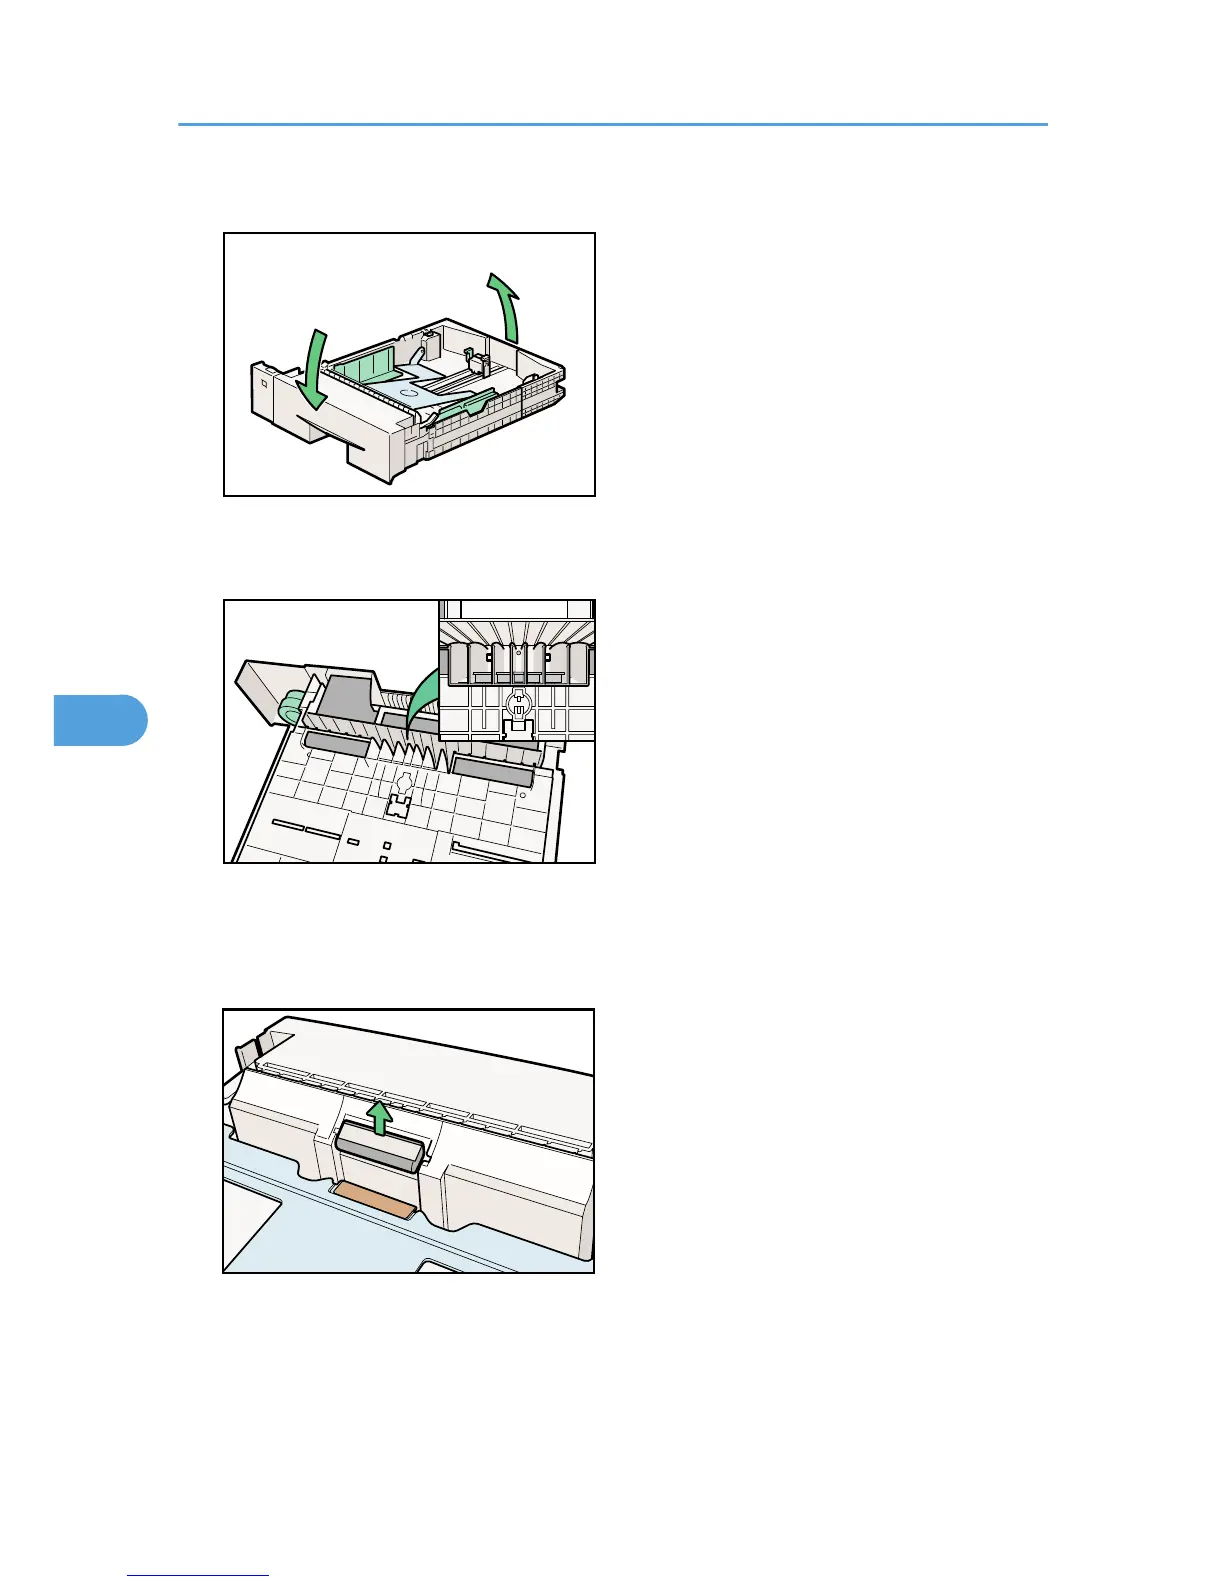
3. Remove paper from the paper tray. Place the tray upside down on a flat surface.
4. Use a sharp-pointed item like a ball-point pen, to release the two catches that lock the friction
pad.
The friction pad may fall off when the catches are released. Place your hand over the friction pad
while releasing the catches.
5. Return the paper tray to its original position, and then remove the friction pad from the tray.
6. Insert the new friction pad in the paper tray.
Attach the central projection of the new friction pad to the spring, and then align the projection of
both sides of the friction pad with the holes of the paper tray. Then push the friction pad as shown in
the illustration until it clicks.
6. Replacing Consumables and Maintenance Kit
130
 Loading...


