Select the protocol of the printer whose configuration you want to change.
If you are using IPv4 SNMPv3, enter the user authentication.
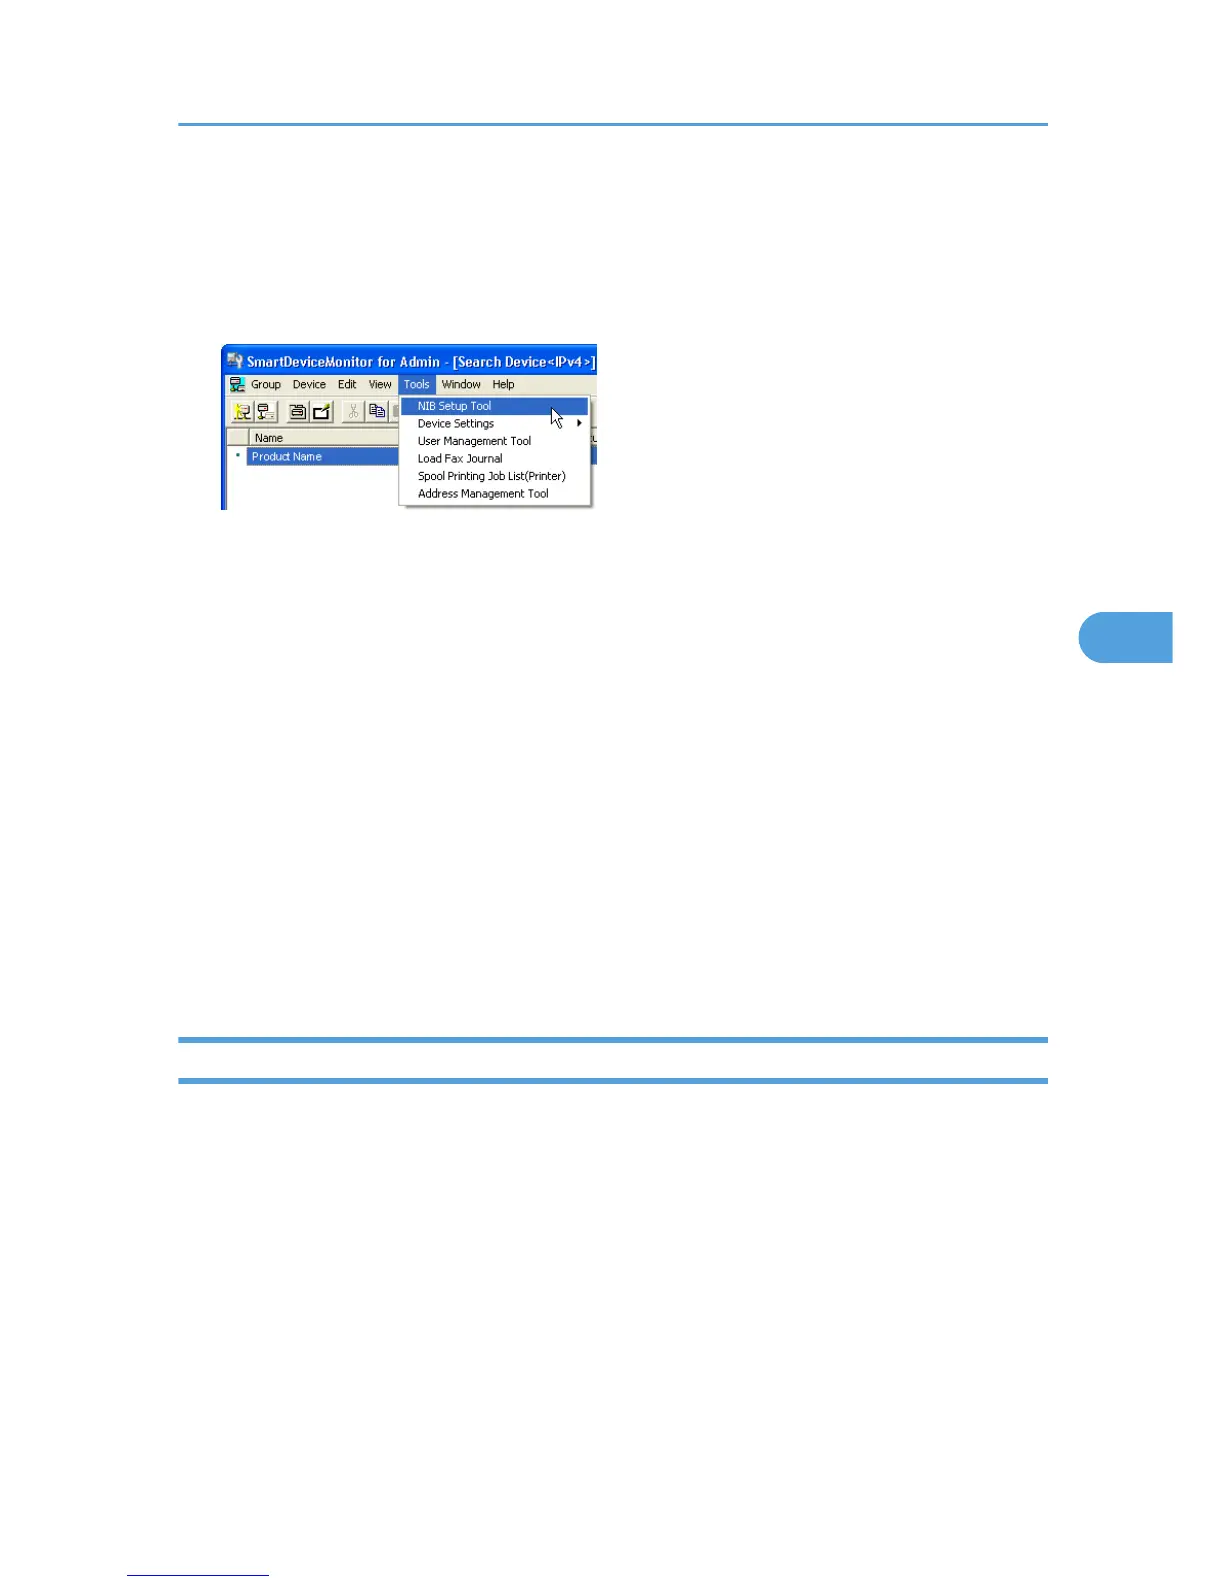
3. In the list, select a printer whose configuration you want to change.
4. On the [Tools] menu, click [NIB Setup Tool].
A Web browser opens and the window for entering the login user name and password for the Web
Image Monitor administrator appears.
NIB Setup Tool starts when the network interface board is default. Follow the instructions on the screen.
5. Enter the login user name and password, and then click [Login].
For details about the user name and password, consult your administrator.
Top Page of Web Image Monitor appears.
6. Click [Configuration].
7. Click [Program/Change Administrator] on the [Device Settings] area, and then change the
settings.
8. Click [OK].
9. Click [Logout].
10. Quit Web Image Monitor.
11. Quit SmartDeviceMonitor for Admin.
Checking the Printer Status
Follow the procedure below to check printer status.
1. Start SmartDeviceMonitor for Admin.
2. On the [Group] menu, point to [Search Device], and then click [IPv4], [IPX/SPX] or [IPv4
SNMPv3].
A list of printers using the selected protocol appears.
Select the protocol of the printer whose configuration you want to change.
If you are using TCP/IP SNMP v3, enter the user authentication.
Using SmartDeviceMonitor for Admin
205
 Loading...


