111
Printed copies are half or three quarter blank in the Multi-Up printing.
• The initial setting of the Multi-Up printing feature is adjusted to provide a 15-second interval
for placing the following originals.
Change the initial setting of the Multi-Up printing feature to cancel the interval time.
☞ p.72
• The STOP key may have been pressed by mistake during scanning originals.
Repeat operation from the beginning.
Printed images are excessively faint or blurred.
• If the machine is not used for a long period of time, ink on the surface of the Print Cylinder
(Drum) may dry. Dry ink on the Print Cylinder (Drum) may cause faint or blurred printing.
Press the TEST PRINT key several times until a clear printed image is obtained.
☞ p.31
Activate the Automatic Idle feature before operation to prevent light images that
may occur after periods of non-use.
☞ p.69
• Light originals result in light images.
Press the SCANNING CONTRAST Adjustment key to make scanning contrast
darker. Then replace the original and press the START key.
☞ p.36
• If the temperature is low (below 59< or 15:) or the Ink cartridges are stored in a cold place,
ink may not flow smoothly.
Warm the room or Ink cartridge before operating the unit.
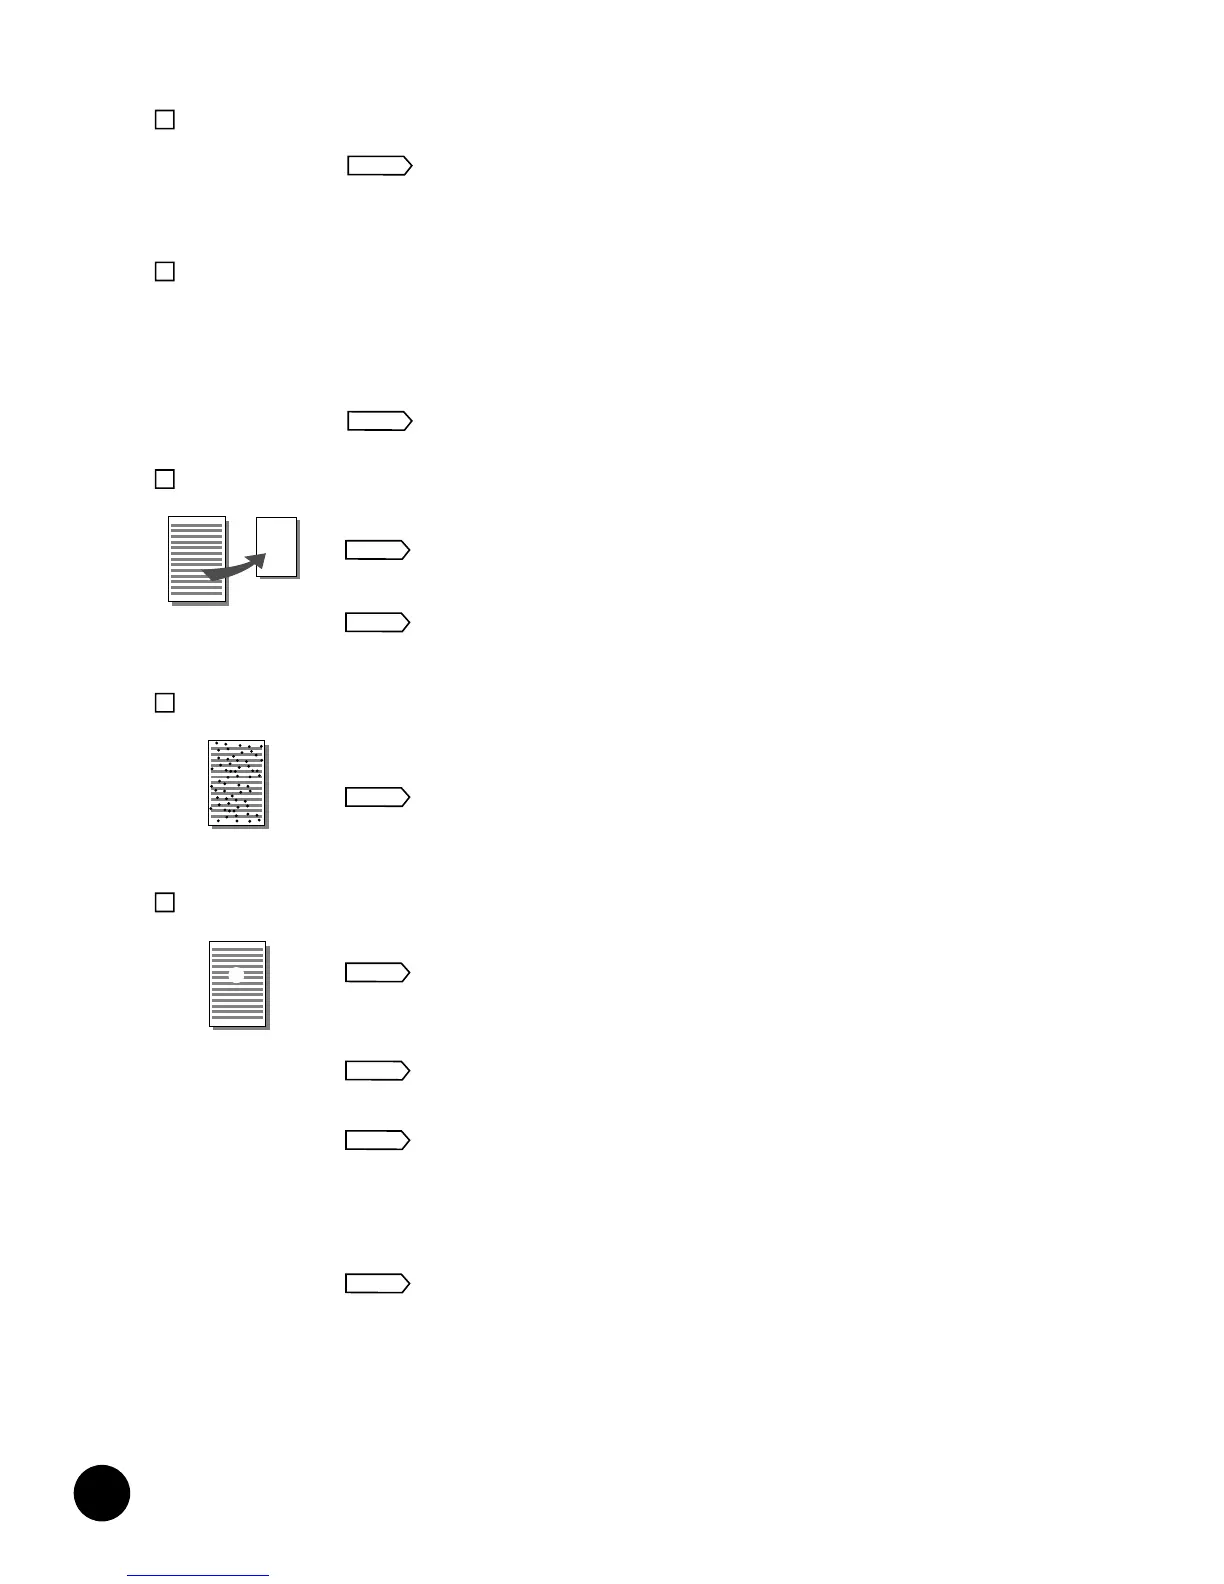
Vertical blank lines are found on printed copies.
• The Thermal print head (the device that makes the master) may be smudged with paper
powder from the master.
Open the Master making unit and clean the Thermal print head using a soft cloth or
tissue.
☞ p.119
• The Stage glass may be stained with correction fluid or dust.
Open the Stage cover (or the optional ADF unit table) and gently clean the Stage
glass using a soft cloth or tissue.
☞ p.119
If the optional ADF unit is installed:
• The ADF scanner glass may be smudged with dust or correction fluid.
Open the ADF unit table and clean the glass using a soft cloth or tissue.
☞ p.120
The back of finished copies are smudged with ink.
• The rubber Pressure roller, which keeps printing paper pressed against the Print Cylinder
(Drum) during printing, may be stained with ink.
Remove the Print Cylinder (Drum) and clean the roller gently with a soft cloth or
tissue.
☞ p.119
• The paper size indicated in the Main Display may be larger than the actual size of printing
paper loaded on the Paper feed tray.
In this case, images might be printed beyond the paper frame, causing the rubber Pressure
roller to be stained with ink.
Make the displayed paper size equal to the actual one.
☞ p.73
Troubleshooting Tips
Action
Action
Action
Action
Action
Action
Action
Action
Action
110
Troubleshooting Tips
The unit does not start even when the power switch is pressed.
• Check whether the power cord is firmly connected to an electrical outlet.
• Check whether the power cord is connected to the unit.
• Check whether the commercial power circuit breaker is on.
The "Close Front Cover" message appears even when the Front cover is
closed.
• There is a metal plate in the lower right-hand section of the Front cover. Unless this plate is
in direct contact with the magnet on the lower right-hand part of the machine, the advisory
message remains on the Main Display.
Press on the lower right-hand area of the Front cover to close it tightly.
There is no image on copies.
• Check whether the original is correctly placed.
Be sure it is placed face down.
☞ p.28
• Check whether the master is correctly placed.
Be sure that it is placed with the leading edge unrolled from below.
☞ p.98
The unwanted background of an original is picked up on copies.
• If newspaper or colored paper is used as an original, the background might have been
picked up on copies.
Press the SCANNING CONTRAST Adjustment key to make the scanning contrast
lighter. Then replace the original and press the START key.
☞ p.36
Copies are incomplete; some images are missing or unclear.
• The Stage glass may be stained with correction fluid or glue.
Open the Stage cover (or the optional ADF unit table) and clean the Stage glass
using a soft cloth or tissue.
☞ p.119
• A foreign object may be on or under the master on the Print Cylinder (Drum).
Pull out the Print Cylinder (Drum) and remove the object.
☞ p.74
• The Stage cover was open during scanning.
Images were not scanned properly because of exposure to light. Be sure that the
Stage cover (or the optional ADF unit table) is closed during scanning.
• The paper size indicated in the Main Display may be smaller than the actual size of printing
paper loaded on the Paper feed tray.
In this case, the images placed beyond the displayed paper size on originals might not be
printed on copies.
Make the displayed paper size equal to the actual one.
Action
Action
Action
Action
Action
Action
Action
Action
Action