99
6
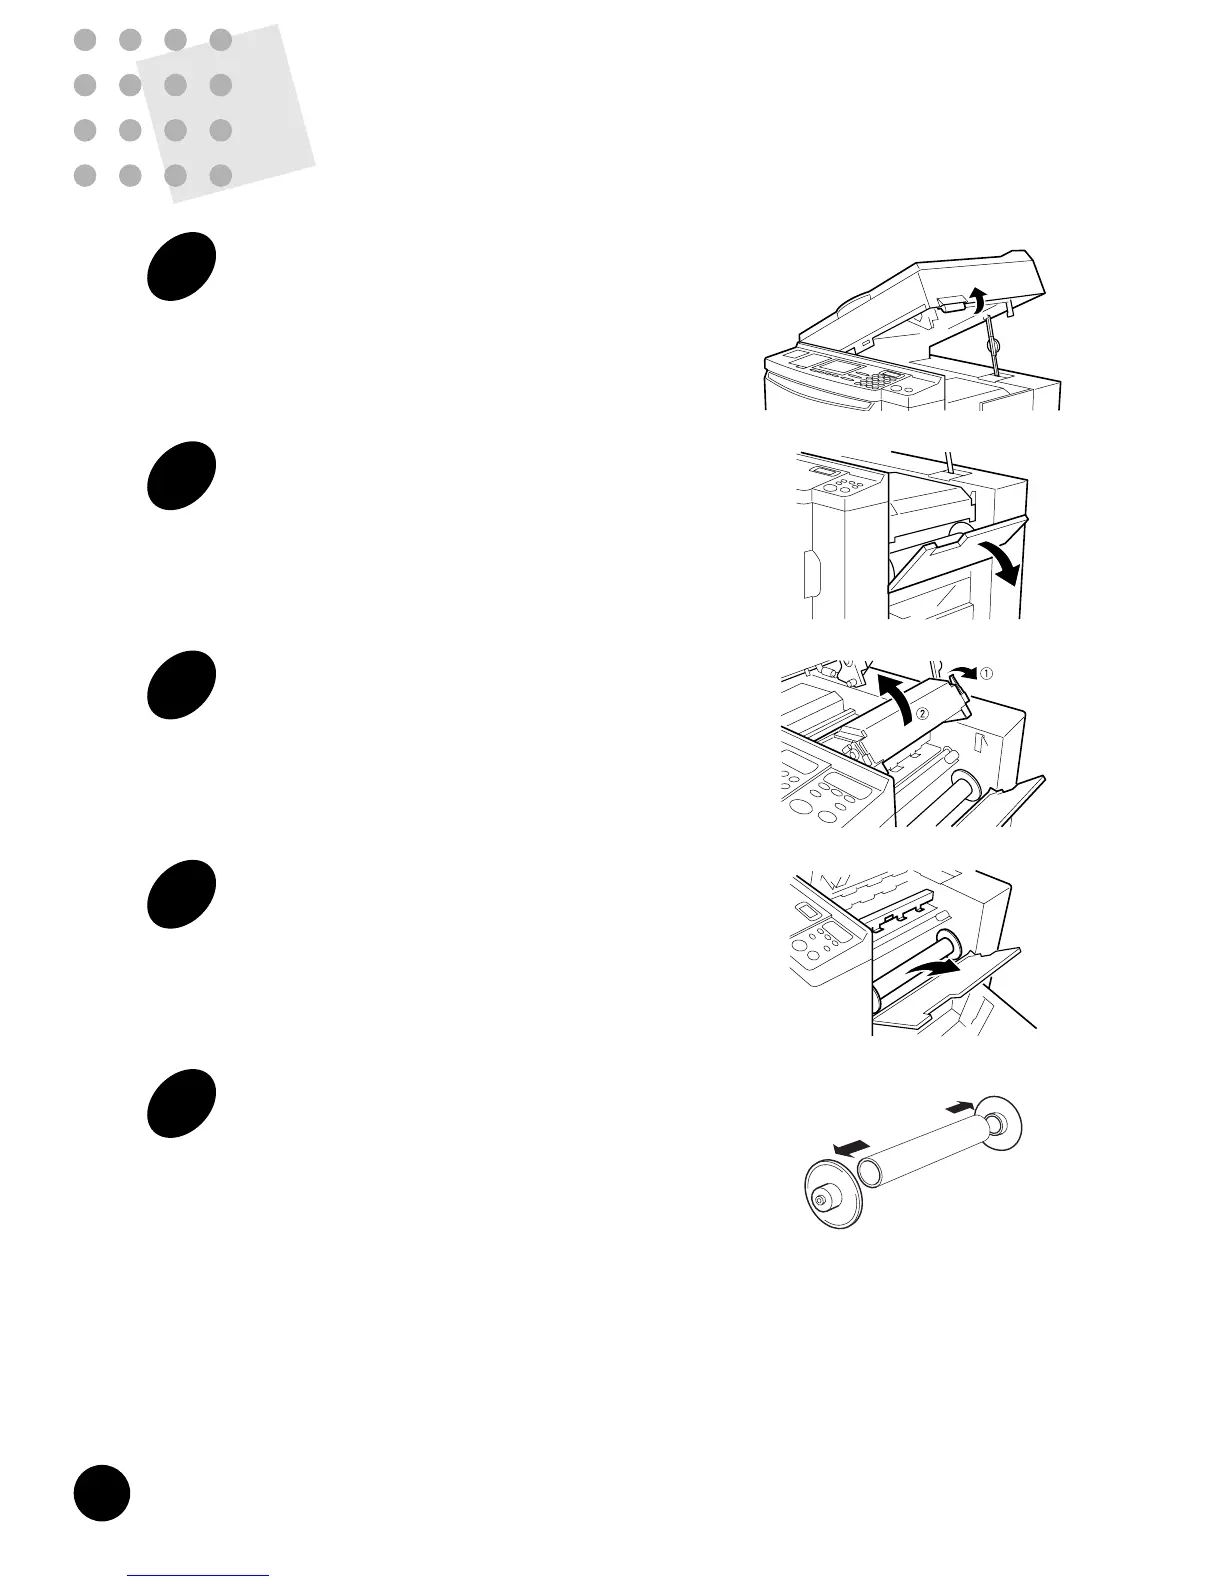
Attach the existing flanges to a
new Master Roll.
Unpack a new Master Roll.
Attach the flanges removed from the depleted
Master Roll to the new one, with the colored
flange to the right end and the white one to the
left end.
Then unwrap the new Master Roll.
7
Install the new Master Roll.
Insert the Master Roll into the supporter, placing
the colored flange on the right-hand flange holder.
8
Insert the leading edge of the
Master Roll into the Master
Entrance.
Unroll the Master Roll by pulling on the leading
edge, pass the Master under the Master End
Sensor on the right side and feed it until the
leading edge reaches the Master Stopper.
Then take the slack winding the Master Roll.
9
Close the Master Making Unit and
the Master Roll Cover gently.
10
Close the Scanner Table.
Pull the Scanner Table Support toward you until it
stops and then push down the Scanner Table
gently.
Replacing the Master Roll
White Flange
Master Stopper
End Sensor
Colored Flange
98
Replacing the Master
Roll
1
Raise the Scanner Table.
Hold the Scanner Table Release Lever and raise
the Scanner Table until it stops.
2
Open the Master Roll Cover.
Pull down the Master Roll Cover.
3
Open the Master Making Unit.
Open the Master Making Unit by pulling down the
green Master Making Unit Release Lever, which
is located on the right side of the unit.
4
Remove the depleted Master Roll.
Pull the depleted Master Roll toward you and
remove it from the supporter.
5
Remove both left and right
flanges.
Remove both left and right flanges from the
depleted Master Roll.