96
Replacing the Ink
Cartridge
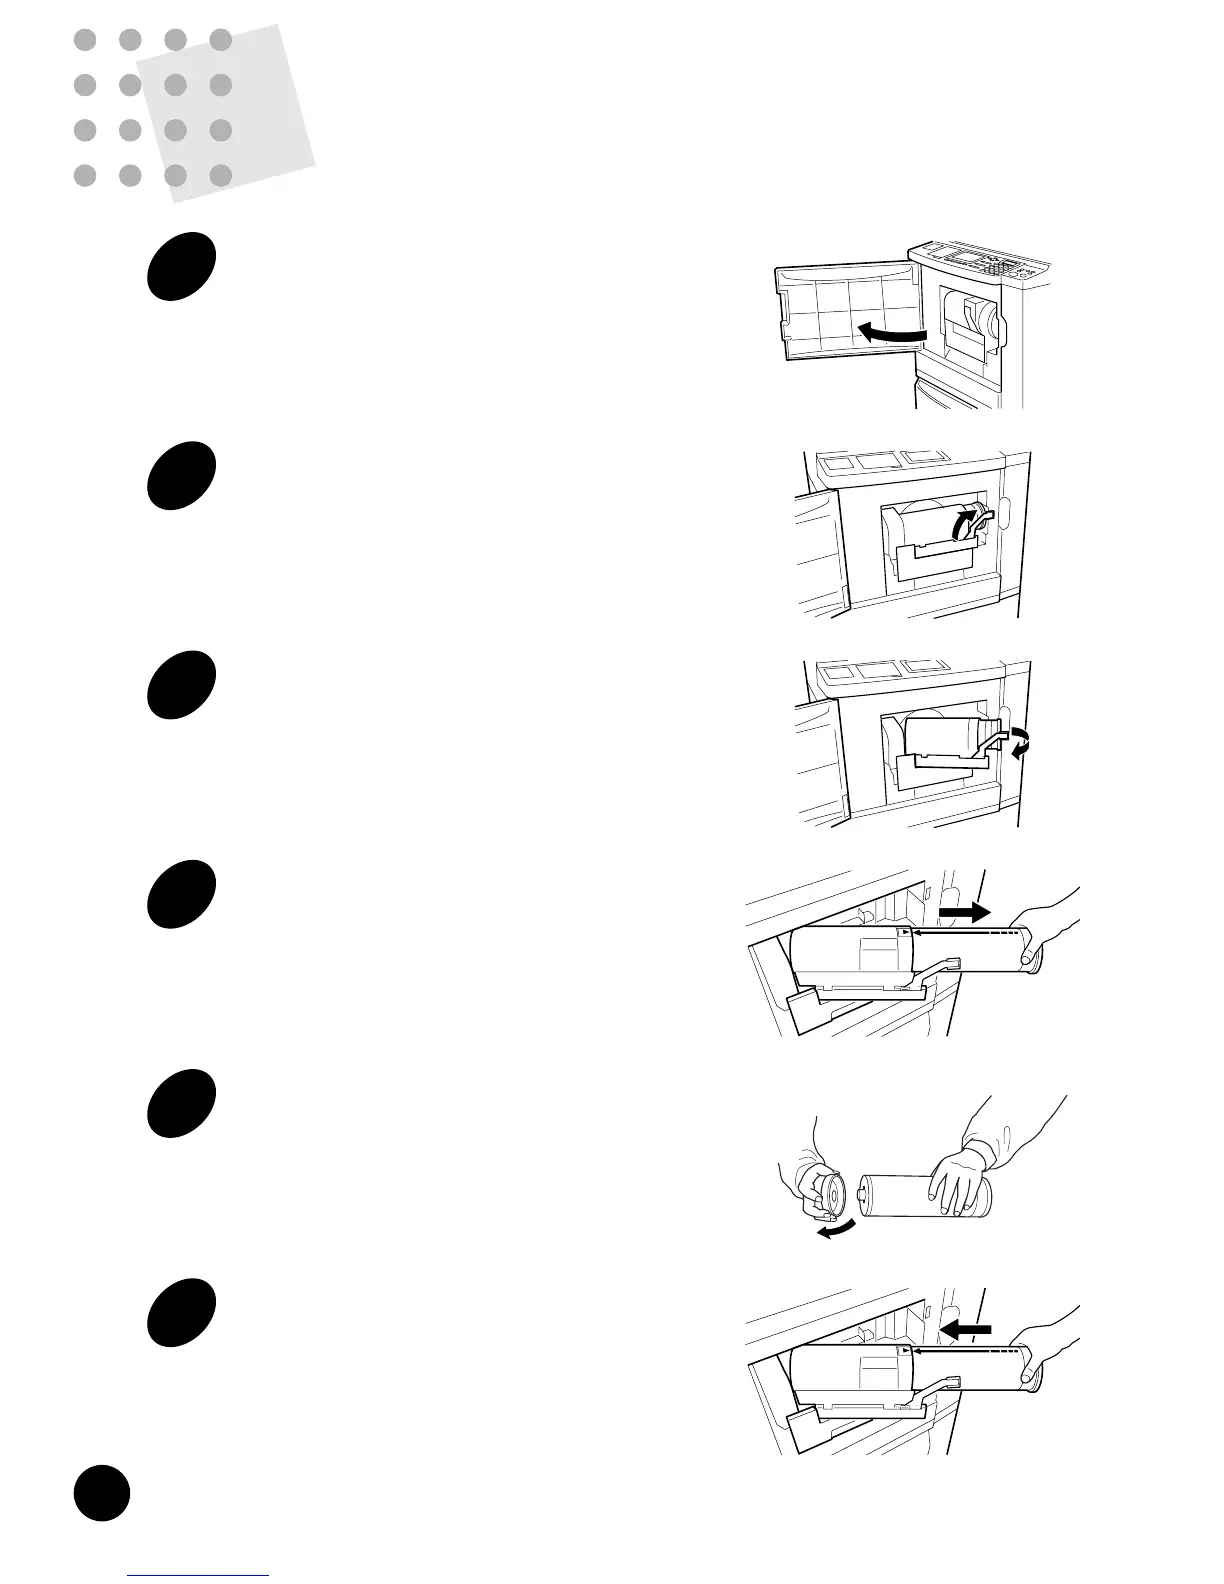
1
Open the Front Cover.
2
Turn the Ink Cartridge Locking
Lever to the right.
The Ink Cartridge is released.
3
Turn the Ink Cartridge Holder off
position.
Pull the Ink Cartridge Locking Lever toward you.
4
Pull the empty Ink Cartridge out of
the Ink Cartridge Holder.
5
Remove the cap from a new Ink
Cartridge.
6
Insert the new Ink Cartridge into
the Ink Cartridge Holder.
Align the arrow on the Ink Cartridge with the s
mark on the Ink Cartridge Holder and push the Ink
Cartridge until it stops.
You can specify how to process print jobs in the PC data mode, i.e., to process
without interruption or to interrupt print jobs after a specified process step, on your
RISOGRAPH. By interrupting print jobs, you can check print position and quality with
sample copies before printing process or change the print job flow according to your
print requirements.
The operations listed in the chart below are available after each process step when
the print job is interrupted.
After interruption, you can resume the print job by pressing the START key.
The figure below shows the key operation timing with the respective Auto-process
options.
Auto Process Function
After printing process
• 180-degree image rotation for the following page
☞ p.86
• Paper replacement
• Received file information review
☞ p.85
After master-making process
• Print position/quality check
• Job flow change
☞ p.87