63
Storing Settings in Memory
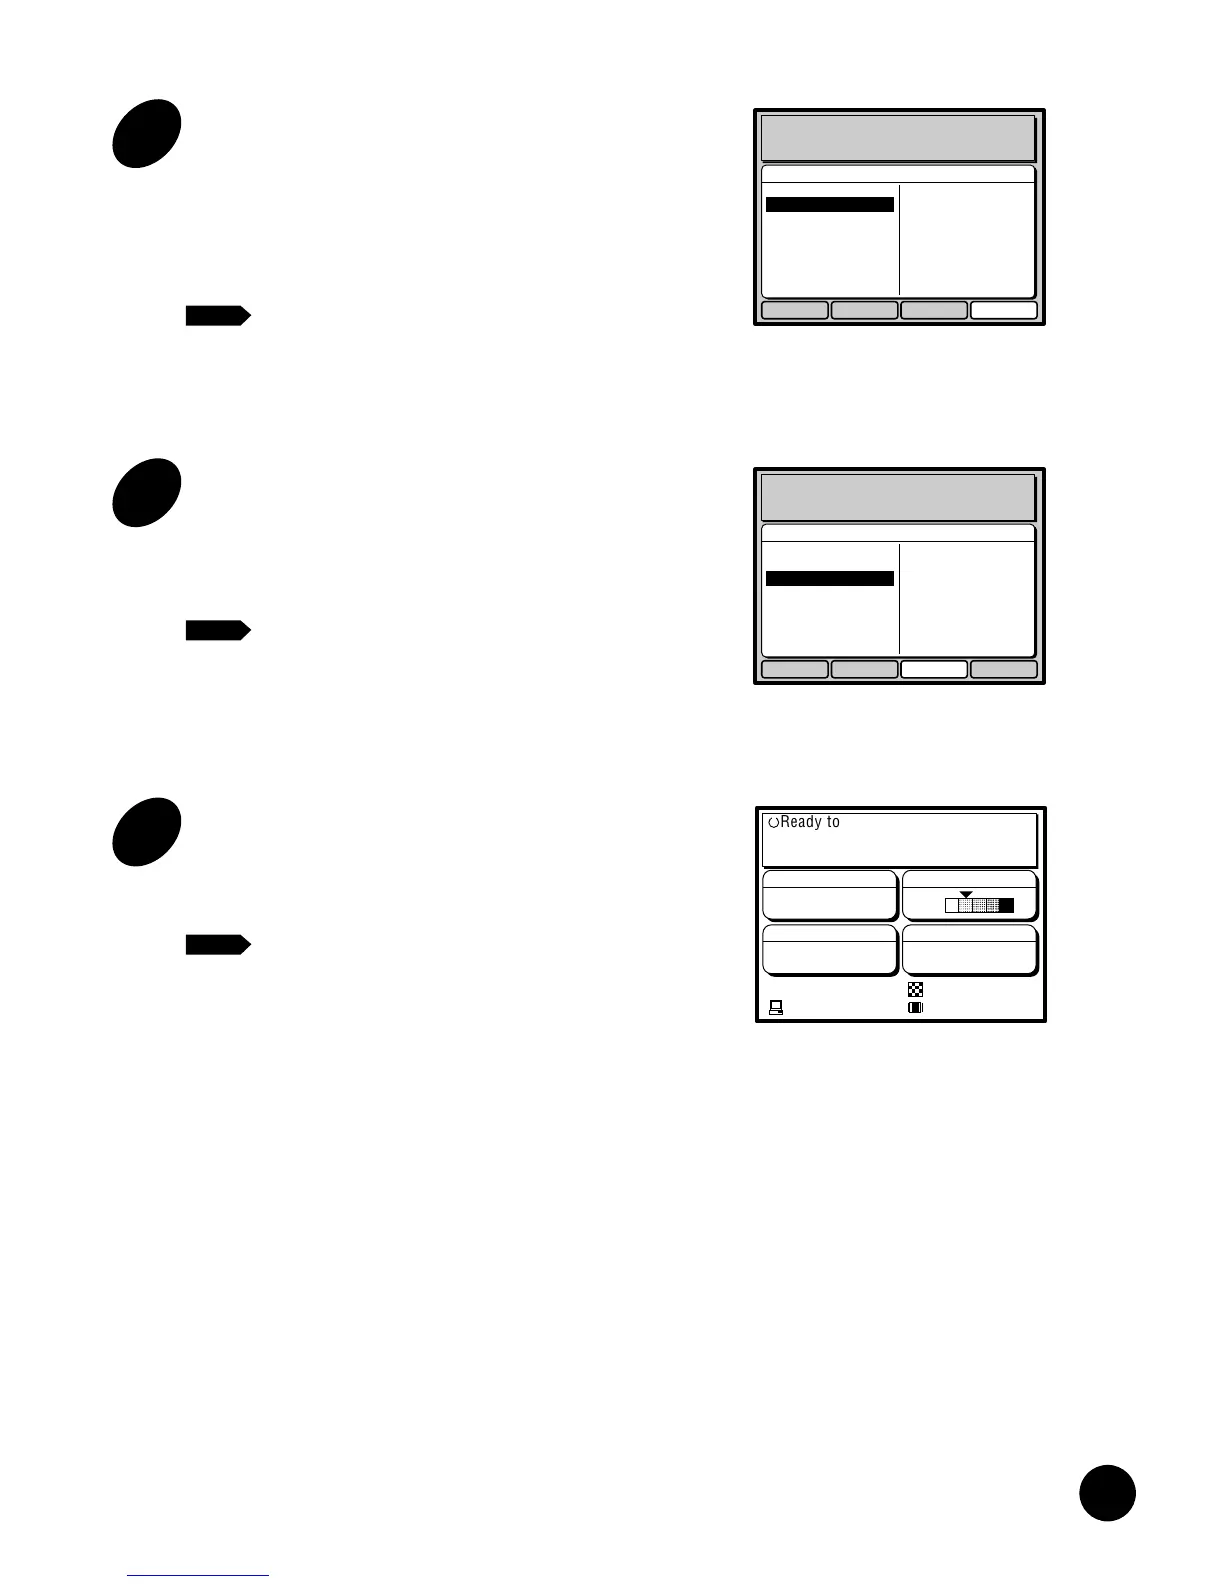
3
Select a job register name.
Highlight a desired job register name by pressing
the cursor keys.
Free job register names appear dimmed.
When they are not dimmed, they are already
occupied and not available for new entry.
If no dim job register name exists in the
list or a desired one is not dimmed, erase
the job setting saved under the selected
job register name first.
☞ p.67 ......Erasing a Saved Print Job
Setting.
Personal4
Personal5
Personal6
Personal7
Personal8
Personal9
Personal10
Personal11
Personal12
Personal13
Personal14
Personal15
Personal16
Rename Close RegisterErase
Job Entry/Job Call
Personal1
Print Job Memory Mode
Personal2
Personal3
NOTE
4
Press the u function key.
The current print job setting is saved under the
selected job register name, whose appearance
changes accordingly.
• Yon can give a desired name to the
saved print job setting in this step.
• To cancel this operation, press the
o function key in place of the
u function key.
☞ p.64 ......Renaming a Saved Print Job
Setting.
Personal4
Personal5
Personal6
Personal7
Personal8
Personal9
Personal10
Personal11
Personal12
Personal13
Personal14
Personal15
Personal16
Rename Close RegisterErase
Job Entry/Job Call
Personal1
Print Job Memory Mode
Personal2
Personal3
NOTE
NOTE
5
Press the o function key.
The Print job memory window is closed and the
basic window appears again.
It is recommended that you maintain a
list of job register names and their
associated settings.
Photo
Image Processing
Reproduction Size
Scanning Contrast
Letter
Paper
Idle Black
Ready to Make Master
Dot Photo
50%
Zoom
AUTO IDLE
CONFIDENTIAL
REDUCE
ENLARGE
1 : 1
ZOOM
PRINT POSITION
DENSITY
LIGHT DARK
DUO
LINE
START
STOP
AUTO IMAGE
PROCESS
TEST
PRINT
RESET
PHOTO PRINT
MASTER
MAKING
AUTO
PROCESS
SLOW FAST
CENTER
PROGRAM
MEMORY
NORMAL
NORMAL
SPEED
CUSTOM
SETTING
SCANNING
CONTRAST
MULTI-UP
PRINT
DOT
PHOTO
BOUND
ORIGINAL
DATA
PC/SCAN
62
2
Press the MEMORY key.
The Print job memory window appears in the Main
Display.
Personal2
Personal3
Personal4
Personal5
Personal6
Personal7
Personal8
Personal9
Personal10
Personal11
Personal12
Personal13
Personal14
Personal15
Personal16
Rename Close RegisterErase
Job Entry/Job Call
Personal1
Print Job Memory Mode
Storing Settings
in Memory
The Print Job Memory feature is a flexible tool for
automating frequently used or complicated
combinations of settings for print jobs.
You can store up to 16 combinations of frequently used
or complex print-job settings and apply them to new
print jobs whenever necessary.
- Image processing mode
• Line/Photo/Duo
• Dot photo
- Scanning contrast
- Reproduction size
- Print quantity
- Vertical print position
- Print speed
- Print density
- Print options
• Auto Process
• Bound Original processing
• Multi-Up printing
Saving the Current Print Job Setting
1
Set up desired settings.
Photo
Image Processing
Reproduction Size
Scanning Contrast
Letter
Paper
Idle Black
Ready to Make Master
Dot Photo
50%
Zoom
The settings of the following print job elements can be registered in memory for quick recall.