36 SteelFusion Edge Hardware and Maintenance Guide
Installing Network Interface Cards in SteelFusion Edge Appliances Installing NICs in 2U SteelFusion Edge appliances
18. Replace the cover on the chassis and tighten the locking screws at the back of the chassis.
19. Connect the power cords.
20. Connect the NIC cables.
21. Power on the appliance and check the status lights.
To test SteelFusion Edge NICs
1. Connect to the SteelFusion Edge CLI.
For detailed information, see the Riverbed Command-Line Interface Reference Manual.
2. Enter enable mode. At the system prompt, enter the following command:
amnesiac > enable
amnesiac #
3. Verify that the NIC is correctly installed.
To verify a Two-Port Gigabit Ethernet Copper PCIe card, use the show hardware all command:
amnesiac # show hardware all
Hardware revision: A
Mainboard: SteelFusion RiOS Motherboard 1U, 425-00218-01
Slot 1: .......... 2 Port Copper GigE Gen2 PCIe Non-Bypass Module, Integrated
Slot 2: .......... 4 Port NIC,PCIE,Bypass+LSi,Mitac, 410-00166-01
System led: Blue
amnesiac #
Installing NICs in 2U SteelFusion Edge appliances
This section describes how to install NICs in the 2U SteelFusion Edge appliances.
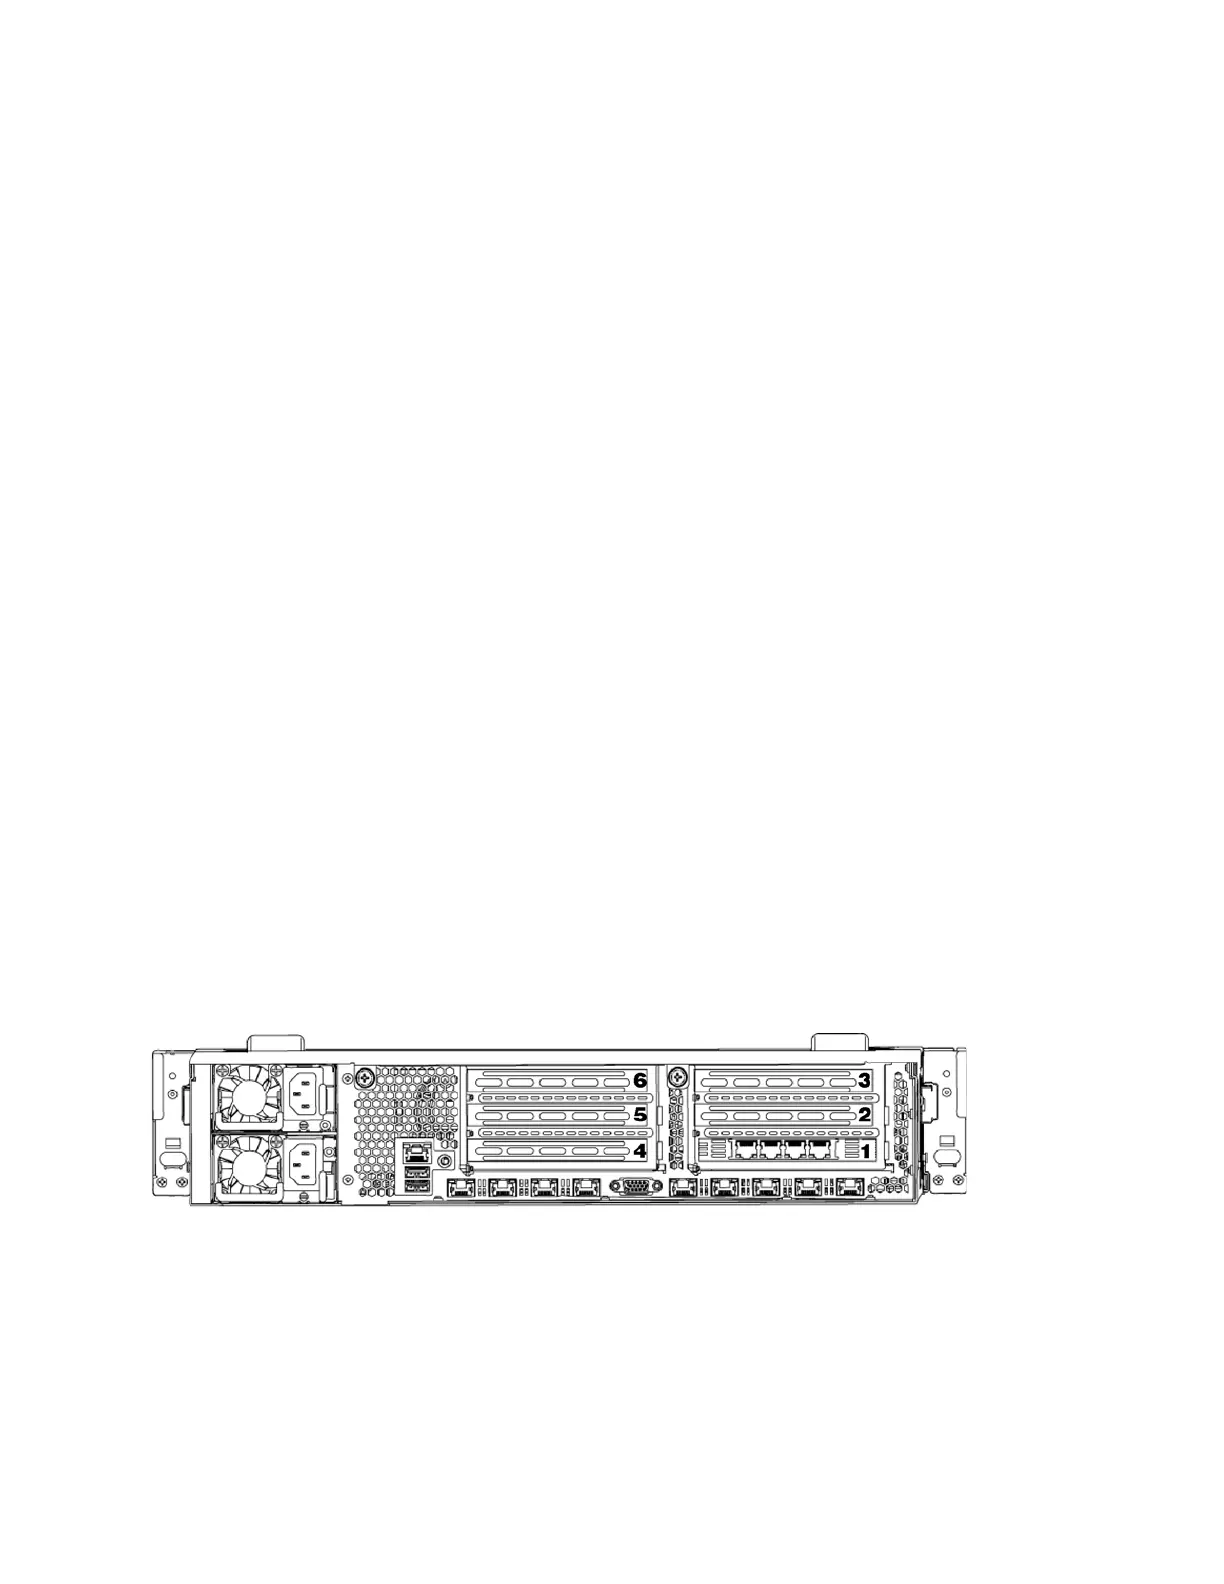
Figure 3-7 identifies the NIC slot locations and number scheme.
Figure 3-7. PCIe slot locations for 2U SteelFusion Edge appliances
To install a NIC in the 2U appliances
1. Power down the appliance.
2. Remove the power-supply cord and all cables connected to the appliance.
3. Remove the appliance from the mounting rack, if necessary.