SteelFusion Edge Hardware and Maintenance Guide
37
Installing NICs in 2U SteelFusion Edge appliances Installing Network Interface Cards in SteelFusion Edge Appliances
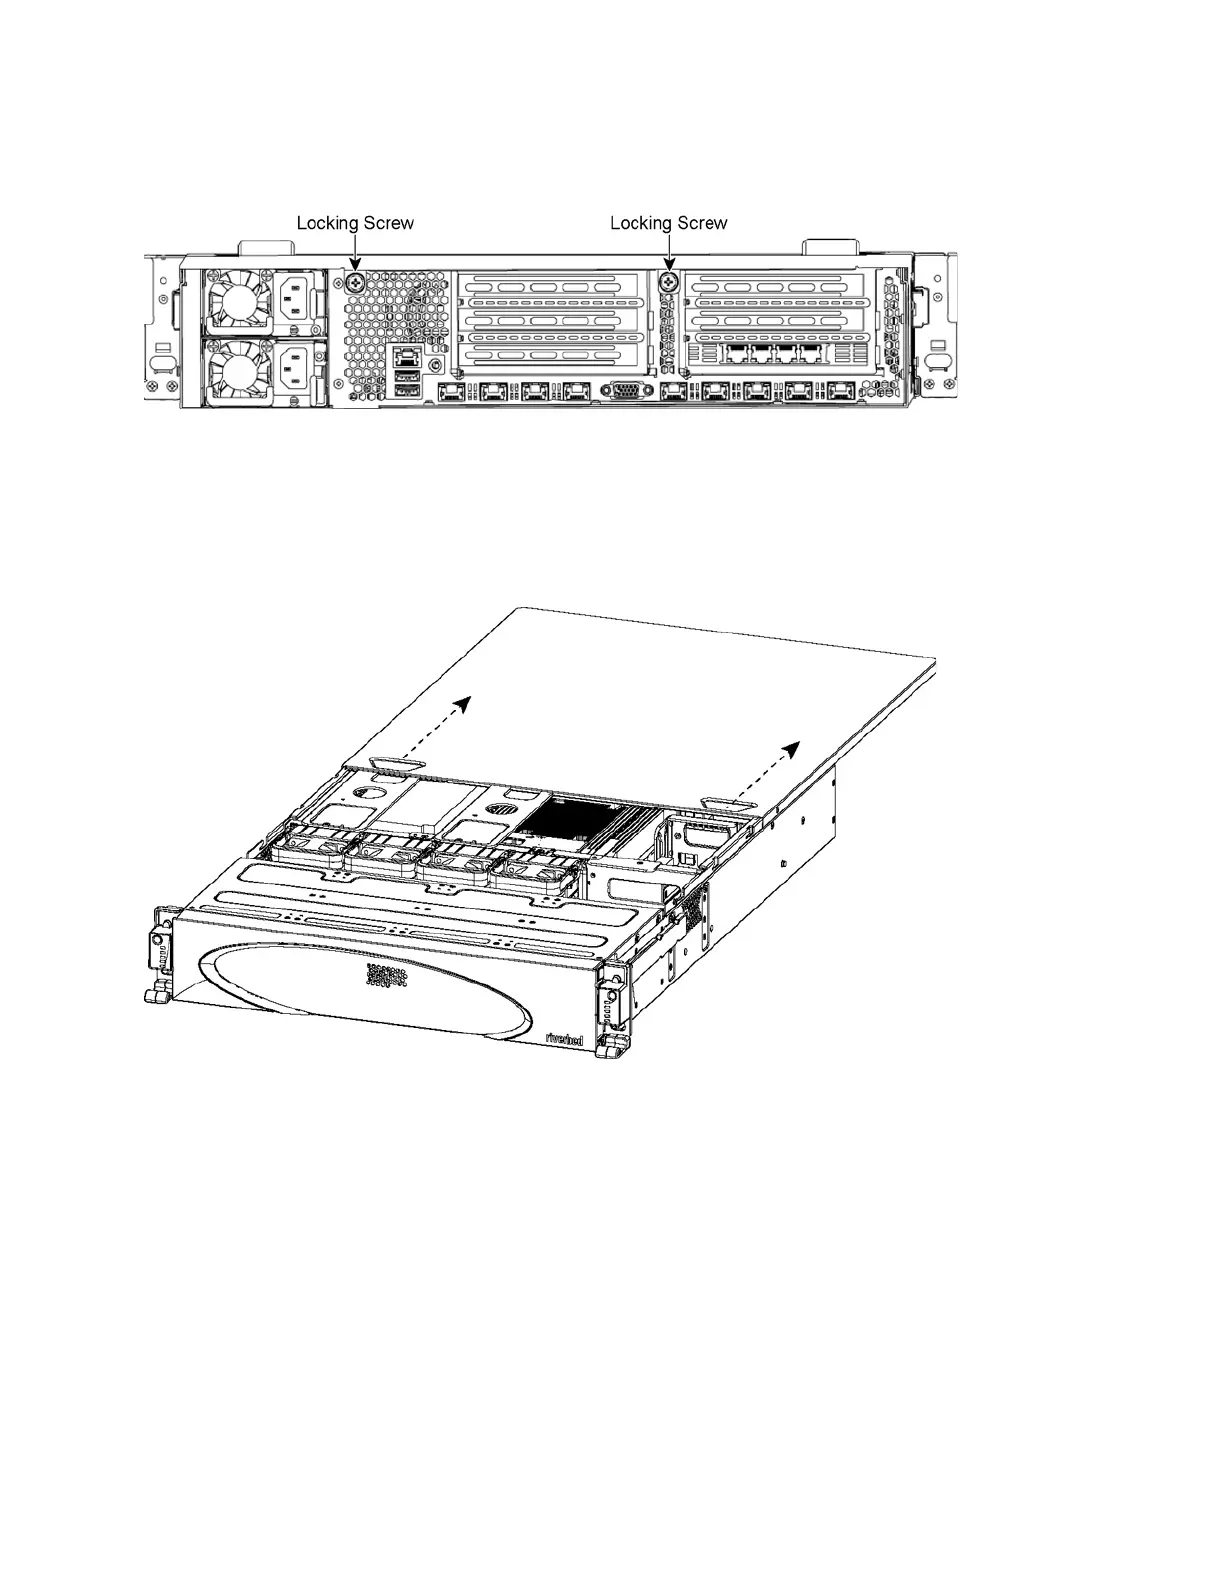
4. Release the two locking screws on the back of the appliance to remove the cover. (See Figure 3-8.)
Figure 3-8. Locking screws
5. Remove a third locking screw on the right side of the top cover.
6. Press down on the indentations and slide back the cover several inches, and then lift up and away
from the chassis. (See Figure 3-9.)
Figure 3-9. Removing the rear top cover from the chassis
7. To release the PCIe carrier, remove the two retaining screws on the top of the carrier and the two
retaining screws on the rear panel.
8. To remove the right or left PCIe carrier from the chassis, place your fingers in the carrier holes and
lift straight up.
9. Turn over the carrier to reveal the PCIe slots.
PCIe cards fit horizontally in the carrier slots and are secured with screws in the rear panel. The
connector at the bottom of the carrier fits into bus slots on the motherboard.
10. Remove the filler bracket on the rear of the PCIe carrier.