SteelFusion Edge Hardware and Maintenance Guide
39
Installing NICs in 2U SteelFusion Edge appliances Installing Network Interface Cards in SteelFusion Edge Appliances
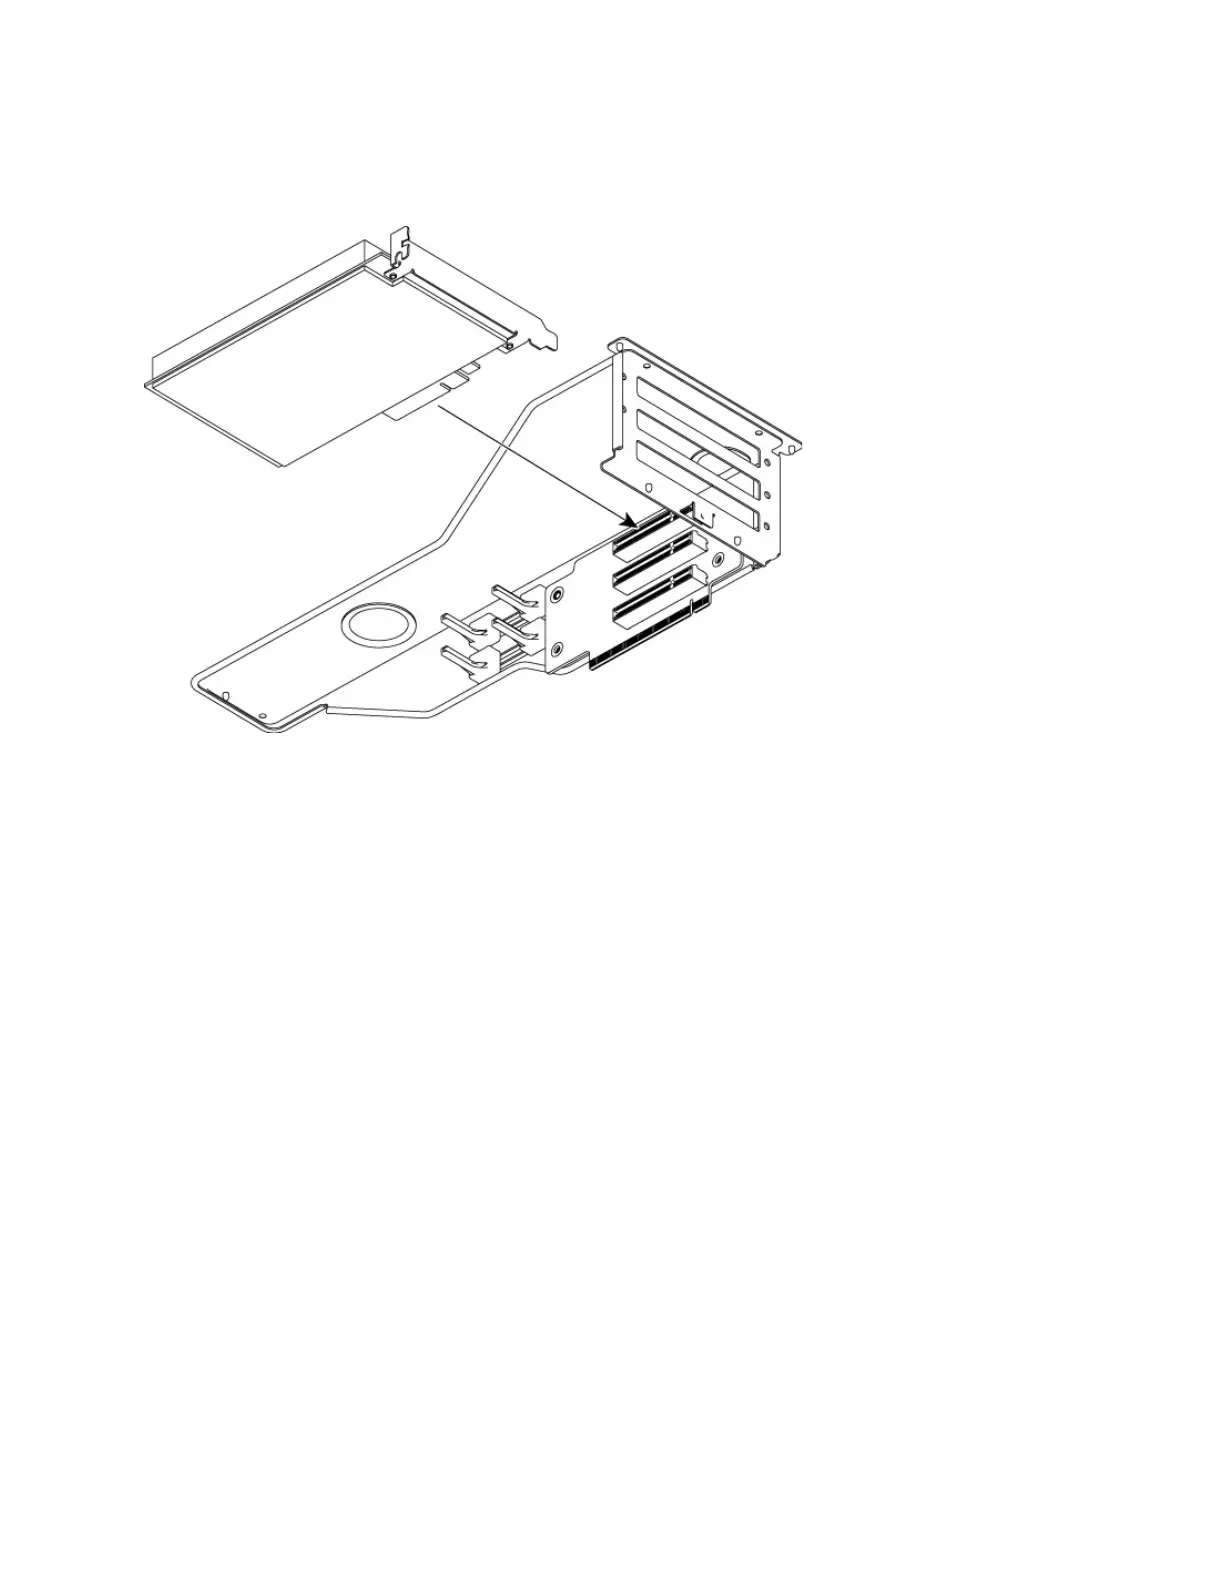
13. Plug the new NIC into the slot on the PCIe carrier. The NIC is attached with screws to the rear of the
PCIe carrier. (See Figure 3-12.)
Figure 3-12. Installing the new NIC into the PCIe carrier
Note: Make sure the NICs are seated properly in the PCIe carrier. If they are not seated properly, the NICs do not
function.
14. Replace the PCIe carrier in the chassis. Make sure that the carrier connectors fit securely into the
bus slots on the motherboard.
15. Replace the two retaining screws on the top of the PCIe carrier and the one screw on the rear panel.
16. Replace the cover on the chassis and tighten the locking screws at the back of the chassis.
17. Connect the power cords.
18. Connect the NIC cables.
19. Power on the appliance and check the status lights.
To test NIC connections in the SteelFusion Edge
1. Connect to the SteelFusion Edge CLI.
For detailed information, see the Riverbed Command-Line Interface Reference Manual.
2. Enter enable mode. At the system prompt, enter the following command:
amnesiac > enable
amnesiac #
3. Verify that the NIC is correctly installed.