4 Maintenance
4--28
F--9999--8 Build 8 Issue 1
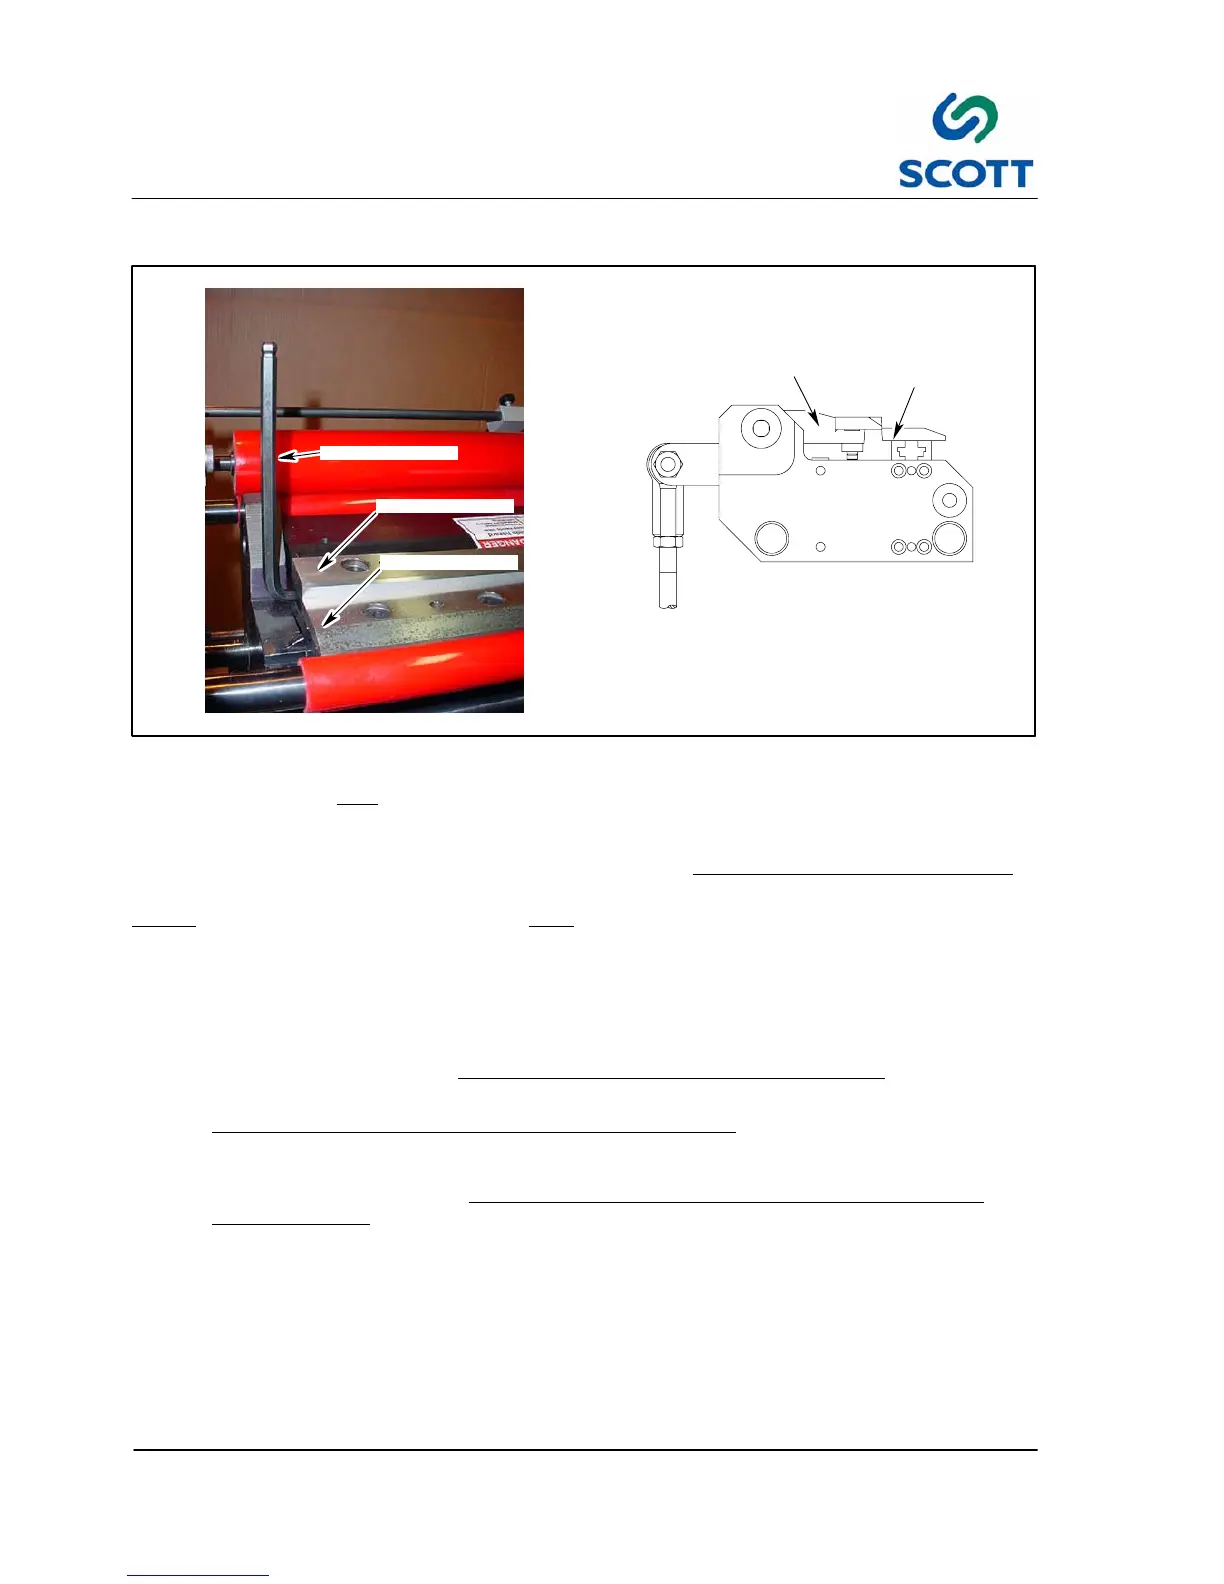
4.2.6 Procedure To Set Tab Cutting Knives
LOWER
KNIFE
UPPER
KNIFE
UPPER KNIFE
LOWER KNIFE
ALLEN WRENCH
Fig. 4 -26. Tab Cutter
The following procedure must
be followed in setting the tab cutting knives.
If this procedure is not followed, you will ruin your knives, spend an excessive amount in sharpening charges
and eventually damage the tab cutting packages on your machine. All operators should read this sheet
.
Note ! The knives are precision made and must be sent to Scott for sharpening.
Before going into a detailed explanation, a summary of the procedure is as follows:
Step: 1. Depress E--Stop button and turn air off.
Step: 2. Place the lower knife against the upper with no space between them.
Step: 3. Before tightening lower knife, raise and lower the upper knife for “clearing”
action.
Step: 4. If knives bump or rub, do the job again.
Step: 5. Check cutting ability of knives with at least .002” (.05mm) Mylar
(the index tab film you use on
machine).
Step: 6. If the knives do not cut the Mylar, go through the procedure again. If they still do not cut send the
knives to Scott for sharpening. NEVER JAM THE LOWER KNIFE AGAINST THE UPPER T
O
MAKE THEM CUT
.
The following is a detailed explanation of the above summary:
Step: 1. Depress E Stop button and turn air off. This is for the operators safety and permits the operator to
rotate the upper knives by hand. Unless this is done, you cannot get a proper setting.
Step: 2. To support the upper knife, insert an Allen wrench under the knife holder at the end, away from the
tab contour. This prevents the knife from falling into a downward position.
Step: 3. Make sure the upper knife is seated properly, with the pin against the knife holder and the screws
firmly tightened.