73
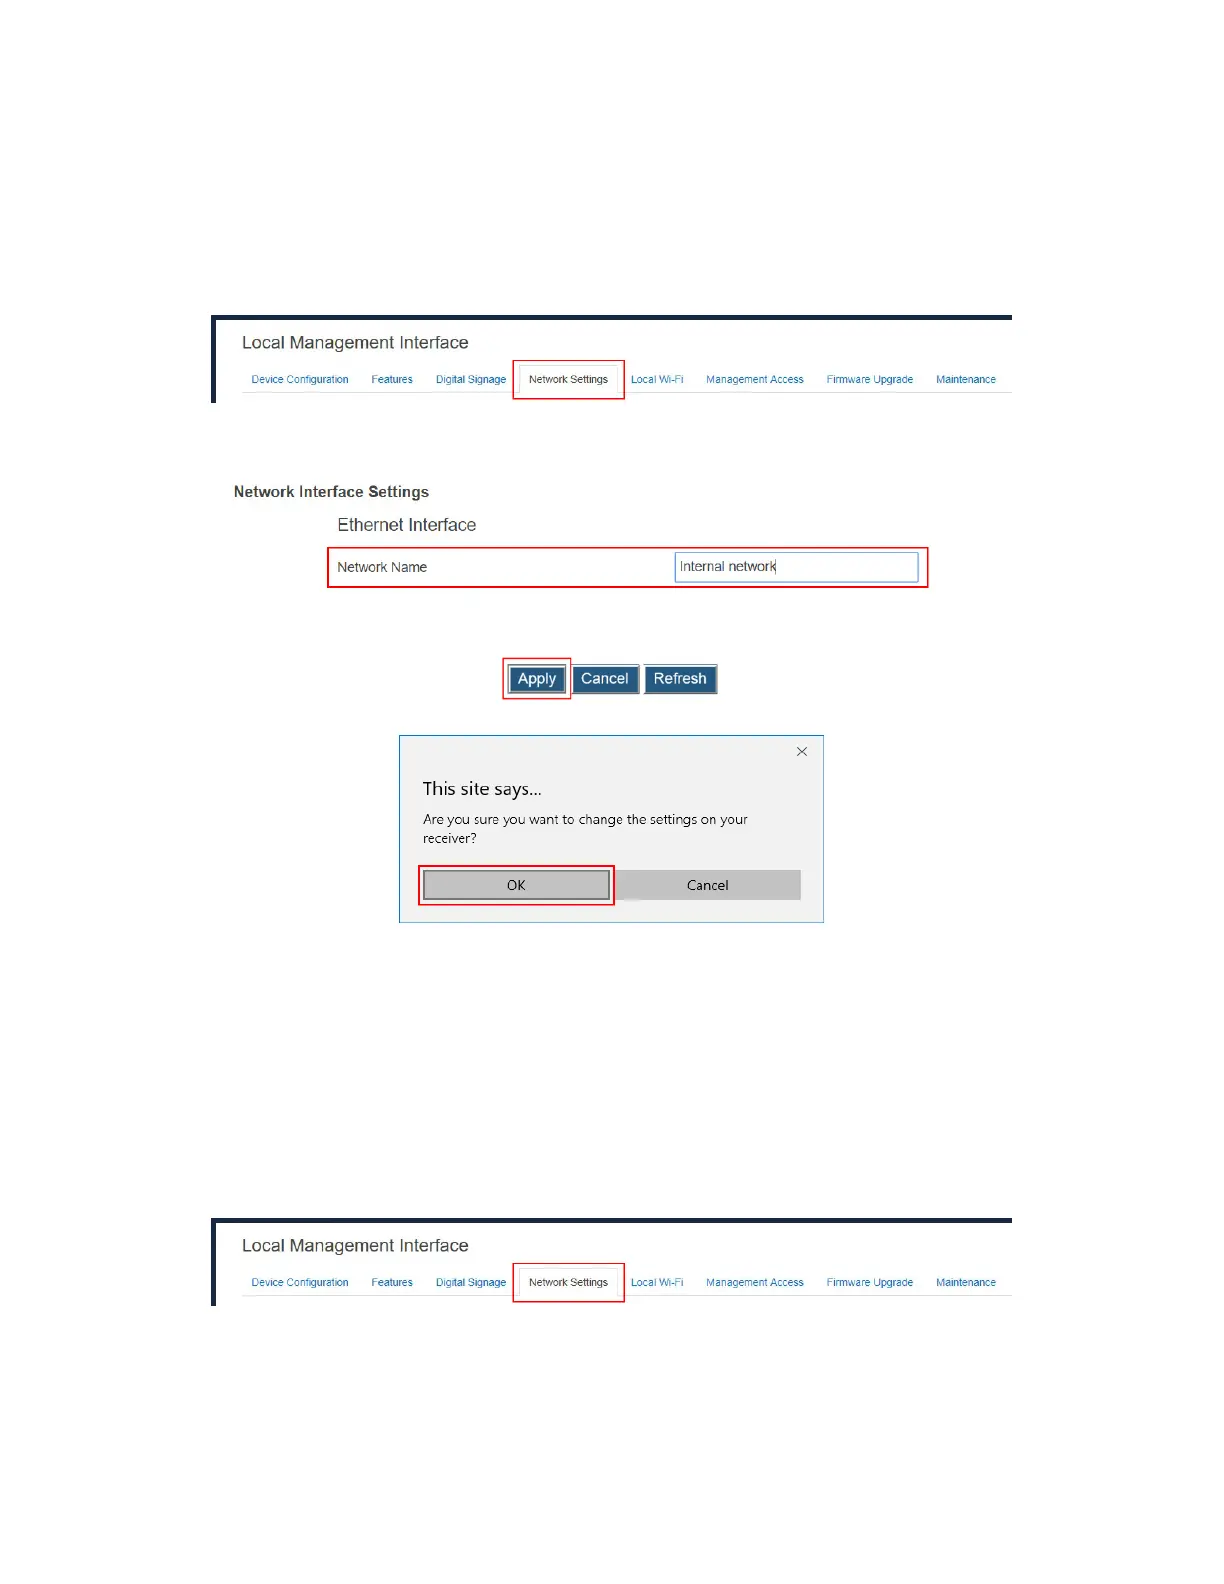
V.3.8.4 Renaming Ethernet Interface’s Network Name
Ethernet interface’s network name can remind users which Ethernet network the receiver is
connecting to.
To rename the Ethernet interface’s network name, follow this procedure:
1. Go to the Network Settings tab page by clicking the Network Settings tab.
2. Go to Network Interface Settings > Ethernet Interface, and rename the Network
Name.
3. Click the Apply button, and then click OK on the pop-up message box to confirm.
V.3.8.5 Setting up the Receiver’s IP Address
The receiver provides both Ethernet and wireless interfaces for connecting to networks.
Separate IP configuration is required for these interfaces. By default, the receiver is set to
obtain an IP address automatically. Make sure a DHCP server is available on your network.
IP configuration procedures for the Ethernet and the wireless interfaces are same.
To set up the receiver’s IP address, follow this procedure:
1. Go to the Network Settings tab page by clicking the Network Settings tab.
2. Go to Network Interface Settings > TCP/IP Setting, and set IP Assignment to Auto
or Static.
Auto: The receiver will be assigned an IP address by the DHCP server.
Static: Users are allowed to define the IP address, subnet mask, and default