Operating Instructions GM35
Probe Model
Commissioning
8009389/07-2006 © SICK MAIHAK GmbH • Germany · All rights reserved 57
‡ Wait until the operating temperature of the optical boundary surfaces in the measuring
probe has been reached.
‡ Leave the power supply connected while you insert the measuring probe in the duct (see
Chapter 6.5.3) and while it is inside the duct.
6.5.3 Mounting the GM35 SR unit and measuring probe on the duct
Protection from hot and corrosive gases
‡ Determine whether the measurement gas duct contains hazardous gases or dusts, or a
high dust content, as well as the temperature and pressure within the duct.
‡ Use suitable safety clothing and equipment to prevent injury and other hazards when the
duct is opened.
■ If the protective equipment does not permit you to work safely on the open gas duct un-
der the current circumstances, or if the duct cannot be opened as this would allow gas
to escape or air to enter the duct:
‡ Contact the persons responsible to have the gas duct shut down for the duration of
the installation procedure and, if necessary, have the duct flushed with ambient air to
ensure that the system can be installed safely.
‡ If present, remove the cover on the flange duct with pipe.
‡ Insert the measuring probe with mounted SR unit in the flange with pipe on the duct. If
you are using a GMP measuring probe, the purge-air supply must remain connected to
the measuring probe and in constant operation. The power supply to the GPP measuring
probe for heating the optical boundary surfaces must not be interrupted.
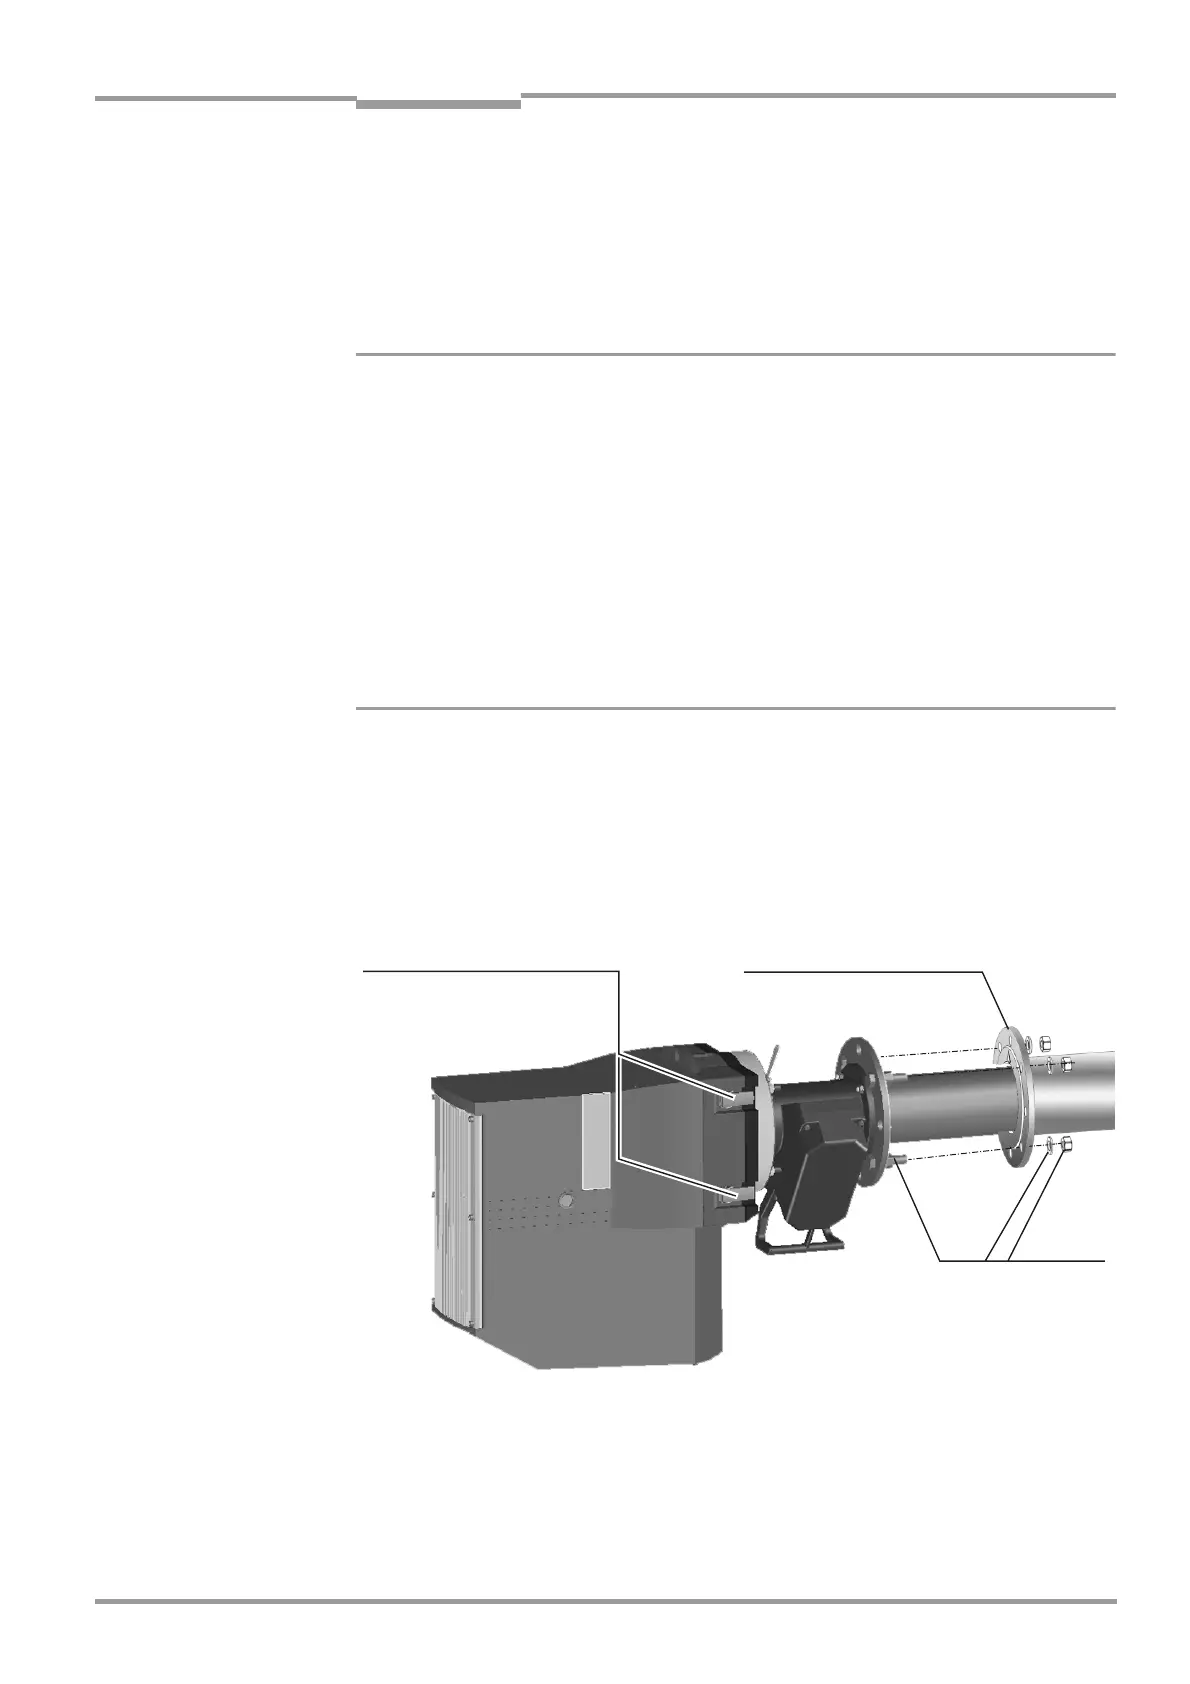
‡ Mount the measuring probe on the flange in the duct using the fixing-parts set as shown
in . The fixing-parts set consists of 4 bolts M16x60, each with nut and 2 washers.
Fig. 31 Mounting the SR unit with measuring probe on the duct flange
Flange with tube (duct side)
Bolts M16x60 with
nuts, washer and
snap ring each
Quck release fastener

 Loading...


