3-6
Step 2: Dispensing the
Sample
Use the provided
micropipette and a new tip
to pick up 200 μL of the
sample.
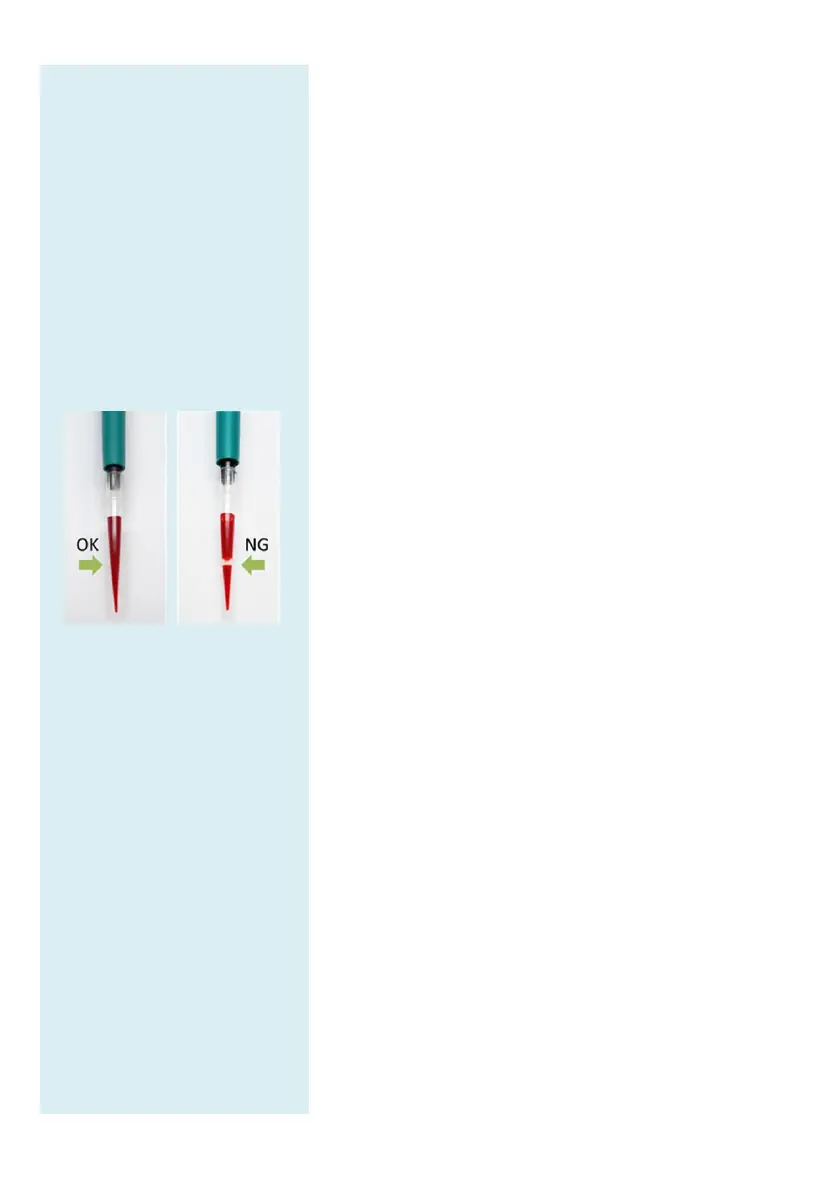
When picking up the
sample, avoid drawing in
any air. This can cause
insufficient volume of the
sample pickup.
Insert the pipette tip into
the sample port. The
pipette tip only needs to
make slight contact with
the bottom of the sample
chamber. Do not push
down hard to avoid
deforming the pipette tip.
Keep the pipette
perpendicular. Gently
push the plunger down in a
slow, continuous motion
to dispense the sample into
the reagent disc. Do not
push down the pipette
plunger repeatedly to avoid
3.4 Dispensing the Sample
Use the provided micropipette to dispense 200
sample into the sample chamber
of the reagent disc.
Attach a new tip to the end of the 200 μL pipette.
not touch the tip.
Hold the pipette and use your thumb to push down
the plunger at the top of the pipette all the way to the
end. Hold it down to pick up the sample.
Immerse the pipette
tip below the surface of the
sample. Slowly release the plunger to pick
sample. Remove the pipette from the sample tube.
Make sure there are no air bubbles or air gaps
pipette tip.
Insert the pipette tip into the sample port
with the sample anti-spilling pad on the top of t
reagent disc.
The pipette tip only needs to make
slight contact with the bottom of the s
do not push down hard to avoid
tip.
When dispensing the sample, ensure that you
keep the reagent disc level and keep the pipette
perpendicular
to the surface of the reagent disc.
Gently push down the plunger at the top of the
pipette all the way to the end
sample to the reagent disc. After the sample
completely dispensed into the reagent disc, keep the
pipette plunger held down and
from the sample port before releasing the plunger
avoid withdrawing the sample from the
disc.
If some
of the sample flows out of the sample
anti-spilling pad, use a lint-free
disc and make sure that
the tissue does not withdraw
any sample from the sample port.
Dispose of the used tissue and pipette tip
designated biohazard container.