2.
LoosenthescrewsonthefrontcoveroftheConnectionUnitusingthesuppliedAllenkey,asshown
below:
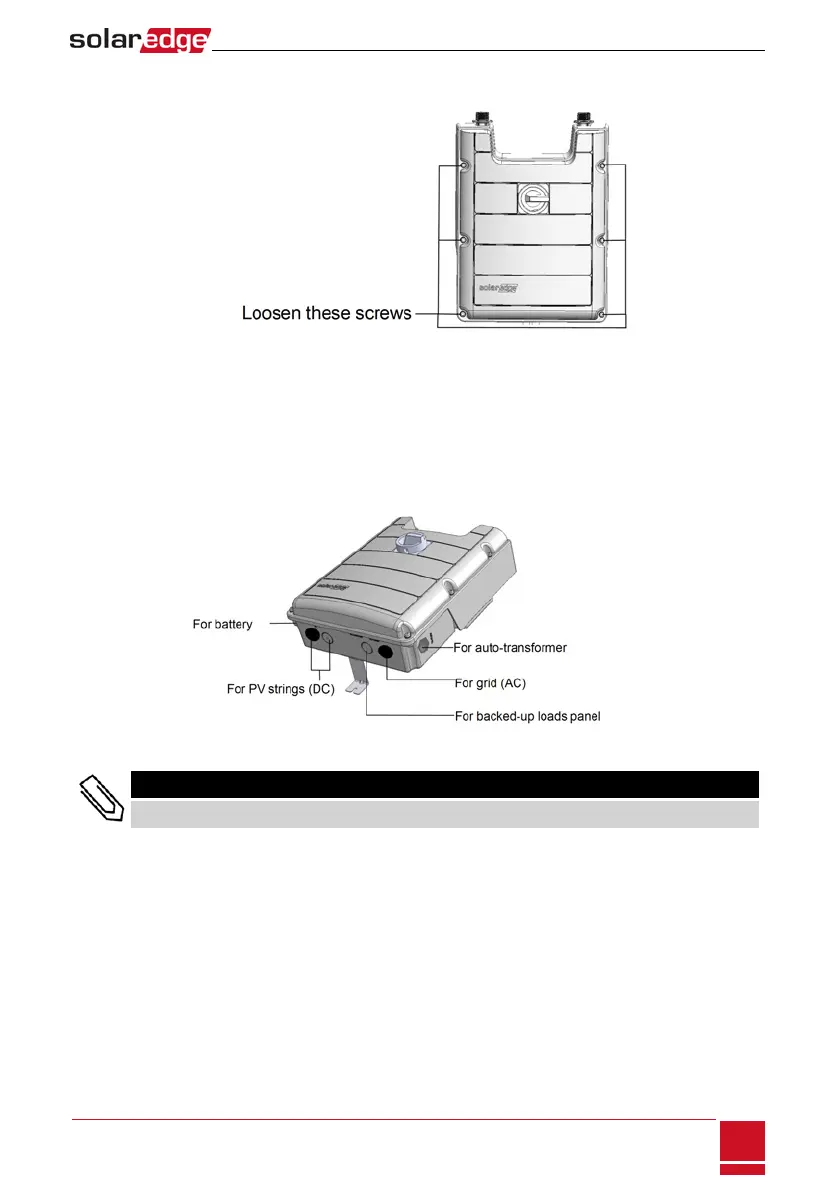
Figure 45: Opening the Connection Unit cover
3. RemovetheConnectionUnitcover.
4. Opentherequiredconduitdrillguidesaccordingtotheconduitsusedintheinstallation(refertothe
figurebelowforrequireddrillguides;someofthedrillguidesmayalreadybeopenbutsealed):The
drillguidesarelocatedatthebottomandsidesoftheenclosure,eachwithtwosizes:¾''and1''.Open
therequireddrillguides,takingcarenottointerferewithanyoftheinternalcomponents.Itis
recommendedtouseaUnibitdrill.
Figure 46: Connection Unit drill guides
NOTE
Unused conduit openings and glands should be sealed with appropriate seals.
Appendix B: Opening Conduit Drill Guides
SolarEdge-StorEdge Installation Guide MAN-01-00262-1.3
103