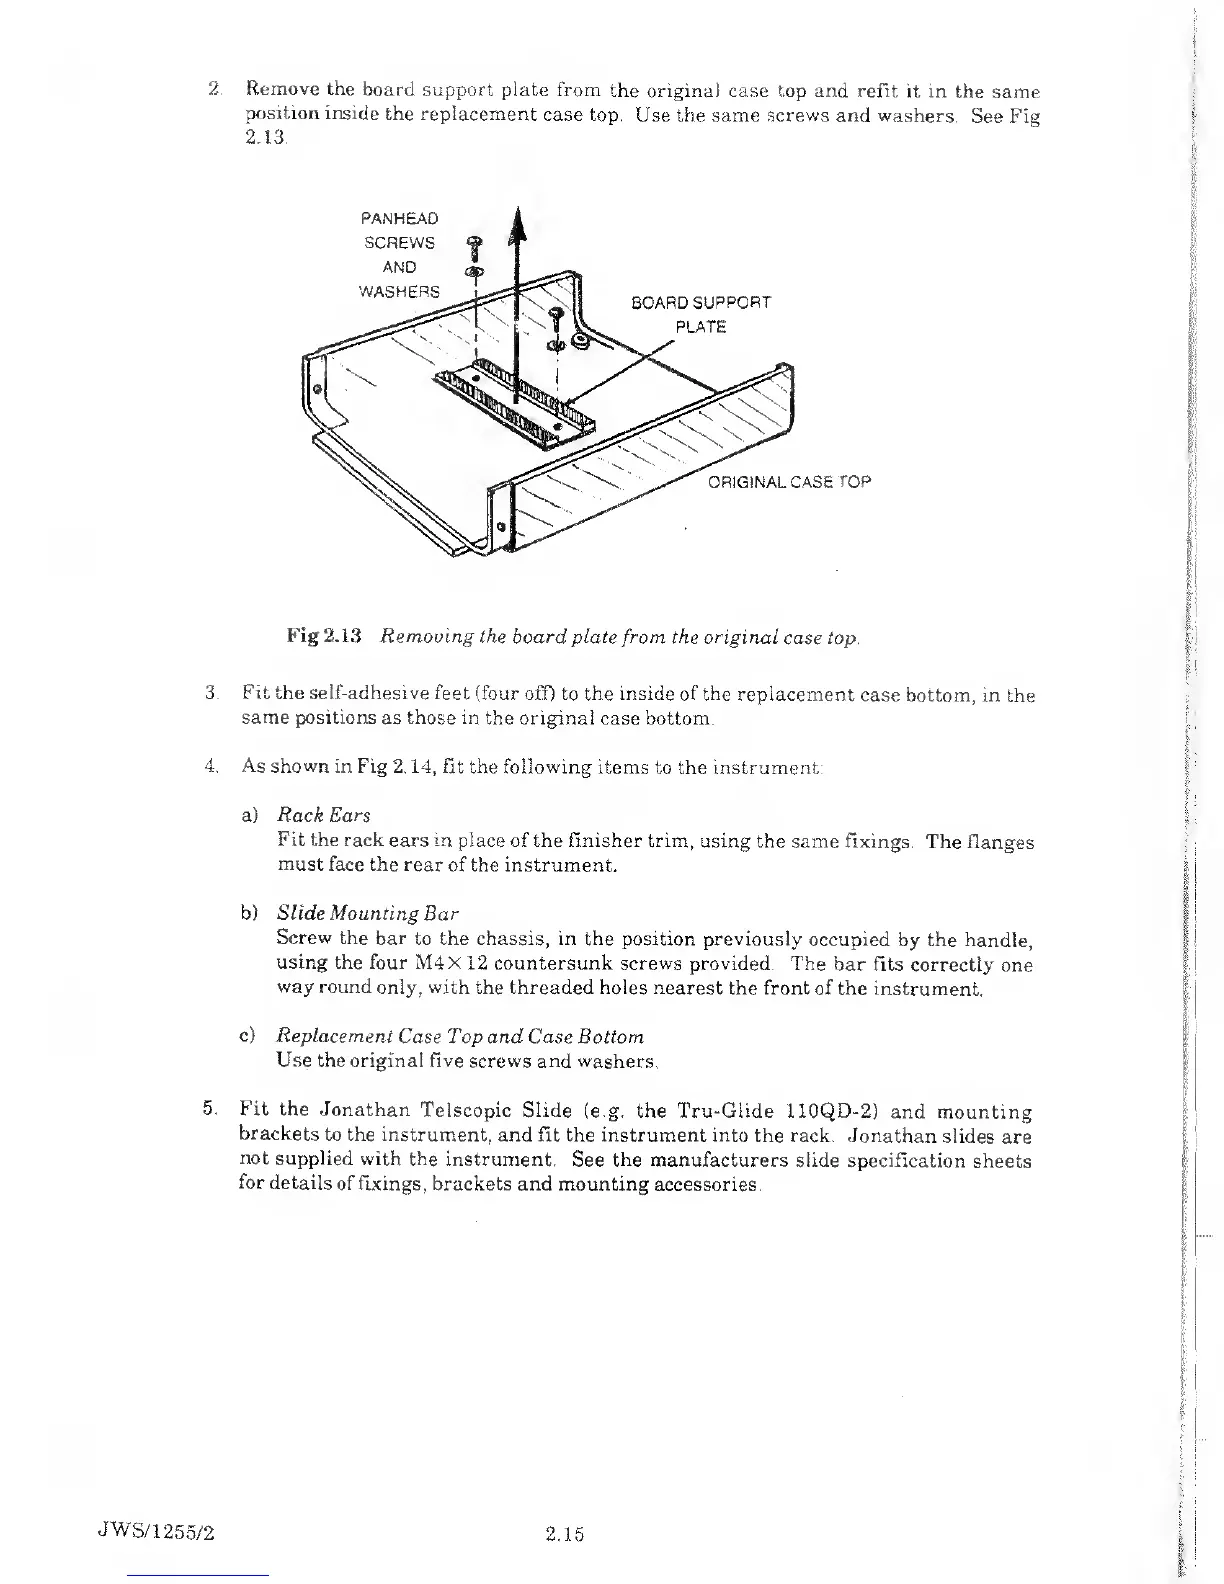
2
. Remove
the
board support plate
from
the original case top and refit it
in the
same
position inside
the replacement
case top.
Use the same
screws
and washers.
See
Fig
2.1.3.
Fig 2.13
Removing the board plate
from
the original
case top.
3. Fit the self-adhesive
feet (four
off) to the inside of the replacement
case
bottom, in the
same positions
as those in the original
case bottom.
4. As shown in
Fig
2.14,
fit the following
items to the
instrument:
a)
Rack
Ears
Fit the
rack ears in place
of the finisher trim, using
the same fixings.
The Ranges
must
face the rear of the
instrument.
b) Slide
Mounting Bar
Screw
the bar
to the chassis, in the
position
previously
occupied
by the handle,
using
the four M4X
12 countersunk screws
provided. The bar fits
correctly one
way round
only, with
the threaded holes nearest
the front of the
instrument.
c)
Replacement
Case Top and Case Bottom
Use the original
five screws and washers.
5.
Fit the
Jonathan
Telscopic Slide
(e.g. the Tru-Glide 110QD-2)
and mounting
brackets
to the
instrument, and fit the instrument
into the rack.
Jonathan slides
are
not
supplied with
the instrument.
See
the
manufacturers slide
specification sheets
for
details of fixings,
brackets and mounting
accessories.
JWS/1255/2
2.15