New Job Startup
12
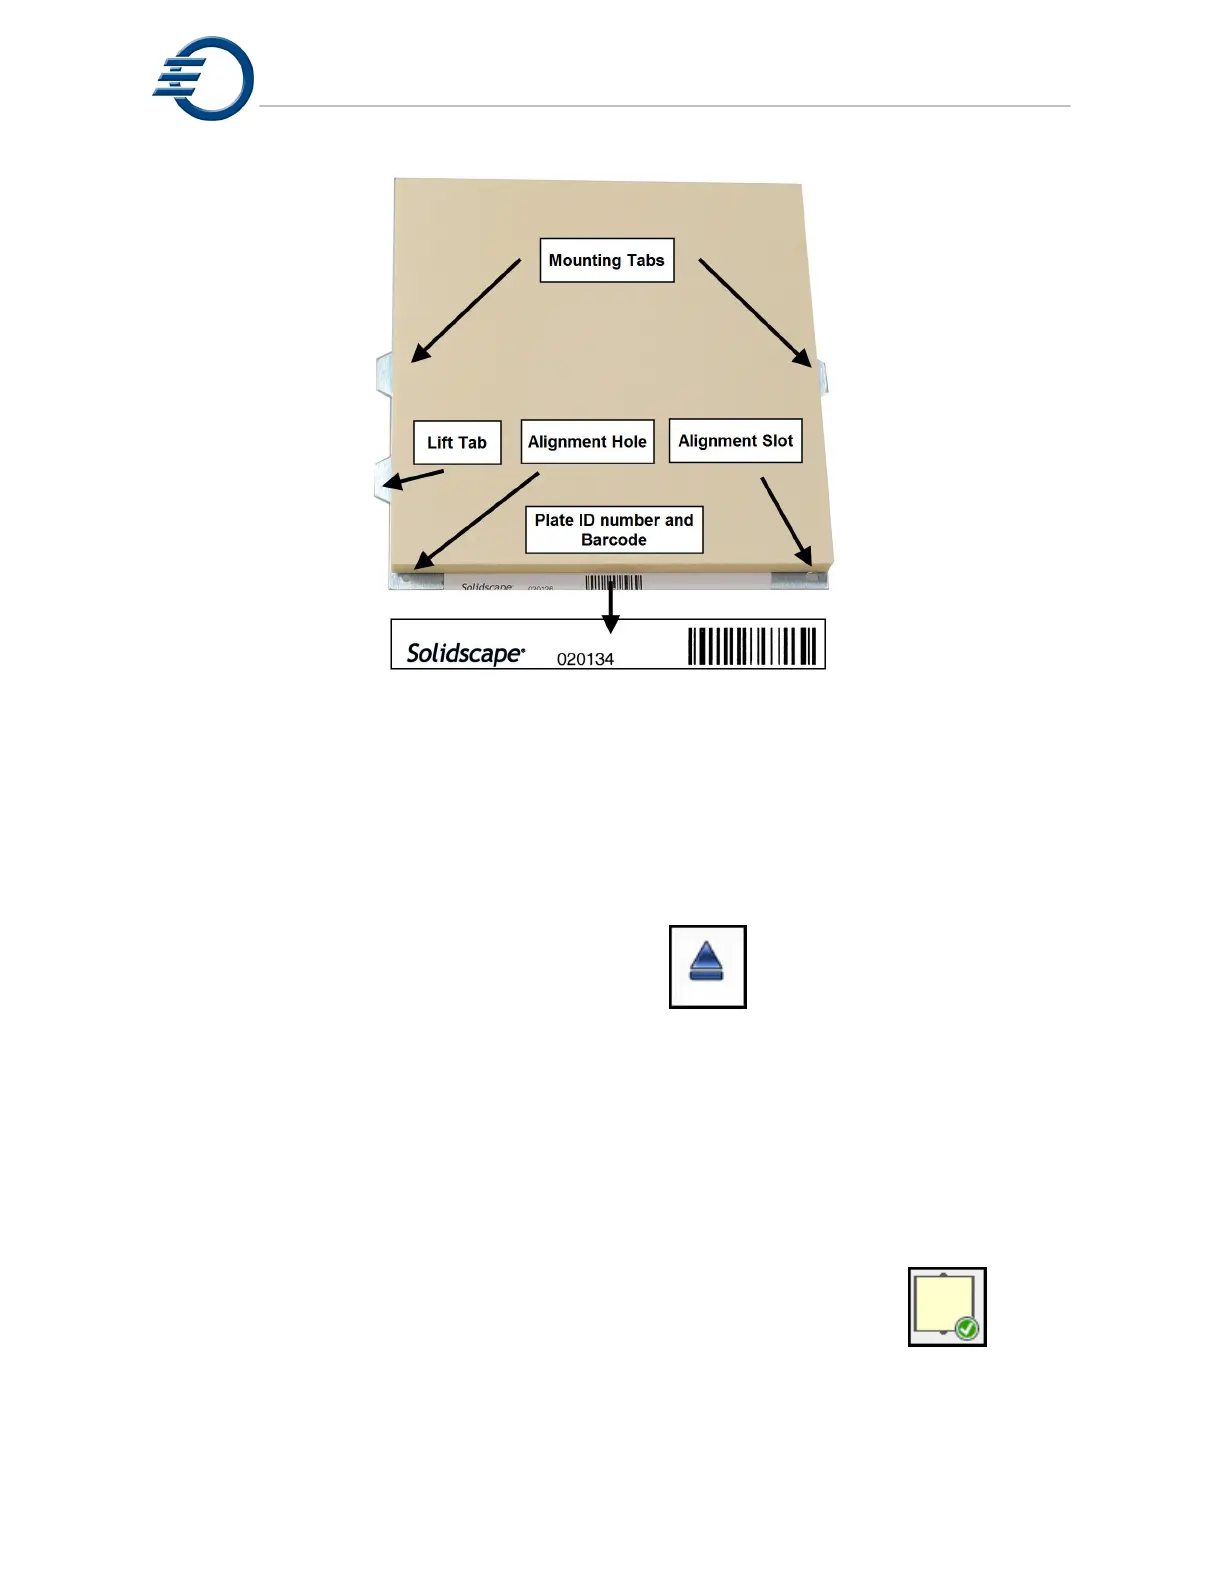
Figure 3-2 Build Plate
3.1.1 Build Plate Mounting
1. Ensure that the back, metal surface of the build plate is smooth and clean and free from
material and debris.
2. Ensure that the build plate mounting hole and slot are clean, unobstructed and free from
material and debris.
3. Open the top cover by pressing the OPEN Icon
4. Ensure that the system build table is clean and free from material and debris.
5. Align the build plate hole and slot with the alignment pins on the right side of the build table
and mount the build plate on the build table. See Figure 3-3 Build Plate Mounting
6. Ensure that the build plate lies flat on the build table at all four corners. If not, debris may be
caught between the table and plate. Remove the build plate and inspect both the table and
plate.
7. Slide the rear then the front tab locks to the right and over the build plate tabs. See Figure
3-3 Build Plate Mounting.
8. Check to ensure that the build plate is fully secured and can not move in any direction.
9. Close the top cover. Upon closing, the printer will automatically print the
serial number of the printer on the build plate and then cut the
3Z Base to the proper starting height. The 3Z Base icon will then have a
green check next to it, indicating the build plate is ready for use.