3-20
BVW-55 P2
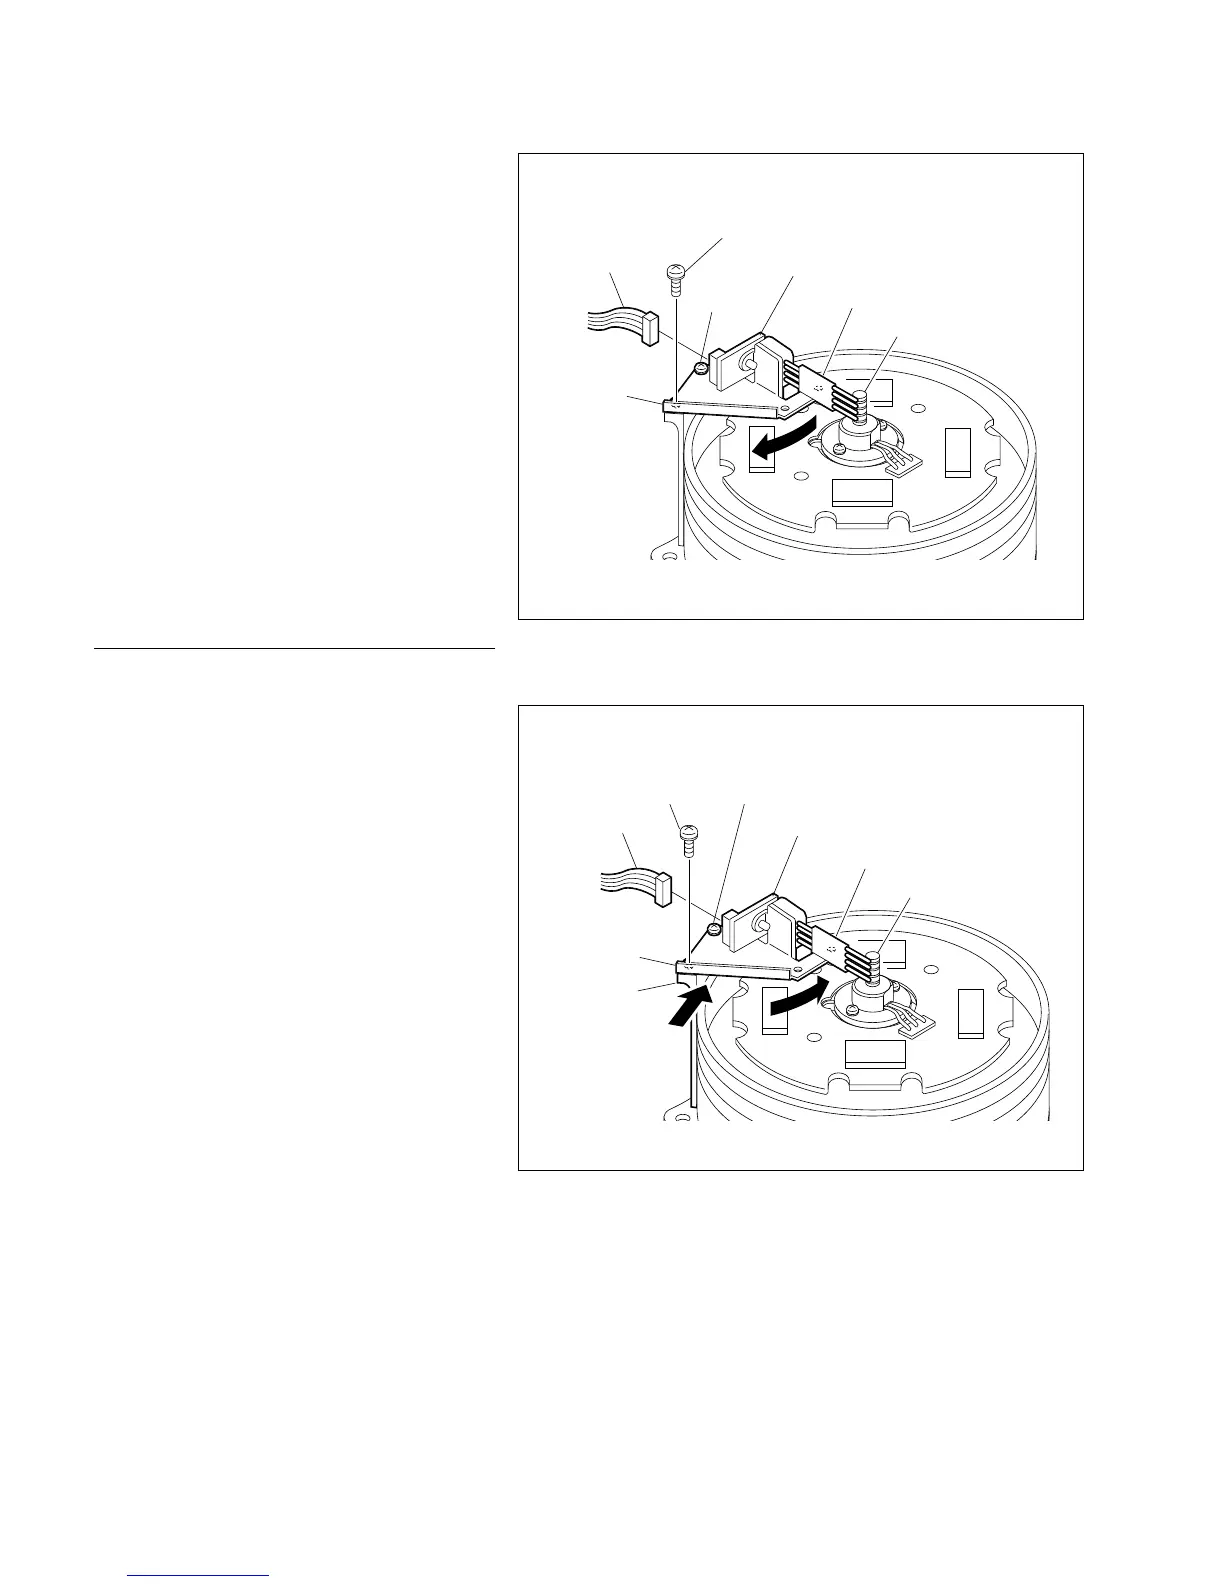
2. Brush assembly removal
(1) Disconnect the harness connected to the
brush board.
(2) Remove the screw shown in the figure of the
two screws fixing the brush base.
(3) Loosen the other screw and move the brush
base in the direction indicated by the arrow.
The engagement of the brush and slip ring is
then released.
(4) Remove the screw, then remove the brush
assembly.
Installation
3. Brush assembly installation
(1) Fix the brush base tentatively to the brush
post with the screw shown in the figure.
n
Never touch the brush.
(2) Move the brush base in the direction indicat-
ed by arrow A while pushing it downward at
the top of the brush post, and fix the other
screw tentatively.
(3) Tighten the screws fixed tentatively in steps
(1) and (2) while pushing the brush base in
the direction indicated by arrow B.
[Tightening torque: 20 x 10
_2
N.m
{2.0 kgf.cm}]
(4) Connect the harness disconnected in step (1)
of procedure 2 to the connector on the brush
board.
3-3. Brush Replacement
Brush assembly
Brush board
Remove this screw first
(PSW2 x 5)
PSW2 x 5
Brush base
Slip ring assembly
Harness
PSW2 x 5
A
B
Brush assembly
Brush board
At first, tighten this screw tentatively.
(PSW2 x 5)
Brush base
Slip ring assembly
Harness
Brush post
 Loading...