3-33
BVW-55 P2
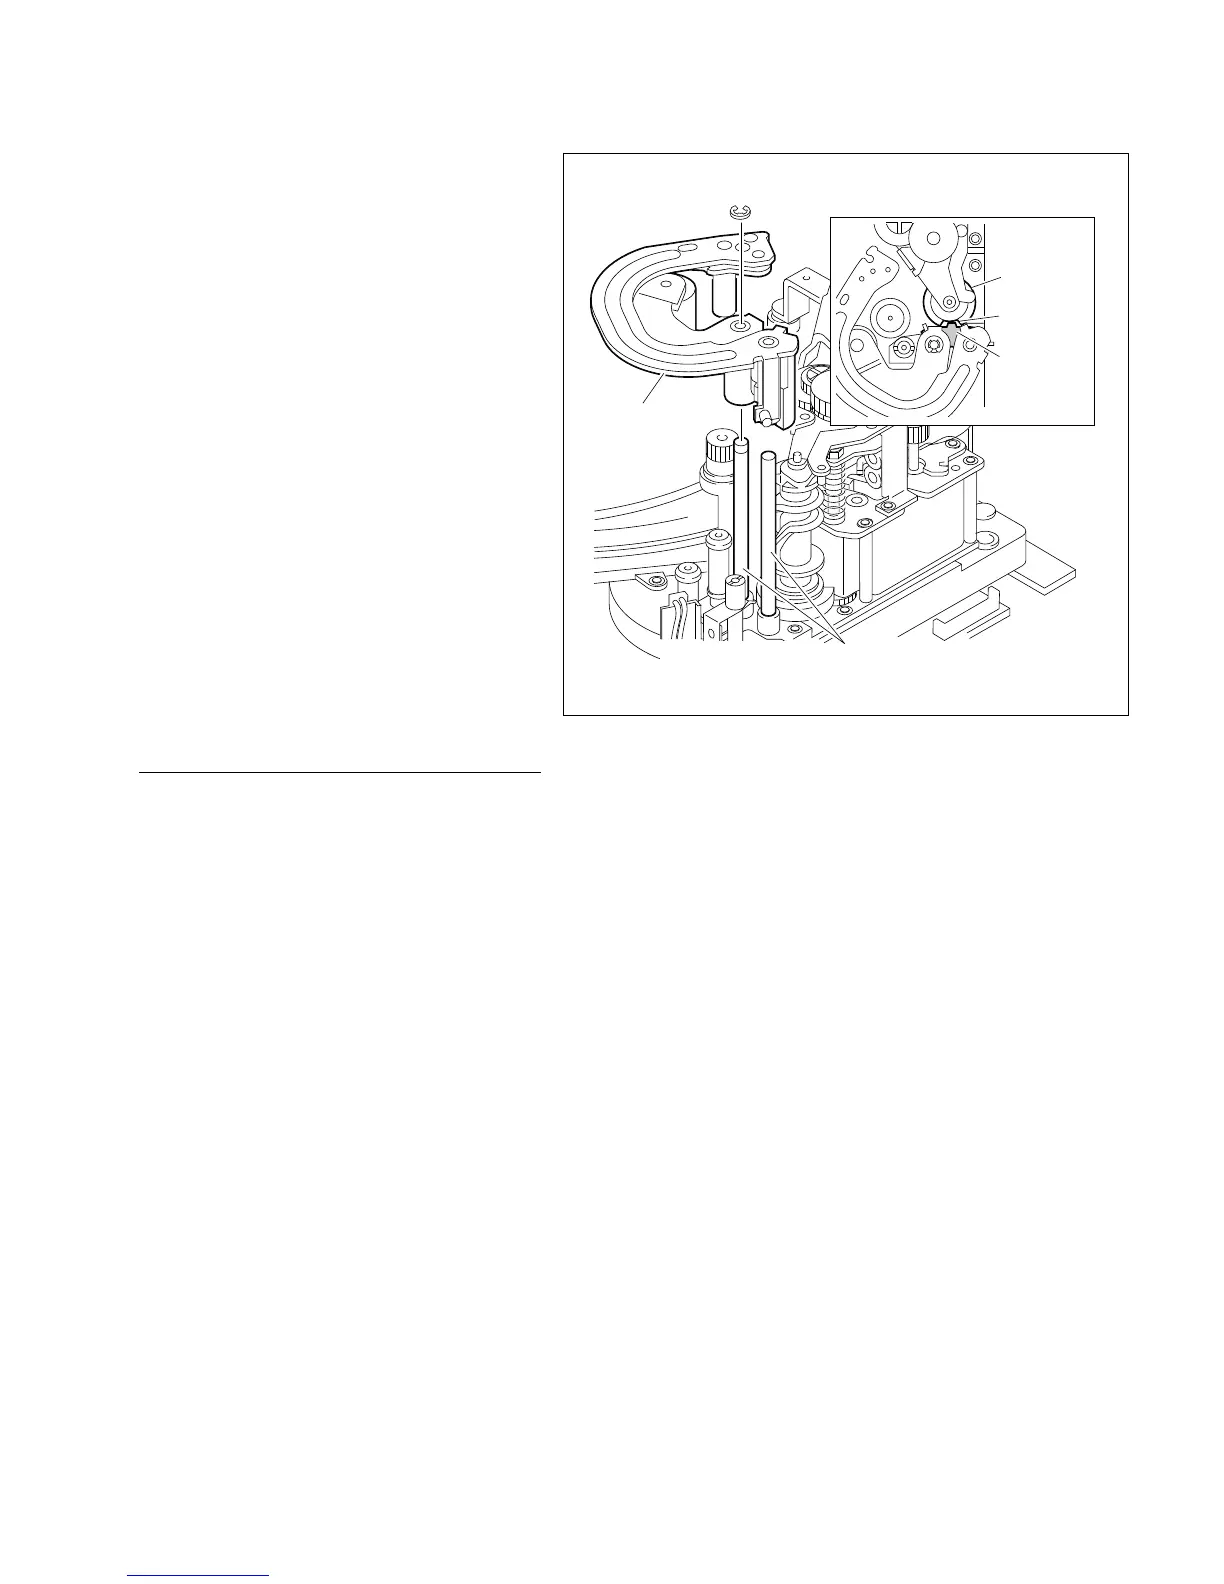
3. Pinch arm assembly installation
(1) Clean the pinch arm lifting shafts with
cleaning cloth moistened with cleaning fluid.
(2) Apply a quarter drop of oil to the pinch arm
lifting shafts.
(3) Put the holes of the pinch arm assembly into
the pinch arm lifting shafts while putting the
slider of the pinch arm assembly into the
notch of the pinch press cam.
(4) Install a new E ring to the pinch arm lifting
shaft.
4. Cleaning
Clean the surface of the pinch roller and T3 tape
guide with cleaning cloth moistened with clean-
ing fluid. (Refer to the maintenance manual Part
1, Section 4-2-6.)
5. Operation check
Check that the pinch roller is engaged to the
capstan shaft when the unit is in the threading end
state.
Adjustment after replacement
6. Tape running adjustment
(Refer to Section 5-4.)
3-7. Pinch Roller Replacement
E ring
Pinch arm assembly
Pinch arm lifting shafts
Notch
Slider
Pinch press
cam





 To Next Page