4-4
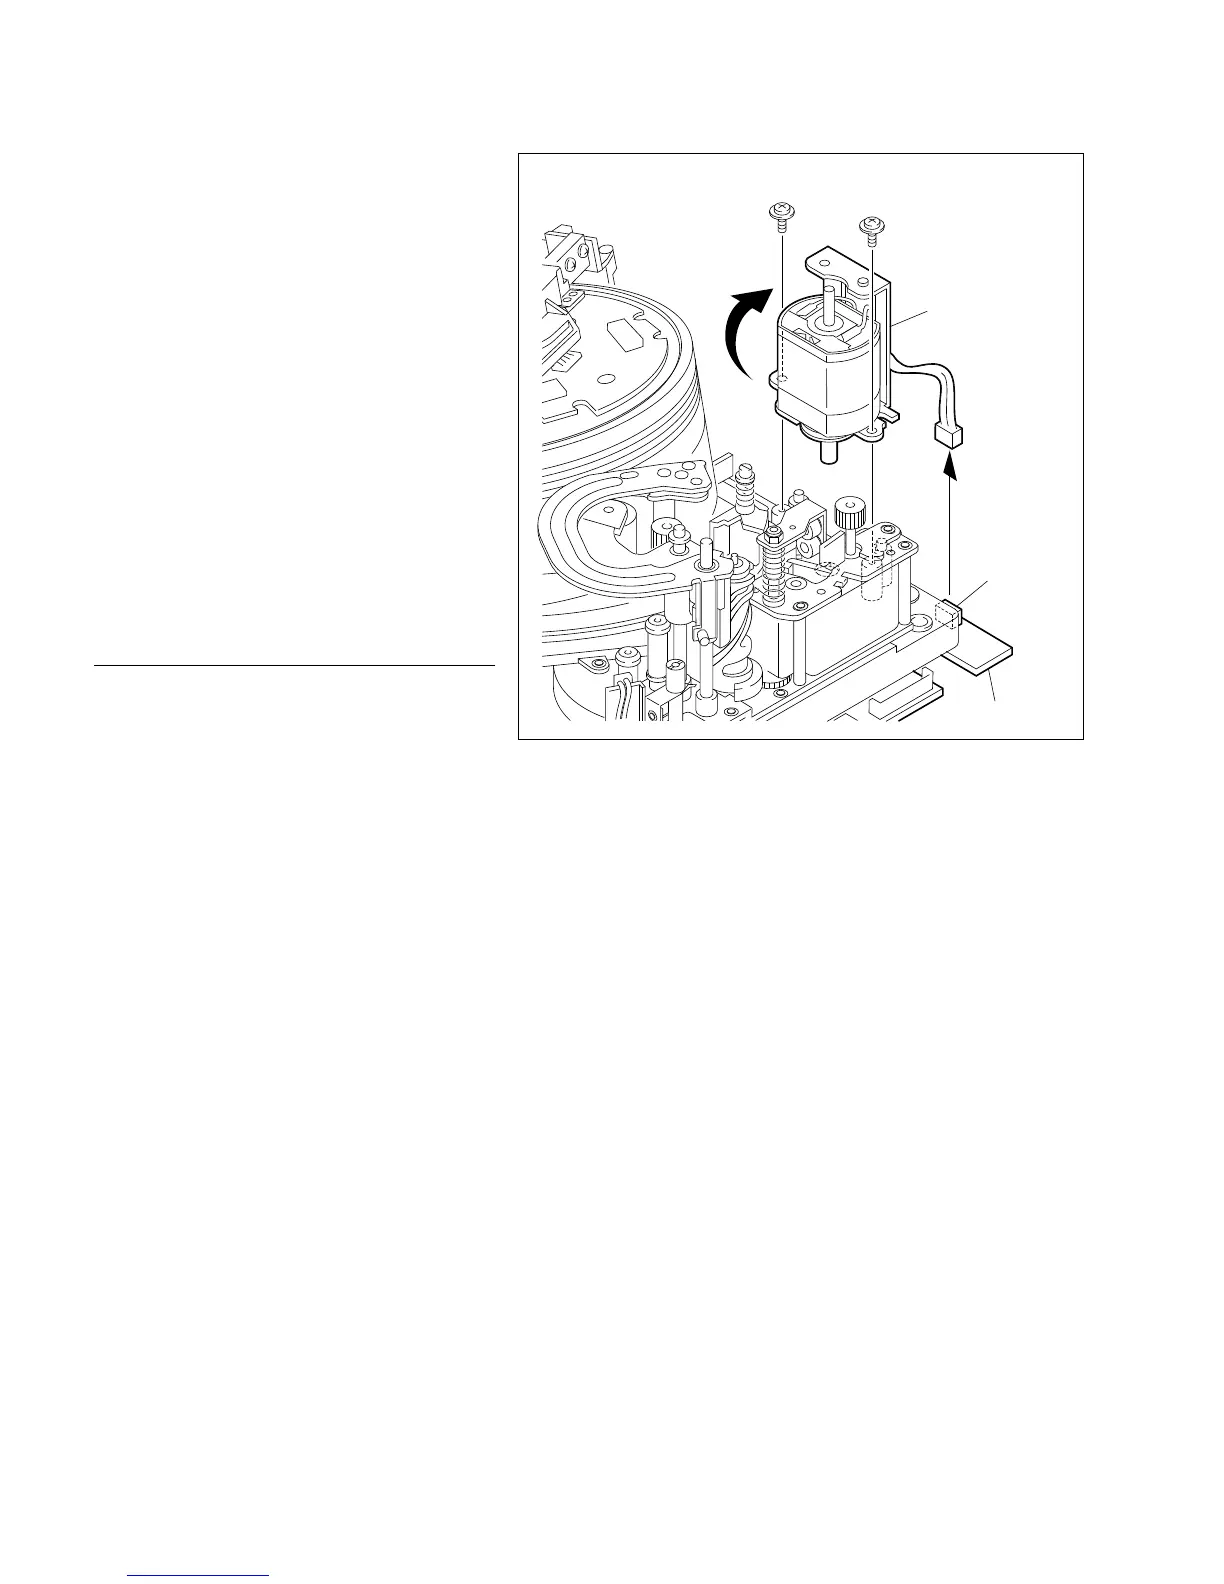
BVW-55 P2
CN702
Precision
PWH1.4 x 3.5
Precision
PWH1.4 x 3.5
Threading motor
assembly
SV-206 board
5. Threading motor assembly installation
(1) Put the threading motor assembly onto the
mechanical deck while hooking the timing
belt on the pulley of the threading motor
assembly.
(2) While pushing the motor assembly in the
direction of the arrow, secure it with the two
precision screws.
(3) Connect the connector of the threading motor
to CN702 on the SV-206 board.
6. AT head assembly installation
Install the AT head assembly.
(Refer to Section 3-15.)
7. VH cleaner assembly installation
Install the VH cleaner assembly.
(Refer to Section 3-6.)
Adjustment after replacement
8. AT head position adjustment
(Refer to Section 5-8.)
4-1. Threading Motor Replacement