4-67
BVW-55 P2
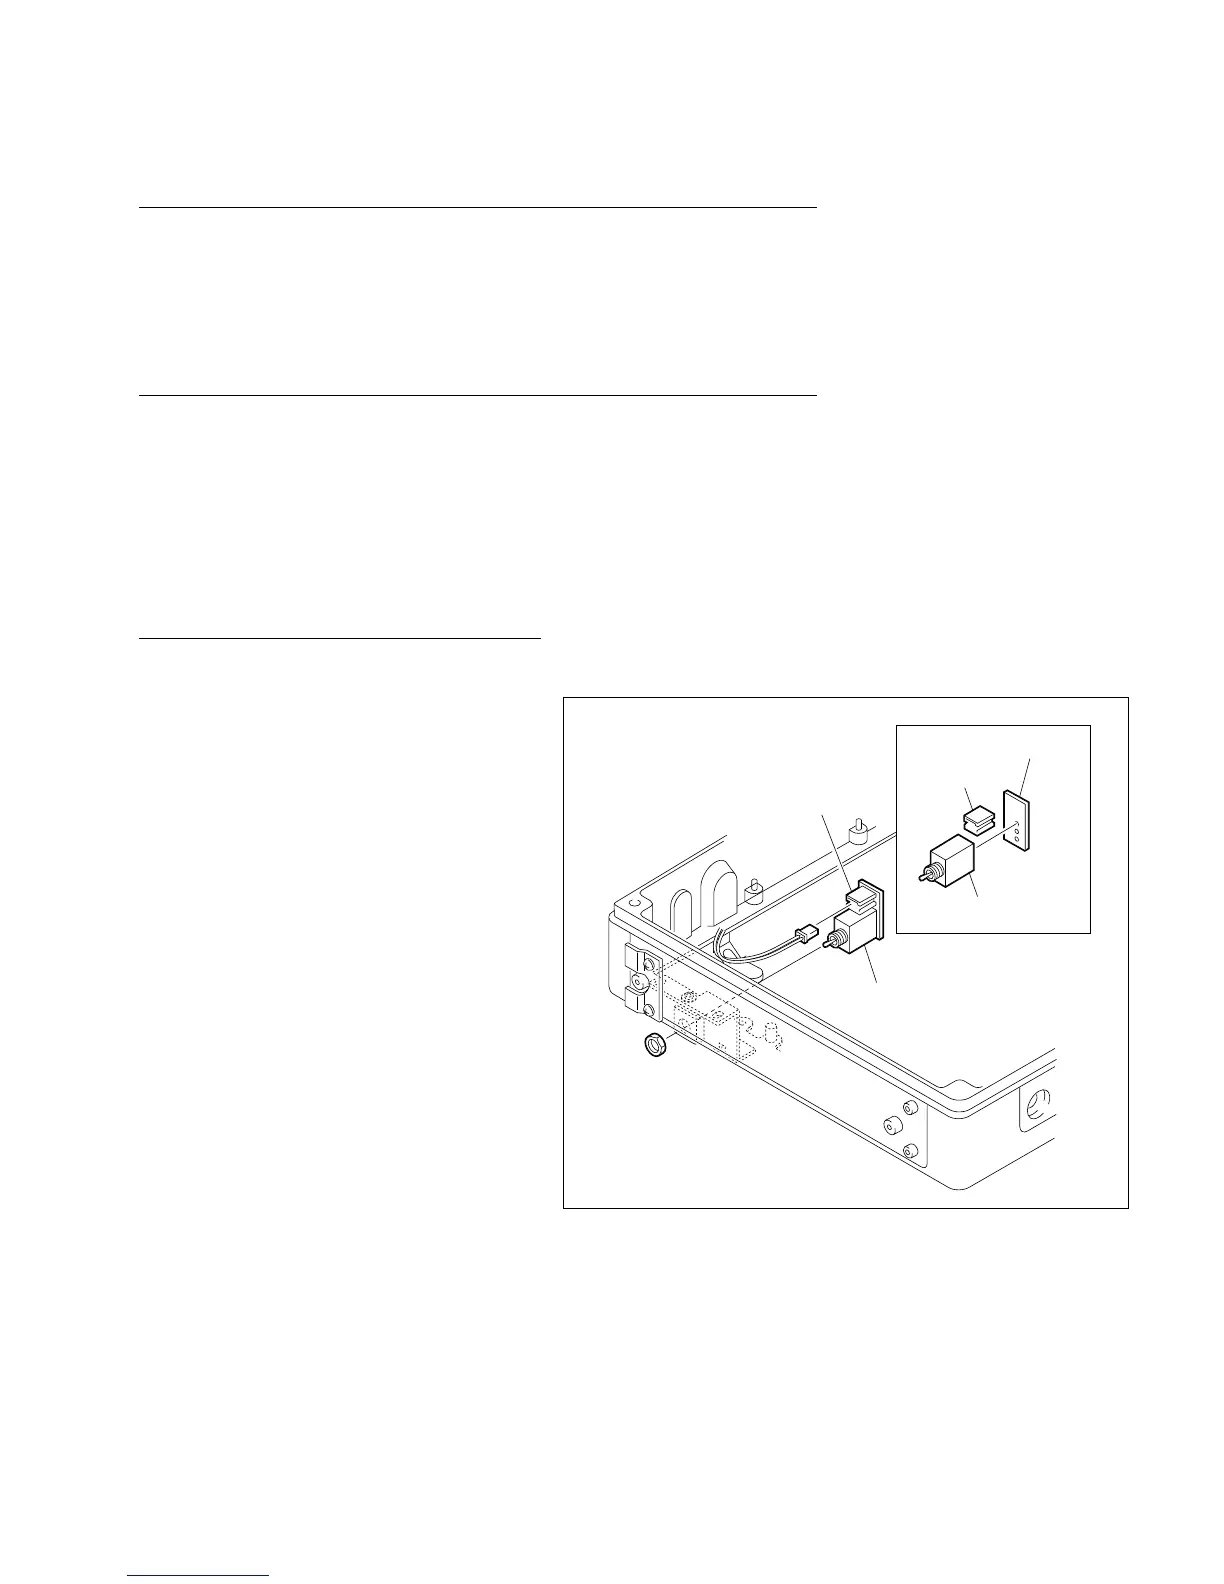
4-18-6. PSW-63 Board Replacement
Outline
Replacement
Power switch block removal
PSW-63 board replacement
Power switch block installation
Preparations
1. Put the unit into the unthreading end state.
2. Turn off the power.
3. Remove the upper frame.
(Refer to the maintenance manual Part 1, Section 1-6.)
4. Remove the bottom plate.
(Refer to the maintenance manual Part 1, Section 1-6.)
Replacement
1. Power switch block removal
(1) Remove the hexagon nut fixing the power
switch, then remove the power switch block.
(2) Disconnect connector CN1 connected to the
PSW-63 board.
2. PSW-63 board replacement
(1) Remove the PSW-63 board soldered to the
power switch.
(2) Unsolder connector CN1 from the removed
PSW-63 board and solder it to a new PSW-63
board.
(3) Solder the new PSW-63 board to the power
switch.
3. Power switch block installation
(1) Connect the harness connector to connector
CN1 on the PSW-63 board.
(2) Install the power switch block in the unit
using a hexagon nut so that the connector
CN1 on the PSW-63 board faced to the
mechanical deck.
4-18-6. PSW-63 Board Replacement
CN1
Hexagon nut
Power switch block
Power switch
Connector CN1
PSW-63 board
 Loading...