www.spacelabshealthcare.com
4-28
91390
QUBE
M AINTENANCE
5 Install the new fan. Secure it to the chassis with the three screws
removed in Step 4 on page 4-27.
6 Reconnect the fan cable to the CPU board.
7 Attach the handle again. Refer to Reinstall the Rear Handle
Assembly on page 4-26.
8 Attach the bezel assembly again. Refer to Remove the Bezel
Assembly on page 4-8.
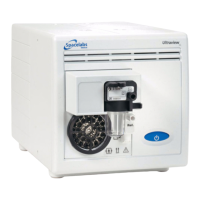
Install or Replace the Optional Recorder Assembly
Note:
Unless purchased separately for a monitor already in the field,
the recorder option is installed at the factory. Order an upgrade
from your local sales representative.
For options A and B only.
To install the recorder
1 Power OFF the monitor and remove the batteries.
2 Remove the printer “dummy panel.”
3 Insert the recorder assembly. Make sure that it fully engages
the connector at the back of the recorder compartment. To
open the recorder assembly, press the release bar. tighten the
two Phillips-head screws at the rear of the recorder.
Warning:
A safety hazard is created if the mylar insulator is not properly installed
over the recorder CPU PCBA.
 Loading...