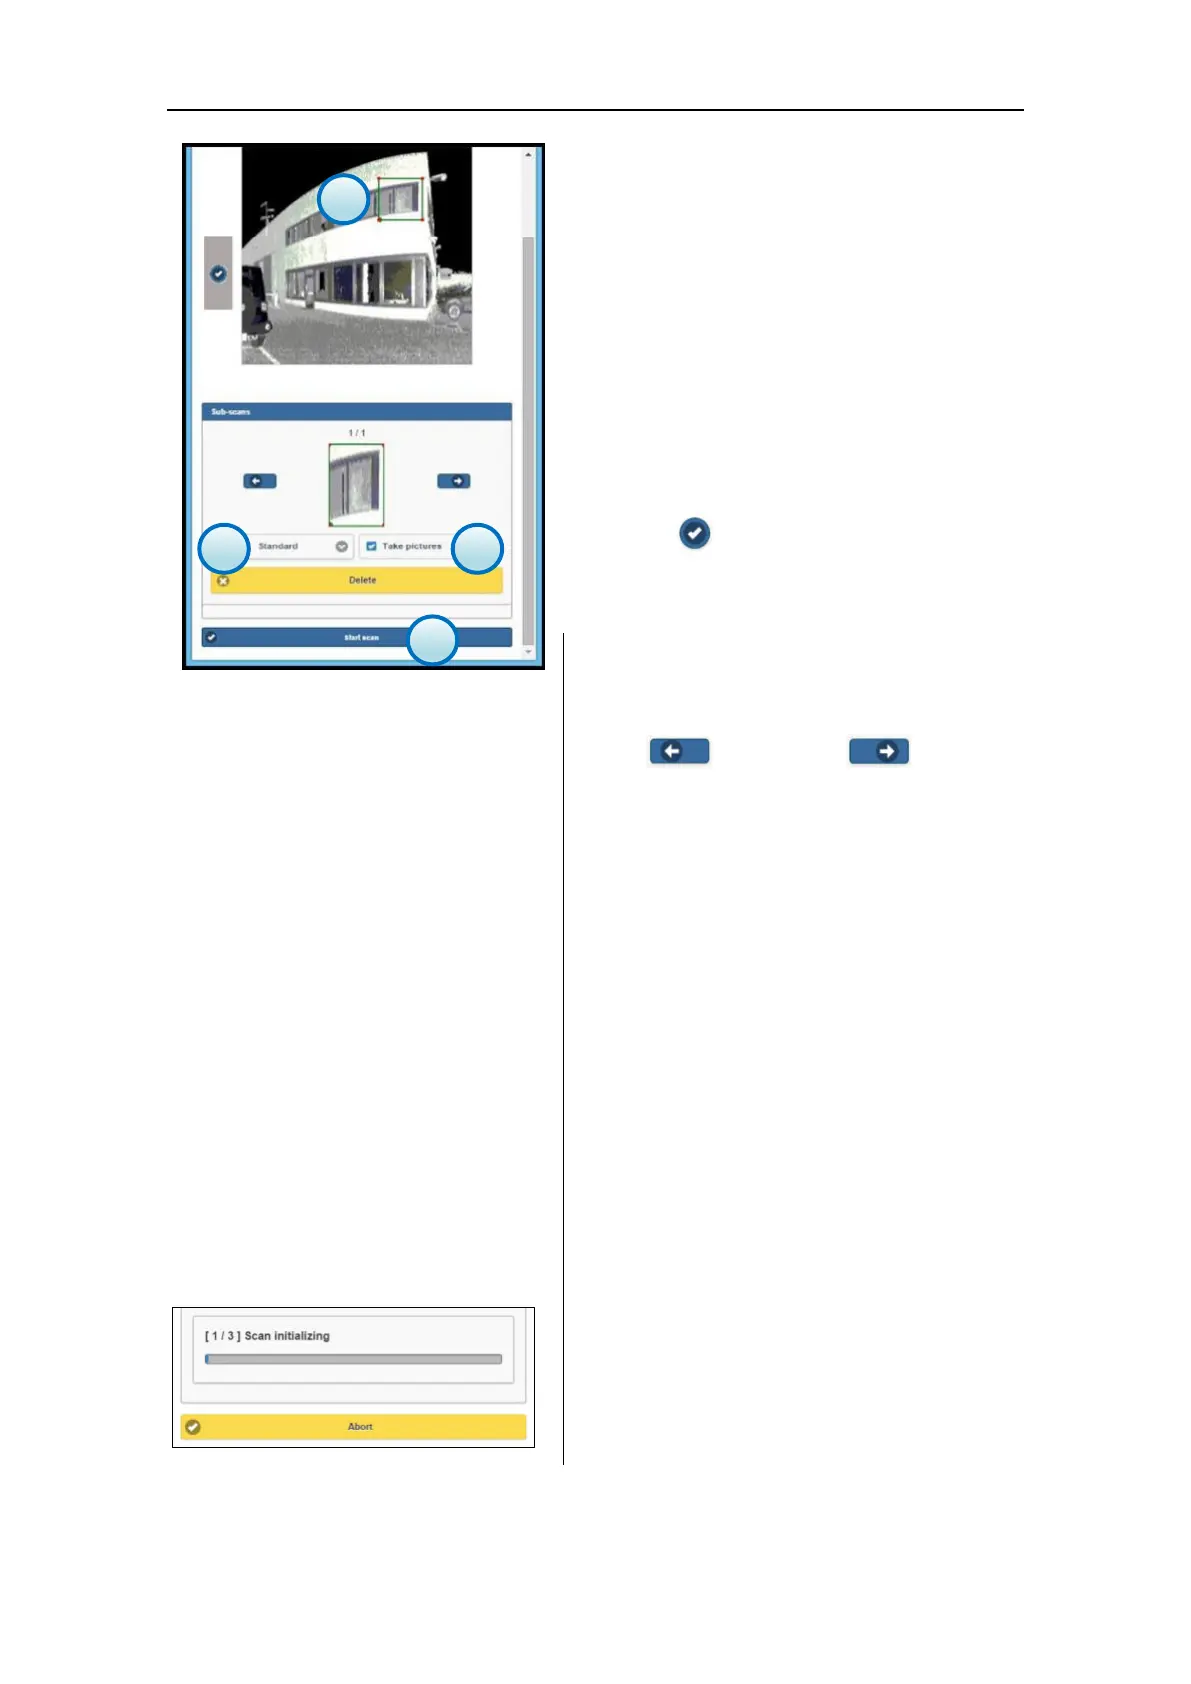
5. Sub-scan selection
Now it is possible to use the preview scan as it
was a canvas: use the fingers (touchscreen) or
the mouse (pc) to pinch the red dots on the
corner of the scan-frame (green rectangle) and
drag them along X and Y direction until the area
of interest is inside the scan-frame.
If the area of interest is not visible on the
screen, just slide the image to the right-left
using the fingers (touchscreen) or the mouse
(pc). The green scan-frame will move
accordingly remaining always visible on top.
Press the button on the sliding bar on the
left to confirm the selection.
The preview will be displayed in the sub-scans
panel below.
Repeat the steps described in this section to
select other scan frames.
Each scan-frame is serially numbered, use the
LEFT ( ) and RIGHT ( ) buttons
to scroll through the selection.
Press the Delete button to erase the selected
scan-frame.
6. Scan mode
Select the scan resolution from the drop-down
list (par. 1.4).
The resolution will be applied to the selected
scan-frame.
7. Photos
Enable/Disable the photos capture using the
X300 internal cameras.
When the control is enabled, the X300
automatically takes the pictures after scanning.
The two synchronized onboard cameras allow
to cover the vertical angle of the scan.
The number of the pictures varies according to
the the width of the horizontal angle.
8. Start
Press the Start button to start scanning,
according to the given settings.
The process will consider each scan-frame in
sequence.