LUCAS
®
3 Chest Compression System – Service Manual
3328798-002, ©2017 Physio-Control, Inc.
Page 59 of 91
NOTE: Do not connect the battery to hood cover unless the Hood Holder Bracket Service Tool is installed. The weight
of the battery in a hood cover can damage the wires or connections.
Use caution when examining or operating the device without its covers.
1. Disassembling
• Remove all four screws for the hood with Phillips Screwdriver PH1. Set aside screws for reuse during
assembly.
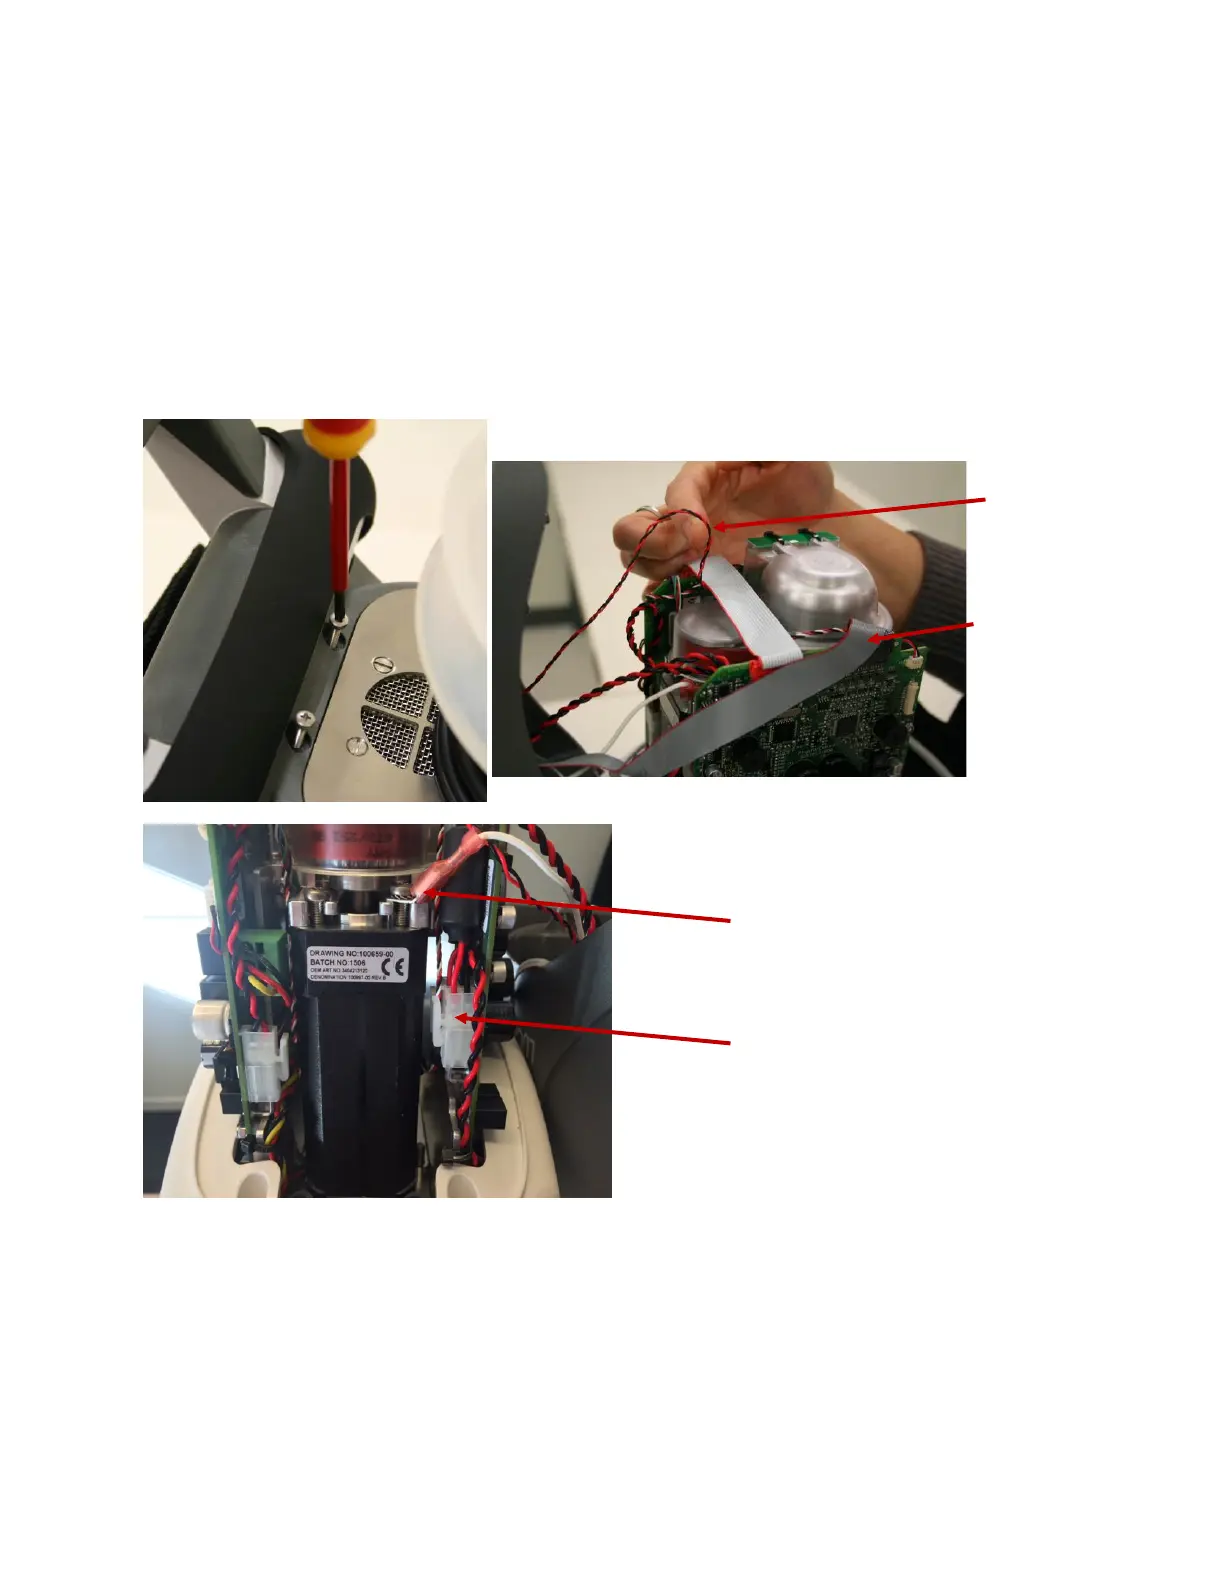
• Carefully lift off the Hood and disconnect the four cables between the Hood and the Protective PCB
1. Speaker Cable (connected to Control PCB)
2. Hood Communication Cable (connected to Protective PCB)
3. Hood Ground Cable (connected to Electric Motor Terminal)
4. Hood Power Cable (connected to Protective PCB)
2. Reassembling
• Connect the four cables according to Disassembling. Make sure that the Hood Ground Cable connector
is mounted in front of the ferrite of the Hood Power Cable to keep the ferrite from moving (see picture
above).
• Put the Communication Cable in front of the Protective PCB shown in the picture below, and carefully put
the hood back in place, make sure not to damage any cables.
Communication
Cable
Cable
 Loading...


