EasyManuals Logo

Stryker LUCAS 3 Service Manual

Stryker LUCAS 3
91 pages
To Next Page IconTo Next Page
To Previous Page IconTo Previous Page
Page #62 background imageLoading...
Page #62 background image
LUCAS
®
3 Chest Compression System Service Manual
3328798-002, ©2017 Physio-Control, Inc.
Page 62 of 91
Place the Bellows ring above the retaining ring.
Thread the edge of the Bellows over the Bellows ring.
Put back the Suction Cup.
3. Test
Perform a Function Check according to Function Check
.
How to Replace the Compression Module
1. Disassembling
Take off the Suction Cup and remove the Bellows according to Disassembling instruction in
How to
Replace the Bellows.
Remove the Hood according to instructions in How to Replace the Hood.
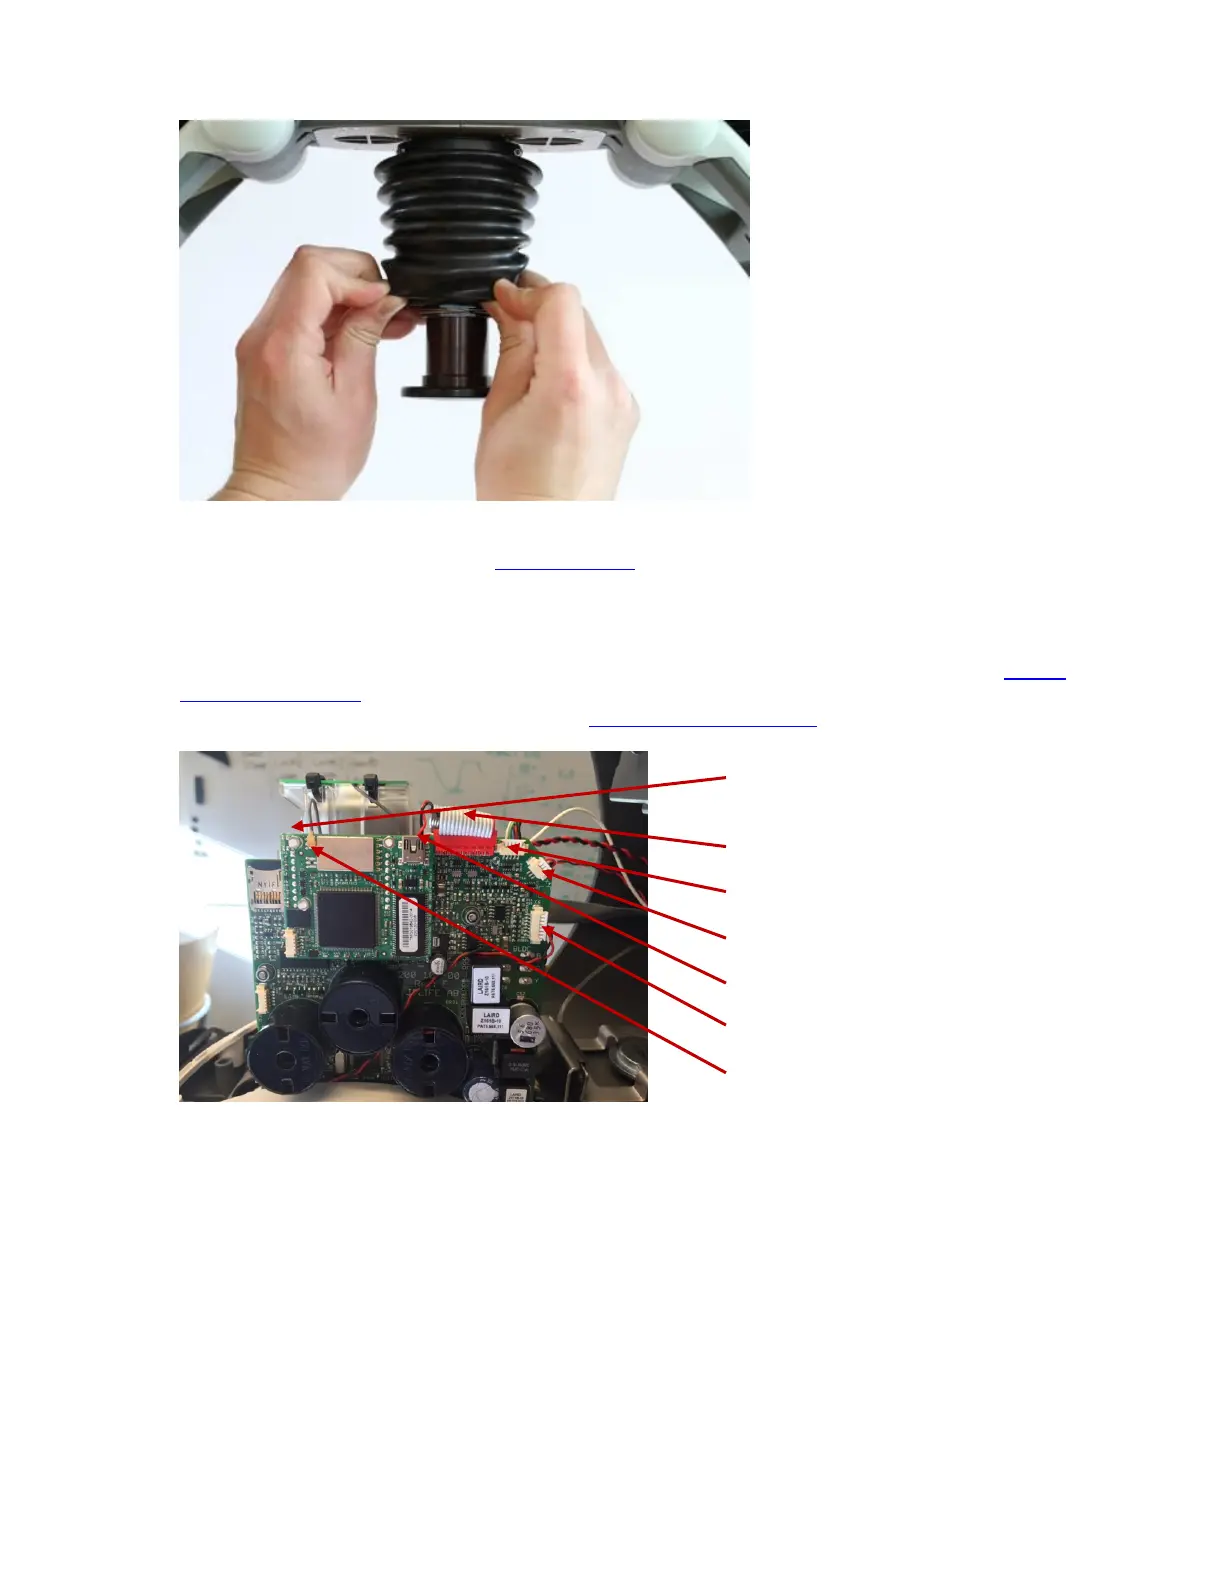
Disconnect the following cables according to pictures below
1. Protective Linear sensor Cable (on the
back side of Protective PCB)
2. Communication Cable
3. Motor Rotation Sensor Cable
4. Control Linear sensor Cable
5. Speaker Cable
6. Fan Cable
7. Antenna Cable

Table of Contents

Other manuals for Stryker LUCAS 3

Questions and Answers:

Question and Answer IconNeed help?

Do you have a question about the Stryker LUCAS 3 and is the answer not in the manual?

Stryker LUCAS 3 Specifications

General IconGeneral
Device TypeChest Compression System
Power SourceRechargeable Lithium-ion Battery
Compression Depth5.3 ± 0.2 cm (2.1 ± 0.1 in)
Battery Life45 minutes of operation
Battery Charge TimeApproximately 4 hours
Operating ModesPause
Patient SizeFits most adult patients
Operating Temperature0°C to 40°C (32°F to 104°F)
Storage Temperature–20 to +60 °C (–4 to 140 °F)
IP RatingIP43
Compression Rate100 compressions per minute

Related product manuals