EasyManuals Logo

Stryker LUCAS 3 Service Manual

Stryker LUCAS 3
91 pages
To Next Page IconTo Next Page
To Previous Page IconTo Previous Page
Page #84 background imageLoading...
Page #84 background image
LUCAS
®
3 Chest Compression System Service Manual
3328798-002, ©2017 Physio-Control, Inc.
Page 84 of 91
Replacing the Power Inlet
1. Disassembling
Follow the instructions in Section Replace the Compression Module.
Follow the instructions in Section Replace the Controller PCB
Follow the instructions in Section Replace the Protective PCB
Warning: Always use ESD protection when handling PCB’s!
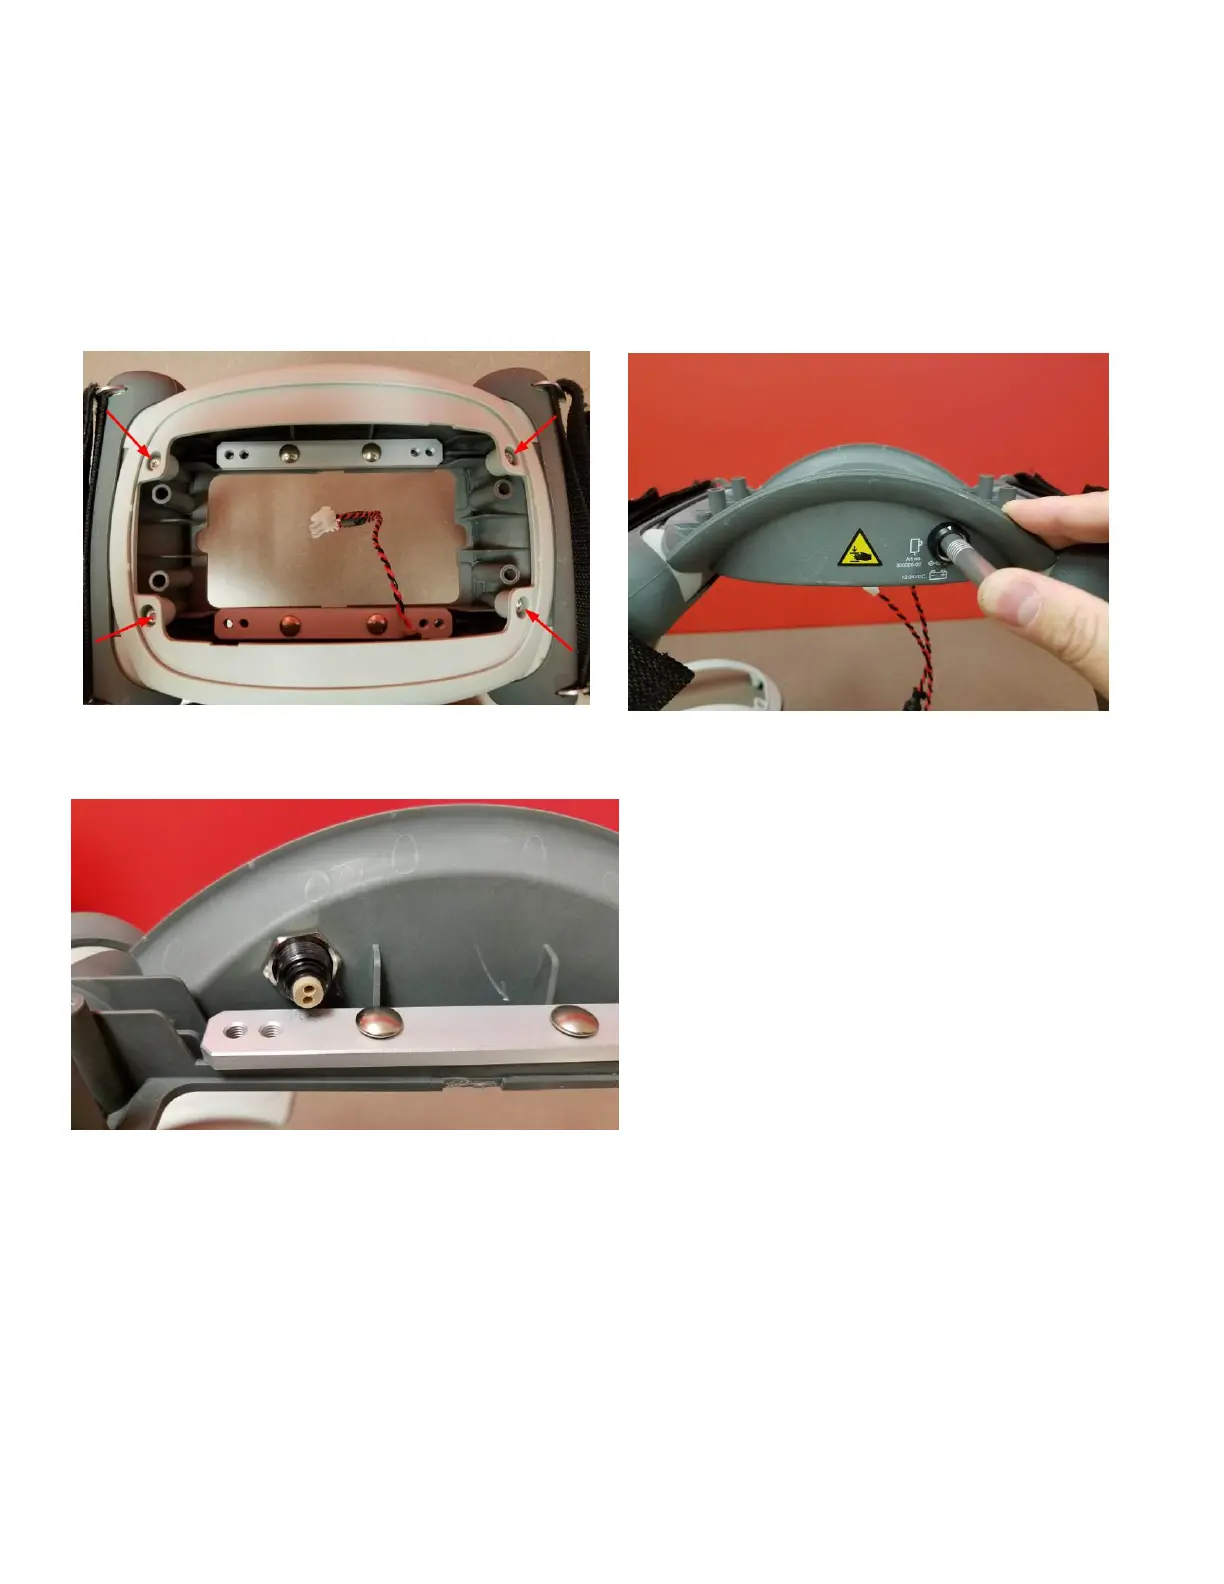
Remove the four Torx 20 screws to remove the Main Body Lid.
Use the extraction tool to remove the wires from the Power Inlet.
With the wires removed you can now remove the nut and Power Inlet.

Table of Contents

Other manuals for Stryker LUCAS 3

Questions and Answers:

Question and Answer IconNeed help?

Do you have a question about the Stryker LUCAS 3 and is the answer not in the manual?

Stryker LUCAS 3 Specifications

General IconGeneral
Device TypeChest Compression System
Power SourceRechargeable Lithium-ion Battery
Compression Depth5.3 ± 0.2 cm (2.1 ± 0.1 in)
Battery Life45 minutes of operation
Battery Charge TimeApproximately 4 hours
Operating ModesPause
Patient SizeFits most adult patients
Operating Temperature0°C to 40°C (32°F to 104°F)
Storage Temperature–20 to +60 °C (–4 to 140 °F)
IP RatingIP43
Compression Rate100 compressions per minute

Related product manuals