EasyManuals Logo

Stryker LUCAS 3 Service Manual

Stryker LUCAS 3
91 pages
To Next Page IconTo Next Page
To Previous Page IconTo Previous Page
Page #66 background imageLoading...
Page #66 background image
LUCAS
®
3 Chest Compression System Service Manual
3328798-002, ©2017 Physio-Control, Inc.
Page 66 of 91
Perform a Function Check according to Function Check
.
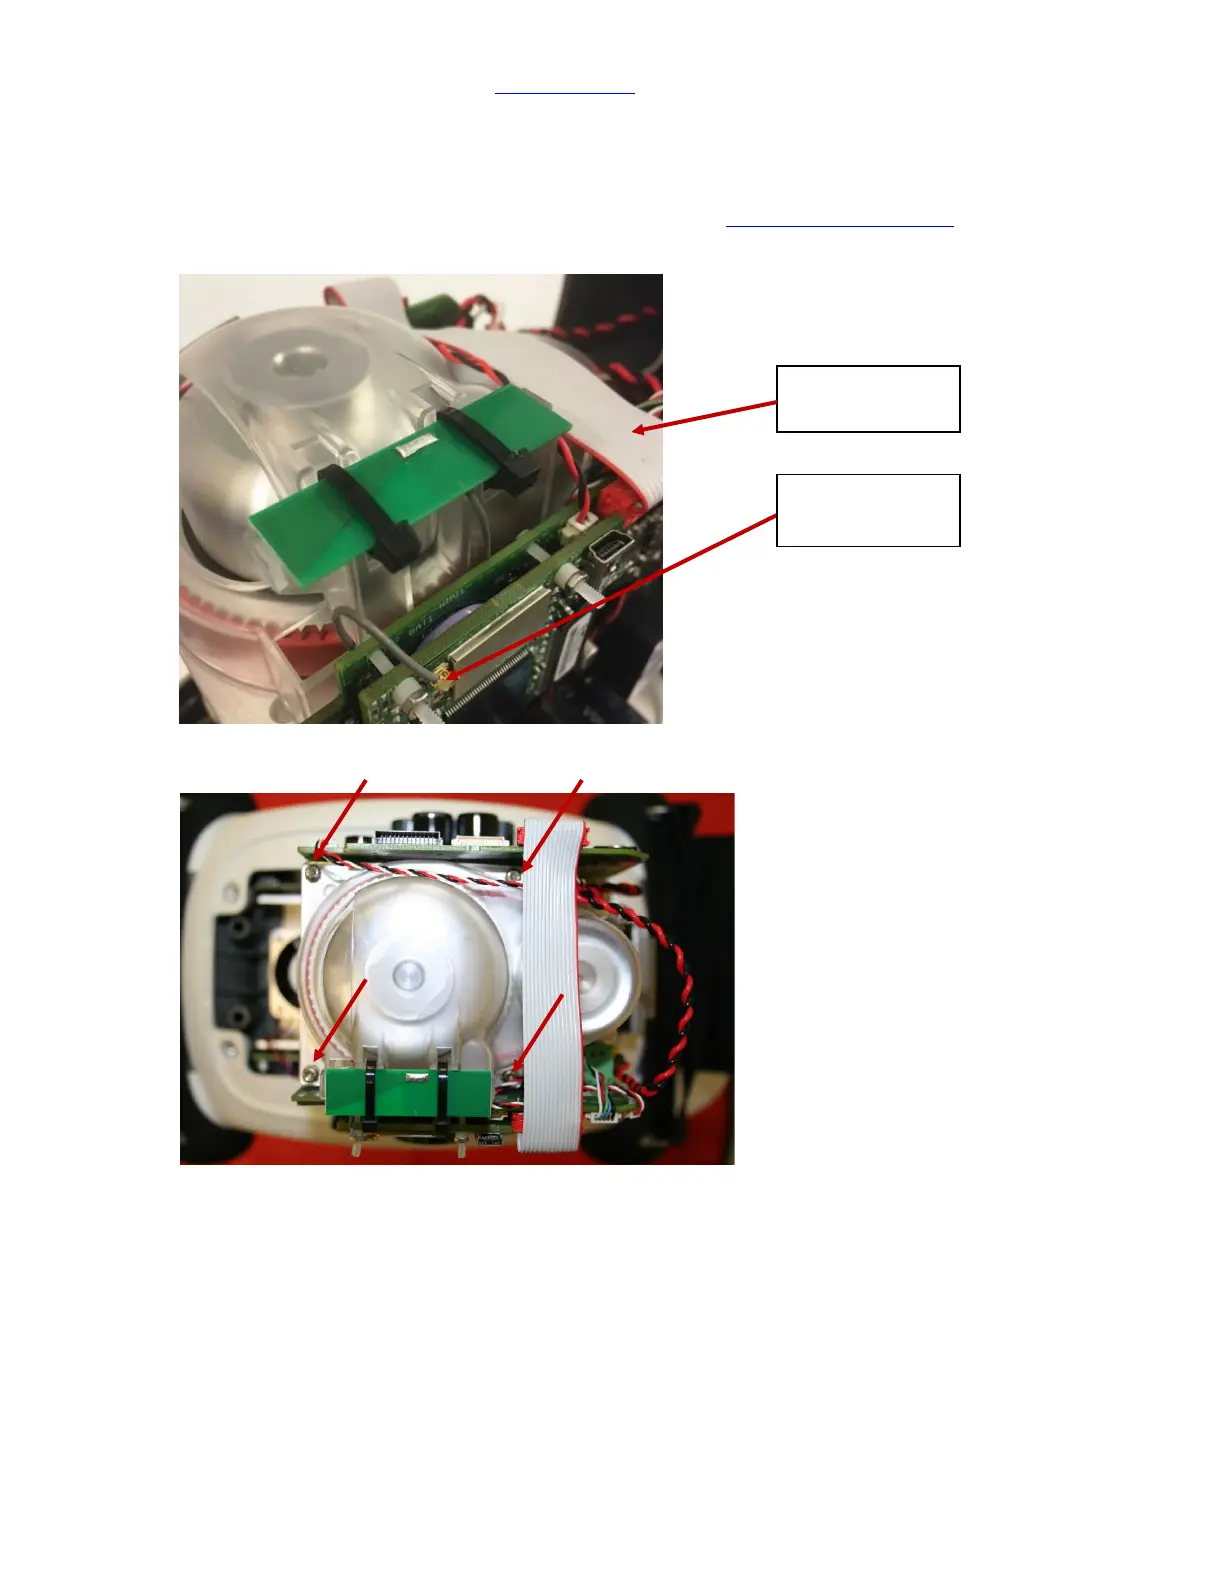
How to Replace the Drive Belt
1. Disassembling
Remove the Hood according to Disassembling instruction in How to Replace the Hood
Disconnect the Antenna Cable Connector and the Communication Cable from the Communication Board
as shown in picture below
Remove the Belt Cover by removing the four screws with a Torx 10 (T10) Screwdriver; be careful not to
lose the washers.
Cut the Belt with cutting plier and remove it.
2. Reassembling
Thread the new Belt over the small Belt Wheel first.
Continue to Thread it over the Large Belt Wheel and turn the wheel at the same time to get the belt in
place.
Antenna Cable
Connector
Communication
Cable

Table of Contents

Other manuals for Stryker LUCAS 3

Questions and Answers:

Question and Answer IconNeed help?

Do you have a question about the Stryker LUCAS 3 and is the answer not in the manual?

Stryker LUCAS 3 Specifications

General IconGeneral
Device TypeChest Compression System
Power SourceRechargeable Lithium-ion Battery
Compression Depth5.3 ± 0.2 cm (2.1 ± 0.1 in)
Battery Life45 minutes of operation
Battery Charge TimeApproximately 4 hours
Operating ModesPause
Patient SizeFits most adult patients
Operating Temperature0°C to 40°C (32°F to 104°F)
Storage Temperature–20 to +60 °C (–4 to 140 °F)
IP RatingIP43
Compression Rate100 compressions per minute

Related product manuals