LUCAS
®
3 Chest Compression System – Service Manual
3328798-002, ©2017 Physio-Control, Inc.
Page 65 of 91
•
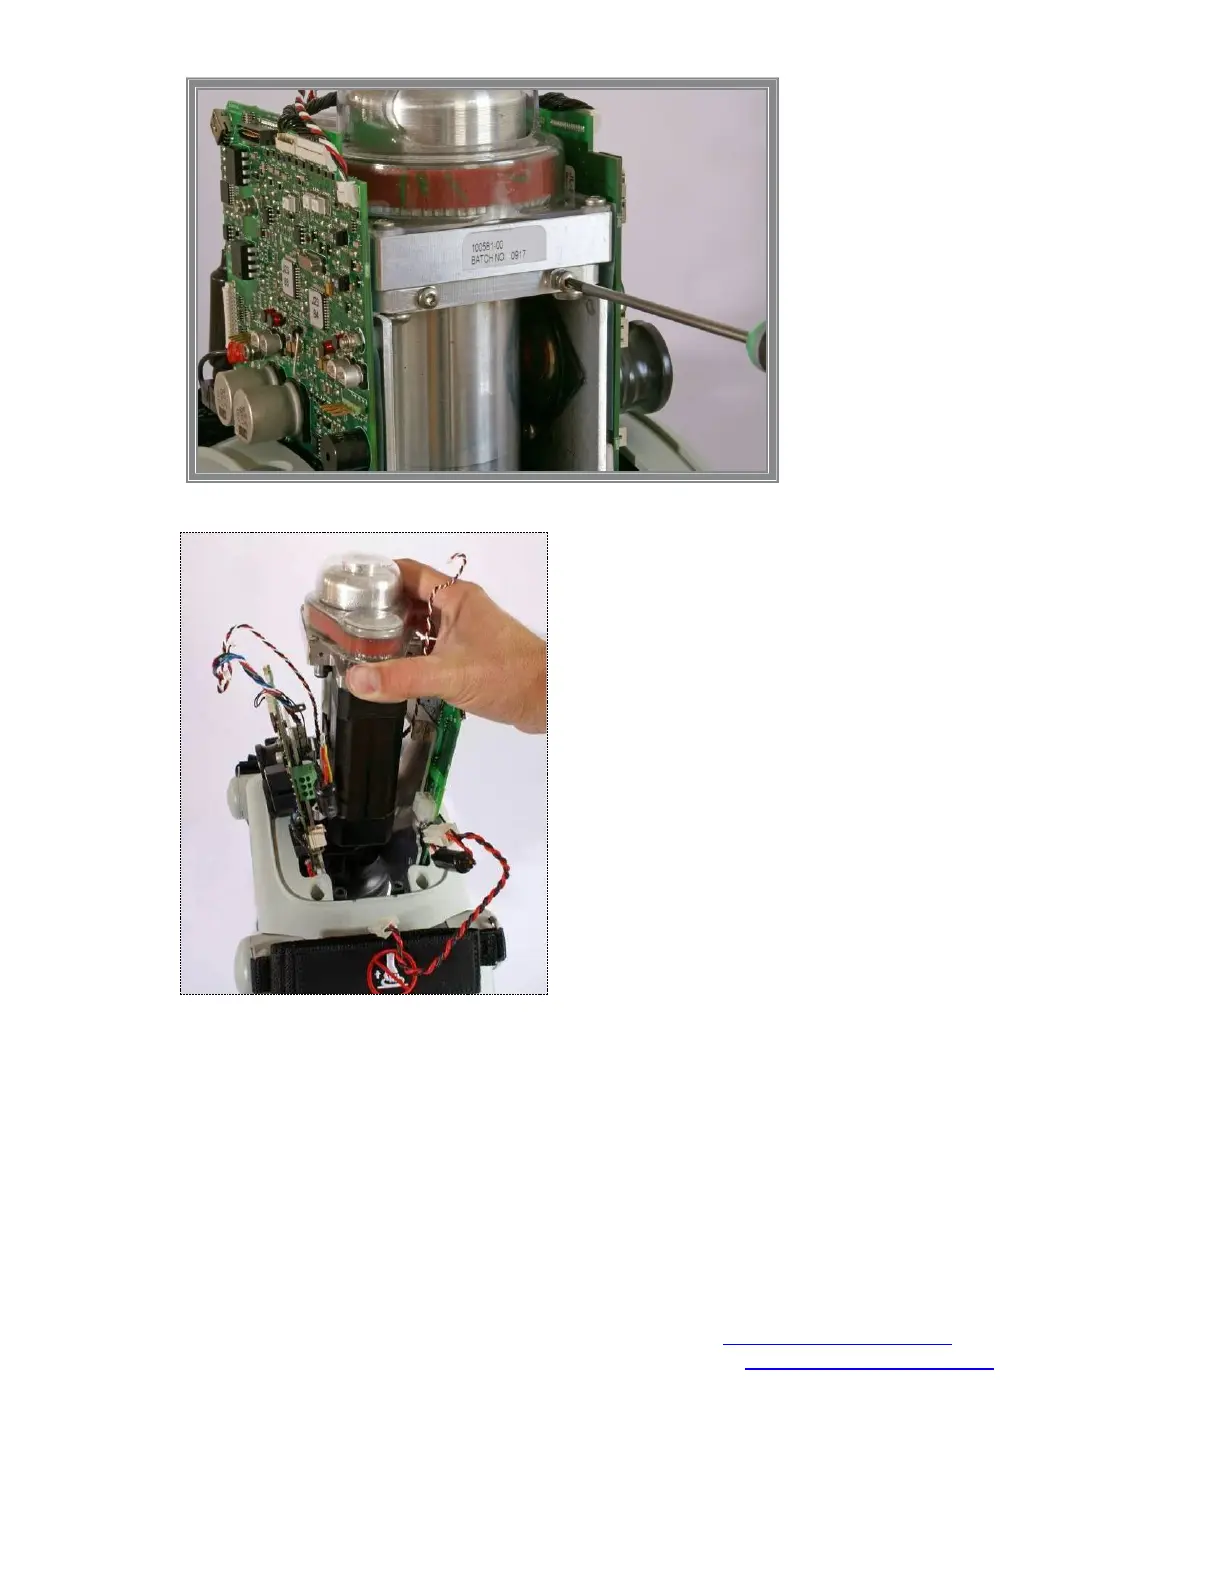
Carefully spread the PCB boards and lift out the Copression Module, make sure that no cables get stuck or
harmed especially the Linear sensor Cables.
2. Reassembling
• Carefully lower the Compression Module down between the PCB’s.
• Position the PCB boards and fasten the Compression Module in the PCB brackets, use thread lock fluid
and tighten to 9.0 in-lbs / 1.0 Nm with a Torque Screwdriver Torx 10 (T10).
• Put back the Fan Bracket, use thread lock fluid and tighten to 35 in-lbs / 4.0 Nm with a Torque
Screwdriver Torx 25 (T25).
• Fasten the Compression Module with four screws, use thread lock fluid and tighten to 35 in- lbs / 4.0 Nm
with a Torque Screwdriver Torx 25 (T25).
• Unscrew the two screws on the bracket that are loose, apply thread lock fluid and tighten to 35 in-lbs / 4.0
Nm with a Torque Screwdriver Torx 25 (T25).
• Re-connect all cables according to picture in Disassembling.
• Replace removed Cable Ties (if applicable).
• Put back the Hood according to Reassembling instruction in How to Replace the Hood
.
• Put back the Bellows according to Reassembling instruction in How to Replace the Bellows.
• Put back the Suction Cup.
3. Test
 Loading...


