EasyManuals Logo

Stryker LUCAS 3 Service Manual

Stryker LUCAS 3
91 pages
To Next Page IconTo Next Page
To Previous Page IconTo Previous Page
Page #19 background imageLoading...
Page #19 background image
LUCAS
®
3 Chest Compression System Service Manual
3328798-002, ©2017 Physio-Control, Inc.
Page 19 of 91
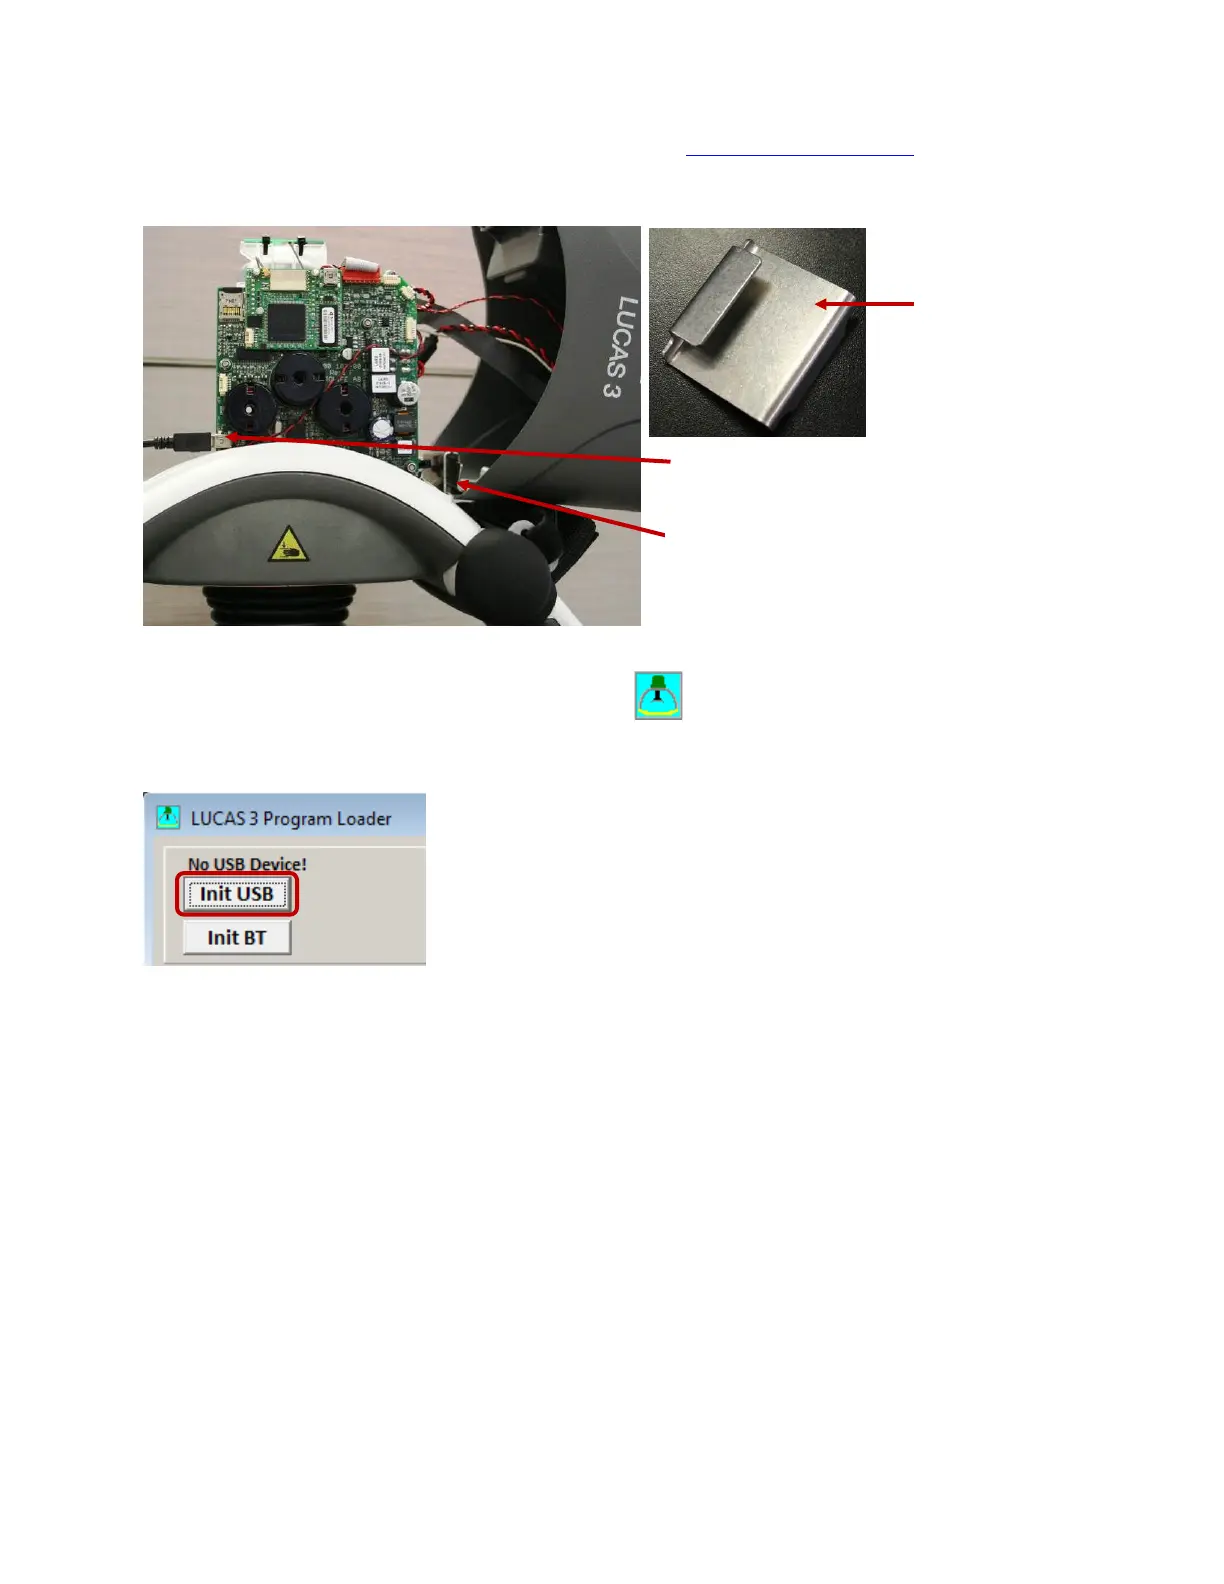
Connect the device via USB cable
1. Remove the hood according to Disassembling instruction in How to Replace the Hood, and use the Hood
Holder bracket to hold the hood on the side and the battery should be installed.
2. Connect an USB cable between the computer and the device, the connector is situated at the lower left side of
the Control PCB.
3. Start the device
4. Start the software by executing LUCAS3_V3_0.exe file,
.
(Note. Different software versions might occur)
5. Normally the software detects the device at start. If not, then Click Init USB.
6. When USB connection is established, the Program Loader screen will show CPUs information
Hood Holder Bracket
USB Port Location
Hood Holder Bracket Location

Table of Contents

Other manuals for Stryker LUCAS 3

Questions and Answers:

Question and Answer IconNeed help?

Do you have a question about the Stryker LUCAS 3 and is the answer not in the manual?

Stryker LUCAS 3 Specifications

General IconGeneral
Device TypeChest Compression System
Power SourceRechargeable Lithium-ion Battery
Compression Depth5.3 ± 0.2 cm (2.1 ± 0.1 in)
Battery Life45 minutes of operation
Battery Charge TimeApproximately 4 hours
Operating ModesPause
Patient SizeFits most adult patients
Operating Temperature0°C to 40°C (32°F to 104°F)
Storage Temperature–20 to +60 °C (–4 to 140 °F)
IP RatingIP43
Compression Rate100 compressions per minute

Related product manuals