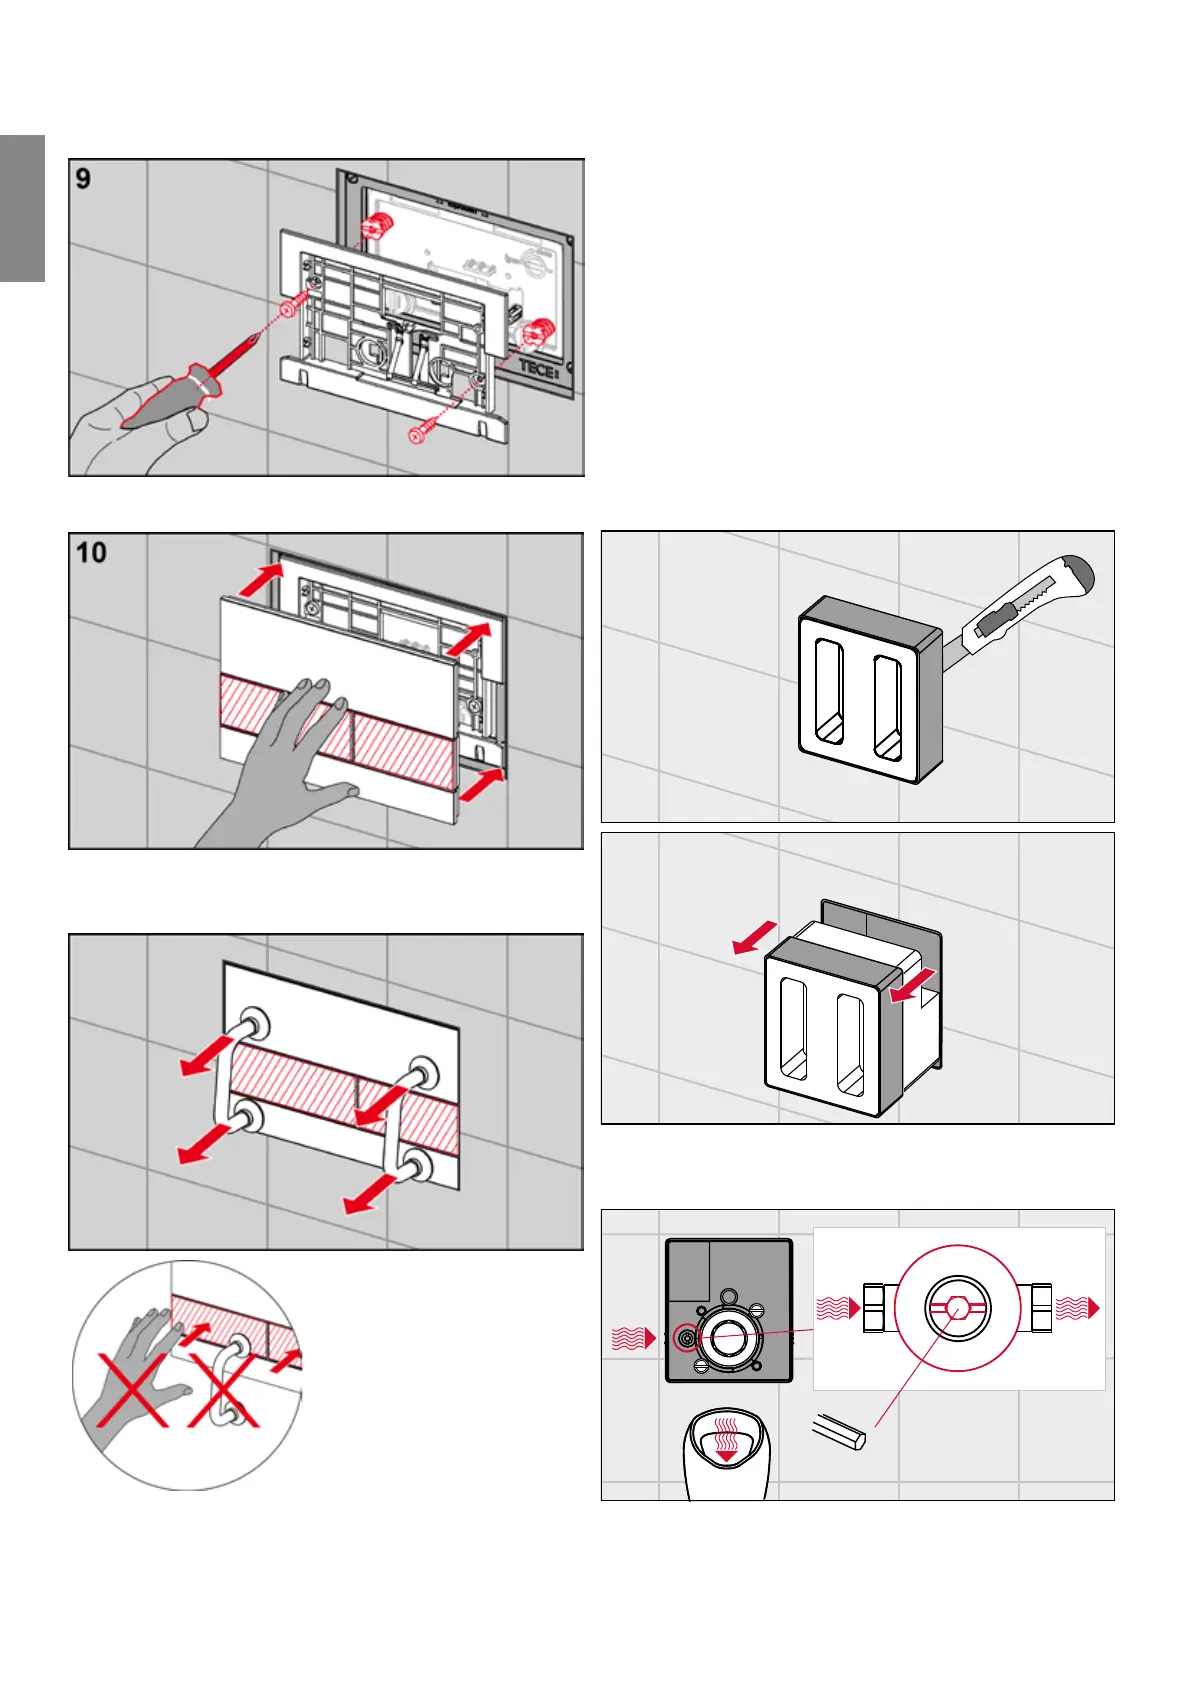
Screw the support frame onto the attachment rods.
Allow the TECEsquare flush plate cover to click into place
in the support frame.
The installed cover can be removed from the flush plate
using the bow-type handles included in the installation
frame's scope of supply.
Please note:
Position the suction cups on the glass surface only – not
on the buttons – of the cover to be removed. During
installation, only apply force to the glass surface, not to the
buttons.
Wall-mounted installation of the glass urinal
flush plate
The first seven steps of the procedure for installing the
glass urinal flush plate for the U urinalflusher are the
same for all TECE (wall-mounted) urinal flush plates.
1
2
Cut the bare-wall protection flush against the wall, and
remove it together with the polystyrene support.
3
SW 3
Suciently flush out the pipe.
Observe the following:
When performing the pressure test, the inlet flow control of
the flush valve must be set to free-flow.
TECE flush plates – TECEsquare
-
Flush plates