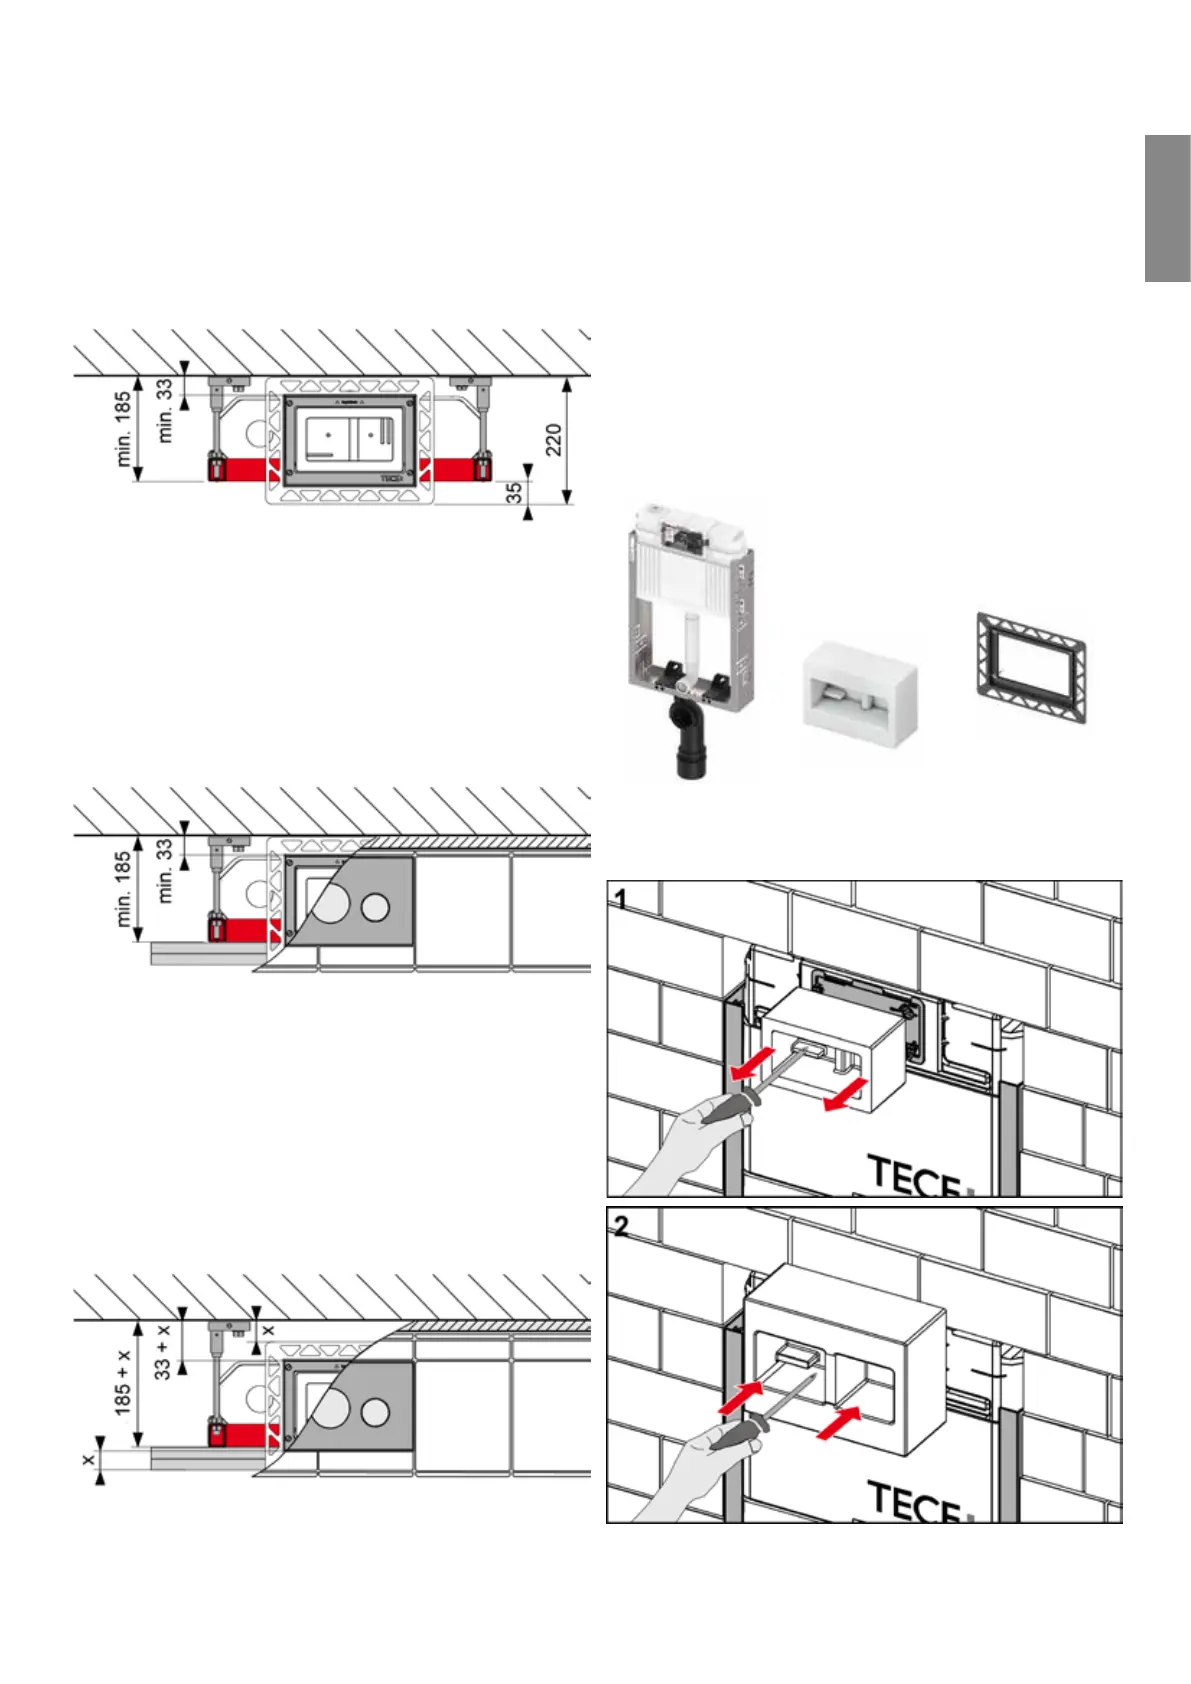
Installation from above
The flush-mounted installation frame can also be used for
top actuation. Installation is the same as installing the flush
plate from the front. The frame must be mounted in the
“reading direction” (= “TOP” lettering to the wall).
“Flush-mounted installation from above”– dimensions
However, thicker minimum panel facing is required due to
the dimensions of the installation frame:
A minimum panel facing of mm corresponds to a panel
facing with
- x mm or
- x . mm thick plaster board.
“Flush-mounted top actuation” installation – minimum wall structure
On a minimum wall structure, there is no space left
between the installed flush plate and the wall (see picture
above). However, for aesthetic reasons, an equal distance
in front of and behind the flush plate is preferred (see
picture below). This also applies to the installation of the
TECEsquare metal flush plate which has slightly larger
dimensions.
“Flush-mounted installation from above” – wall structure (suggestion)
Brick-wall – toilet flush plate
In contrast to the dry-wall, for the brick-wall, an extended
bare-wall protection is required in addition to the TECEbox
brick-wall mounted cistern.
However, TECE cisterns of all installation heights can also
be used in brick-walls.
Components required:
TECEbox module Brick-wall bare-wall
protection
Installation frame for
toilet
Installing the toilet flush plate in a brick-wall
Remove the standard bare-wall protection and mount the
larger brick-wall bare-wall protection for flush-mounted
installations (order no. ).
-
Flush plates