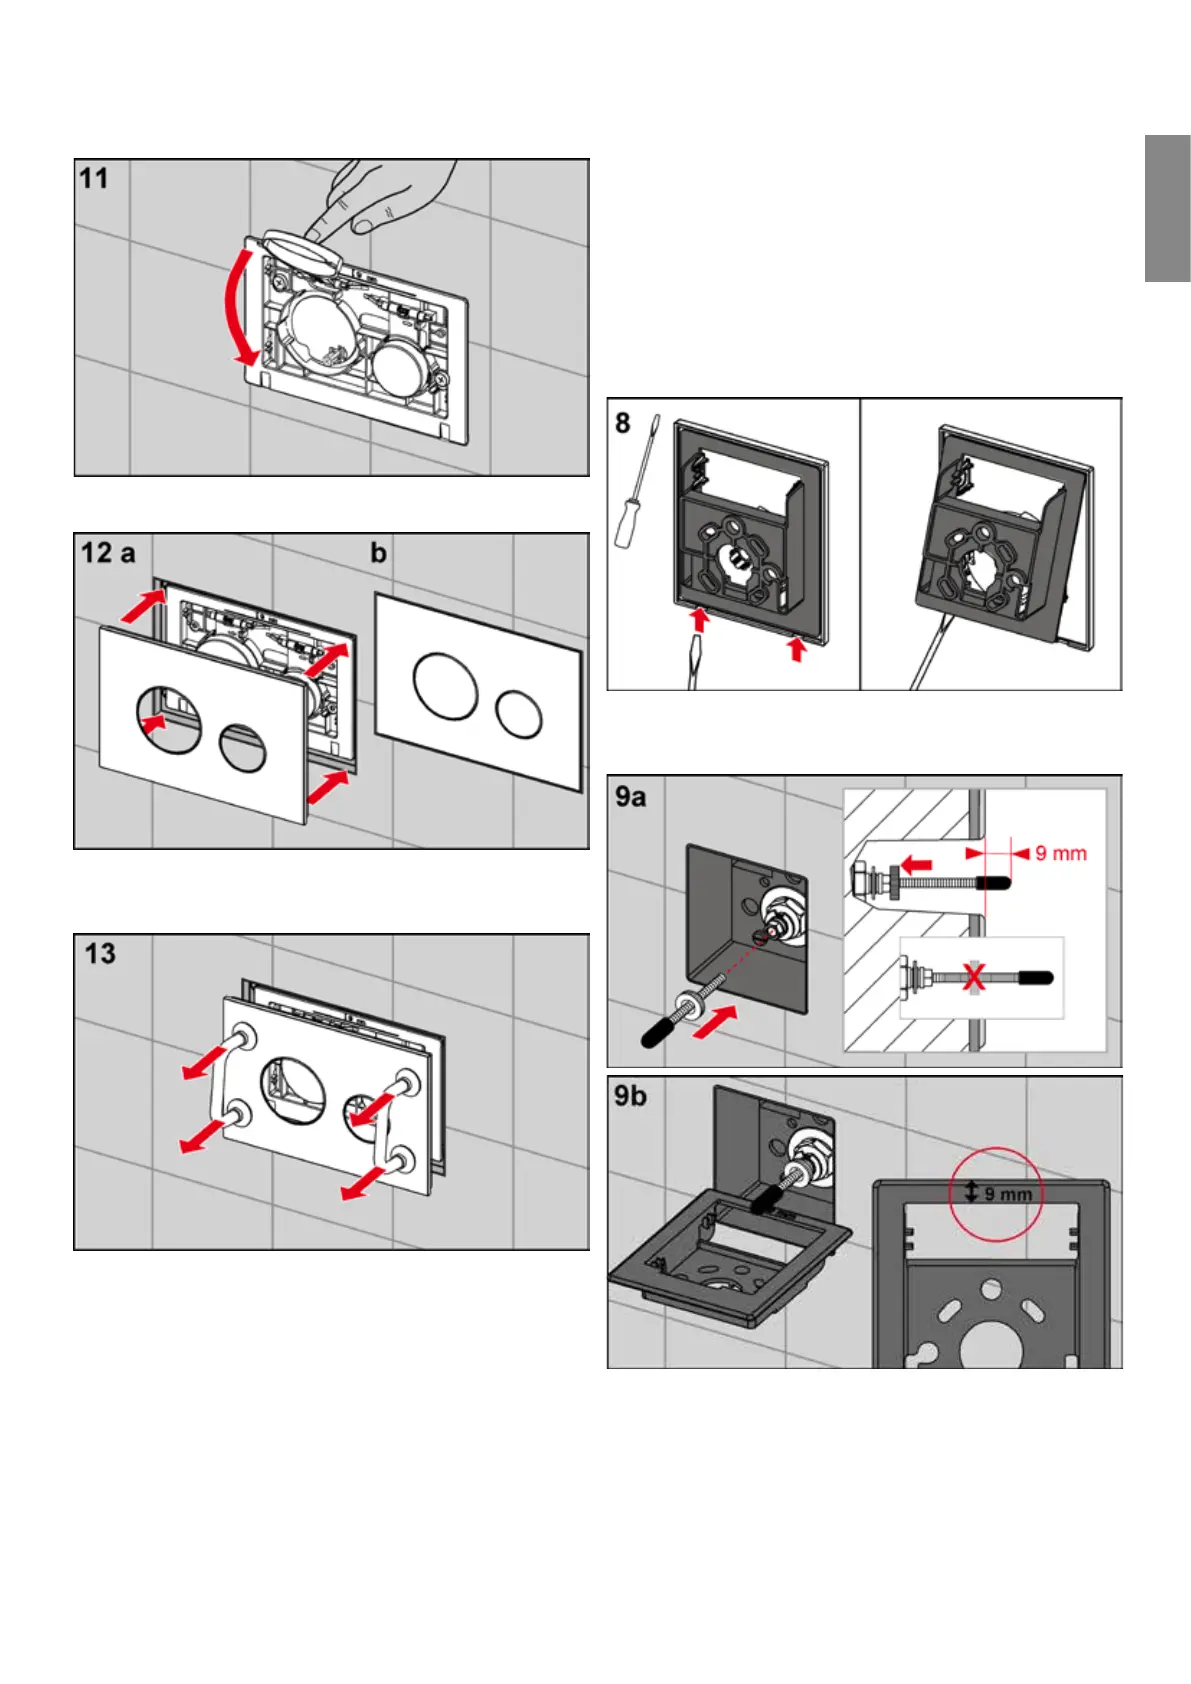
Fold down and lock both buttons.
Allow the TECEloop flush plate cover to click into place in
the support frame.
The installed cover can be removed from the flush plate
using the bow-type handles included in the installation
frame's scope of supply. Only position the suction cups on
the cover to be removed.
Wall-mounted installation of the plastic urinal
flush plate
The first seven steps of the procedure for installing the
urinal flush plate for the U urinalflusher are the same for
all (wall-mounted) TECE flush plates – see “TECEsquare –
Wall-mounted installation of the glass urinal flush plate” for
more information.
Loosen the support frame from the cover by inserting a
screwdriver into the notches on the underside.
Screw in the actuating rods as described above (for the
wall-mounted TECEloop, distance to wall surface = mm)
and screw on the counter nut to prevent them from turn-
ing. The setting length for the actuating rods is indicated
on the top of the support frame. This enables you to set
the rods quickly and easily.
-
Flush plates