Flush-mounted installation of the urinal flush
plate
The first eight steps in the procedure for installing the
urinal flush plate for the U urinalflusher are the same for
all (flush-mounted) TECE urinal flush plates.
9
8 mm
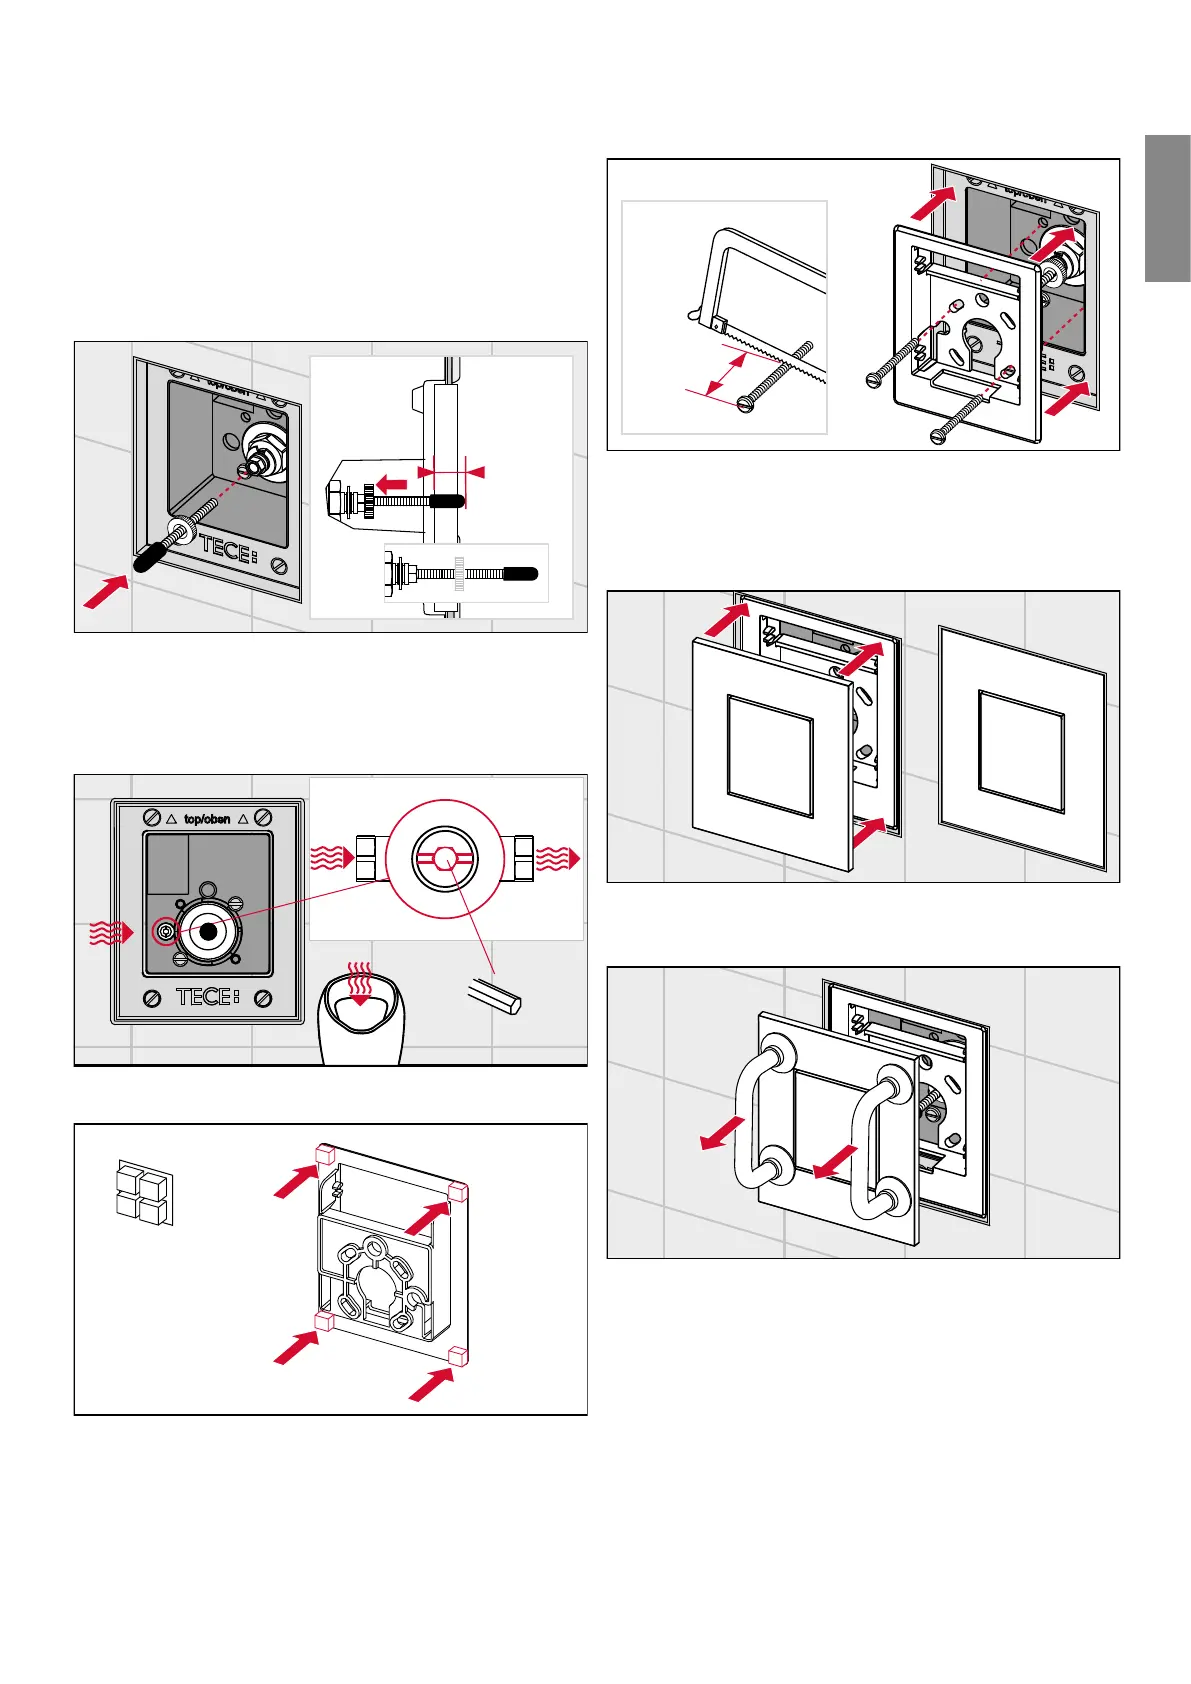
Screw in the actuating rods as described above (for flush-
mounted TECEnow, distance to front edge of inside of
installation frame = mm), and screw on the counter nut to
prevent them from turning.
10
SW 3
Open the inlet flow control.
11
Stick the spacers onto the back of the TECEnow support
frame.
12 a
40 mm
b
Screw the support frame onto the urinal flush valve hous-
ing. If necessary, shorten the two screws so that they do
not knock against the mounting cross beam (minimum
length on minimum wall structure = mm).
13 a
Allow the cover of the TECEnow flush plate to click into
place in the support frame.
When mounting or dismounting the cover, do not press the
button. The installed cover can be removed from the flush
plate using the bow-type handles included in the instal-
lation frame's scope of supply. Only position the suction
cups on the cover to be removed.
-
Flush plates