4
SW 3
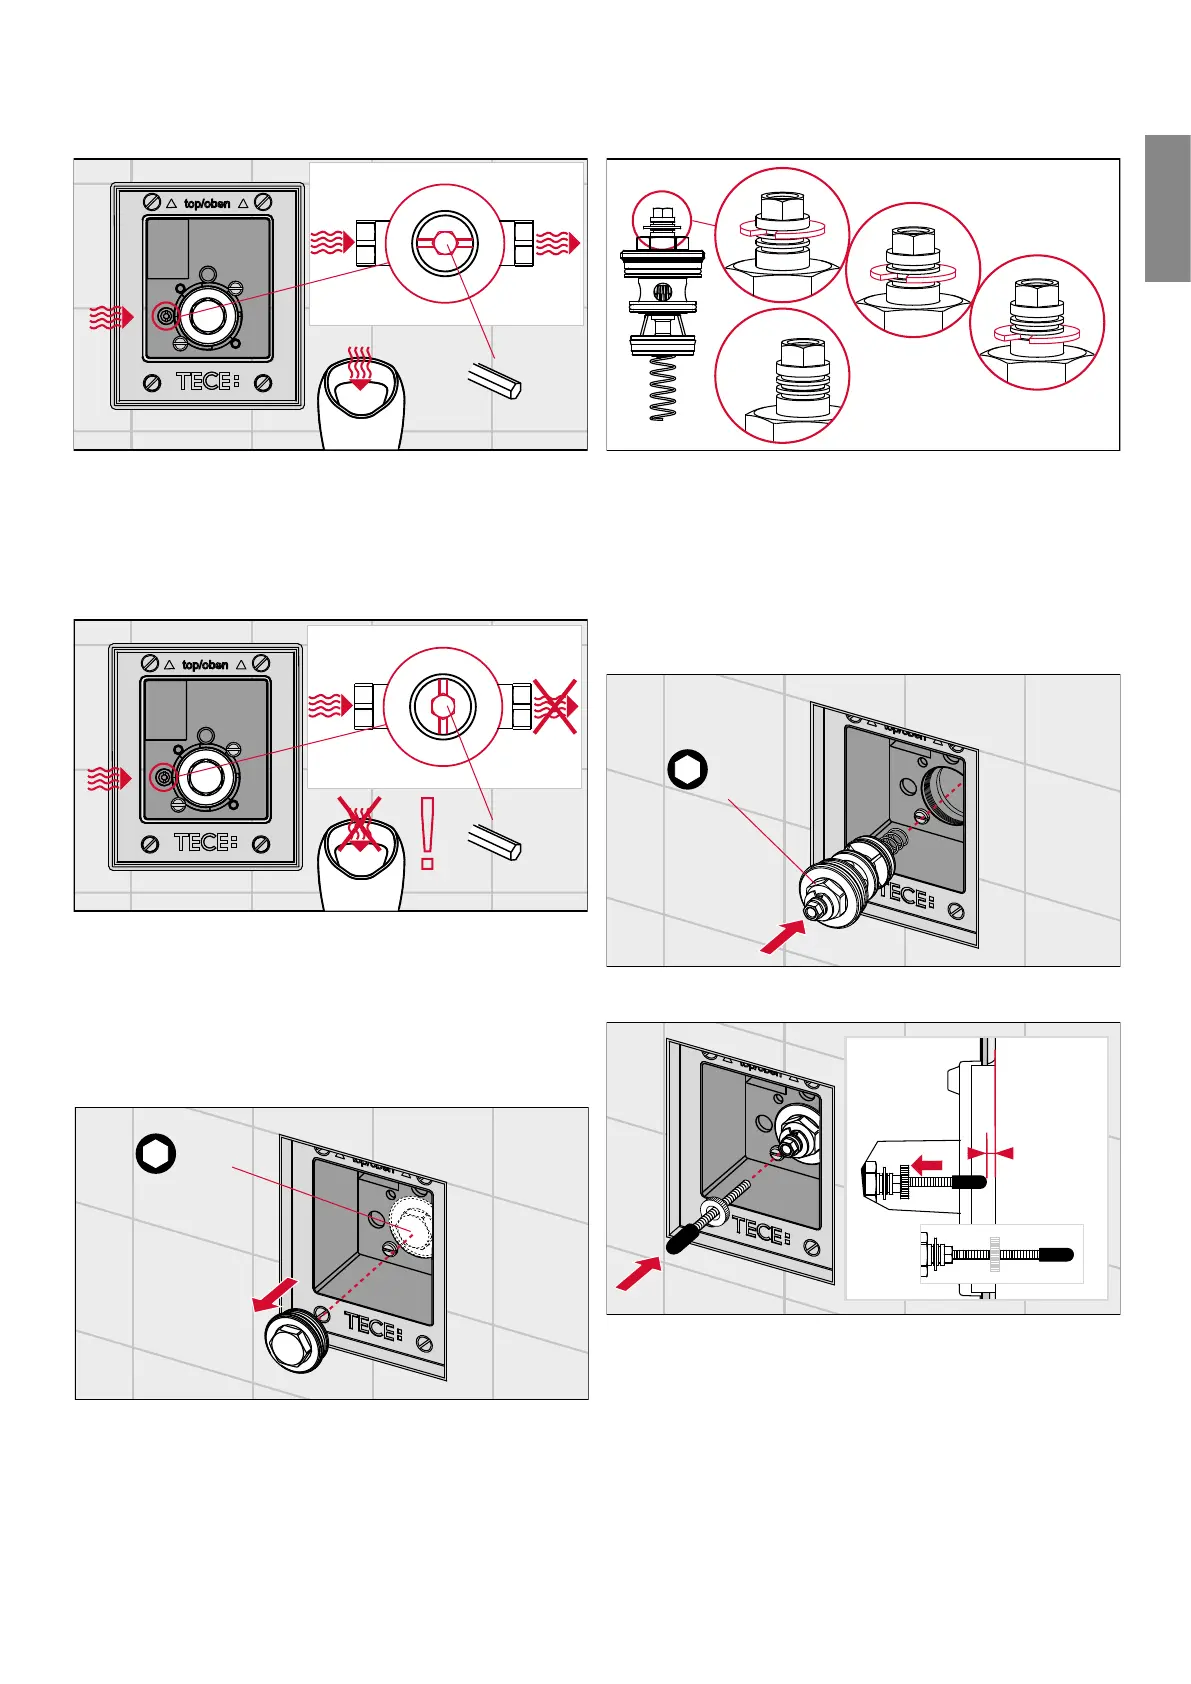
Flush out the pipe.
Observe the following:
When performing the pressure test, the inlet flow control of
the flush valve must be set to free-flow.
5
SW 3
!
Before mounting the cartridge, ensure that the inlet flow
control is closed so that no water can leak out during
assembly. Close the shut-o using an Allen key. In the
free-flow setting (fig. ), the shut-o slot is parallel with
the housing, and in the closed setting (fig. ), it is at right
angles to the housing.
SW 19
Remove the bare-wall plug.
4l
2l
1l
If applicable, set the flush volume before mounting the
cartridge (factory setting = litres). To do this, remove the
retaining ring and insert it back into the corresponding slot:
the first slot corresponds to a flush volume of litre, the
second to litres, and the third slot to a flush volume of
litres. Without a retaining ring, the flush valve will flush a
volume of – litres.
8
SW 19
Screw in the mechanical cartridge.
9
3 mm
Screw in the actuating rods as described above (for flush-
mounted TECEsquare, distance to front edge of inside of
installation frame = mm), and screw on the counter nut to
prevent them from turning.
-
Flush plates