Operating Basics
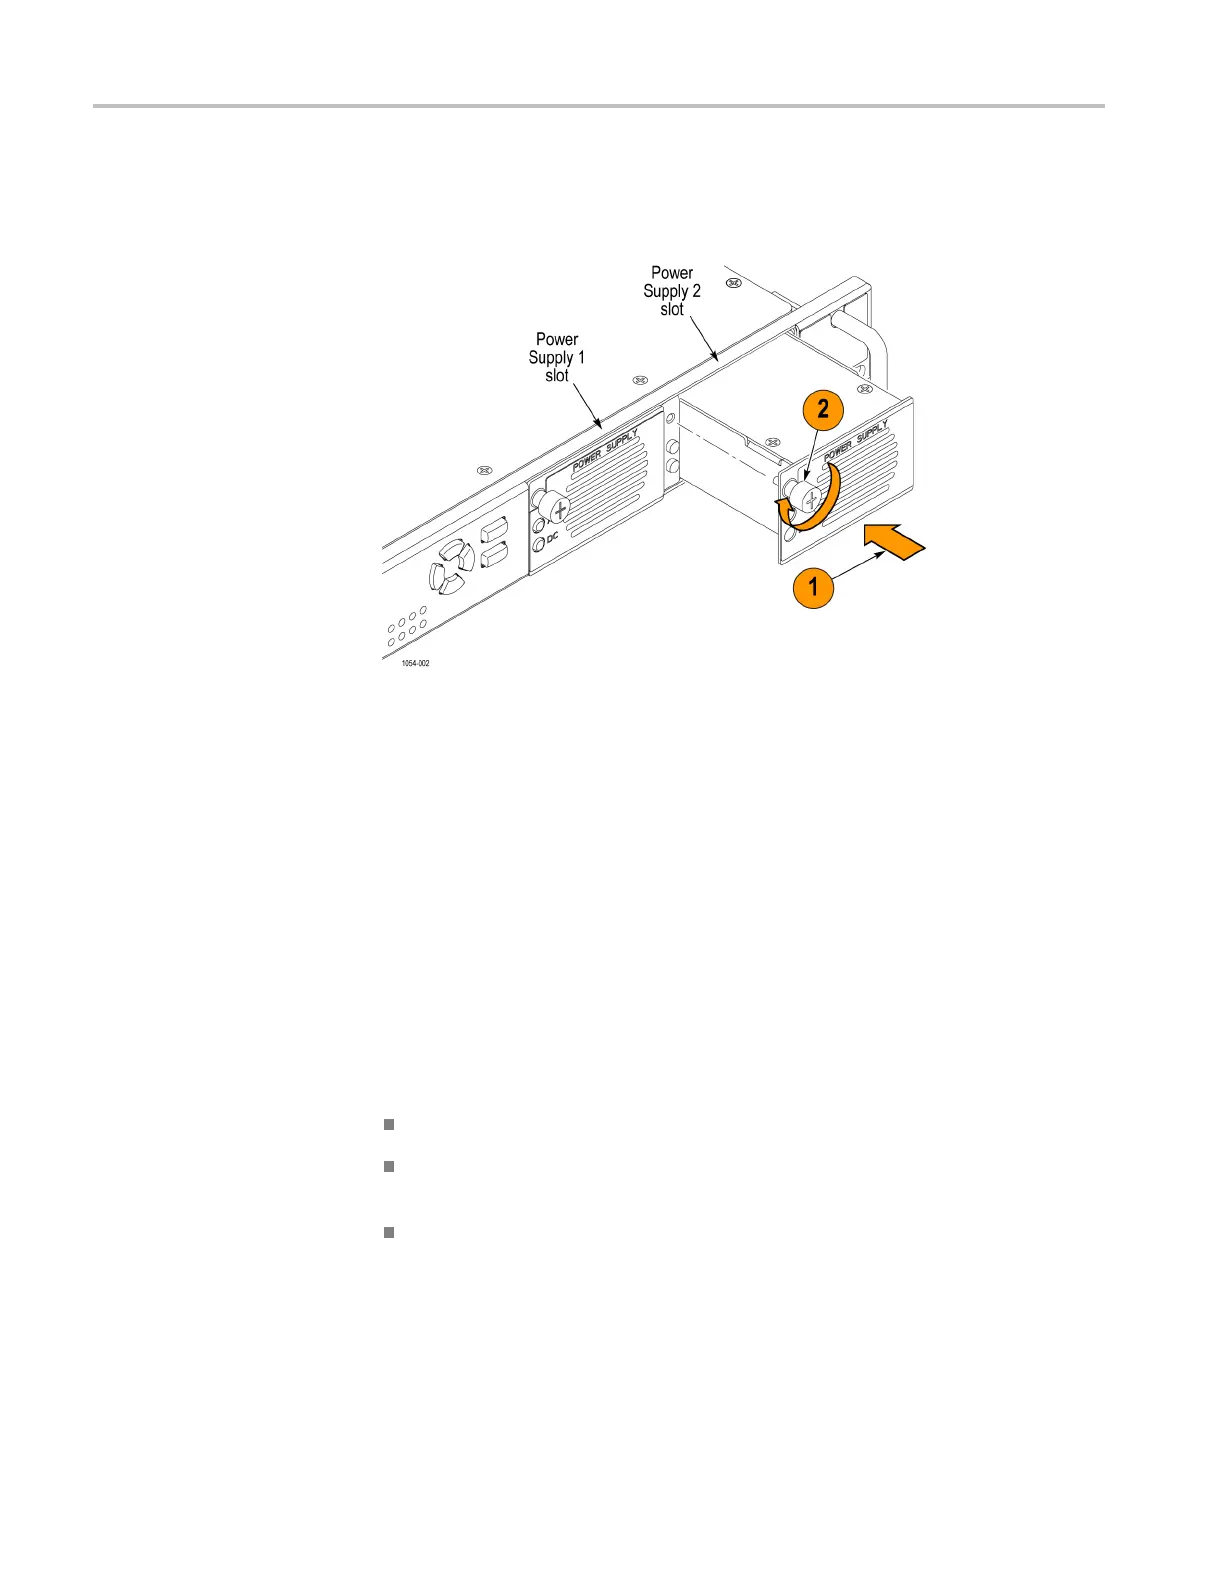
3. Insert the repl
acement s upply module into the instrument until it latches into
place, and then turn the retaining screw clockwise to secure the module in
the chassis.
Figure 9: Installing the backup or replacement Power Supply module
4. Check that the status LEDs of the Power Supply module you just installed.
Both LEDS should be bright green or dim green. (See page 25, Power Supply
module
LED states.)
5. If desired, change the preferred supply con fi guration. (See page 37,
Config
uring the preferred (active) supply (Option DPW only).)
How to upgrade the instrument firmware
Tekt
ronix releases software and firmware updates for products to add new features
and to fix product problems. You can find the latest firmware for your product at
the Tektronix Web site (www.tektronix.com/downloads).
Be aware of the following upgrade considerations:
We
recommend that the instrument b e out of service to perform the upgrade
You must p erf orm the firmware upgrade using the instrument front panel
(
you c annot use the Web Interface)
The instrument must be connected to the same Ethernet network as the
c
omputer you will use to perform the upgrade
40 ECO8000 Series Automatic Changeover Unit User Manual

 Loading...