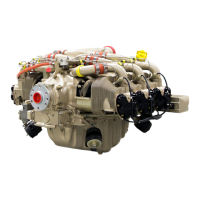
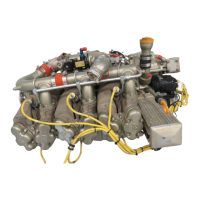
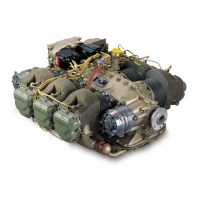
72-1 0-15
CRANKCASE
(See
Figure
72-10-15).
A.
If not already accomplished, remove oil gauge rod and o-ring
(1,
2). Remove attaching
hardware (3, 4, 5), clamp
(6), oil gauge housing (9), and bracket (7).
Remove attaching
hardware (10, 11,
12), and oil cooler (13).
Remove and discard gasket (14). Loosen and
remove plug (16) and oil temperature control valve (17). Discard gasket (15).
B.
Rotate engine stand to place 2-4-6 (left) side of crankcase downward. Place a suitable
support of proper length (wood or pipe using a soft shield to prevent damage to crankcase)
under
2-4-6 (left) side of crankcase to help support during assembly.
C.
On current model engines, remove attaching hardware (61, 62,
63),
1-3-5 side engine
mounts
(64,
65),
attaching hardware (95 thru 98) and turbocharger mounting bracket (93) as
applicable. Remove and discard o-rings
(75).
On older model TS10, LTSIO-360-E,F engines,
remove attaching hardware (61, 62,
63),
1-3-5 side engine mount spacers (92) and turbocharger
mounting bracket (94) as applicable. Remove and discard o-rings (75).
O-rings (75) are used
on
both sides of spacers (92,93) and bracket (94) as applicabie.
D.
Remove attaching hardware (18 thru 23), bracket (24) or brackets (89,
go),
attaching
hardware (25 thru 29) and lifting eye (30). Remove attaching hardware (31 thru 42).
E.
Remove attaching parts
(43,
44)
from both ends of thru bolts (45) and from the right
crankcase side of thru bolts (46). Remove attaching hardware (47,
48,
49) from both ends of
thru bolts (50, 51). Remove attaching parts (53, 54, 55) from both ends of thru bolt (56).
Remove attaching hardware (57, 58) from both ends of thru bolts (59, 60). Very carefully,
using a brass or fibre drift, drive all thru bolts except thru bolt (59) downward and out of
2-
4-6 side of crankcase. Thru bolt (59) must be extracted from the 1-3-5 side of crankcase to
prevent damage to adapter (67). Catch each thru bolt as
it
leaves the case to prevent damage
to threads. Discard o-rings.
F.
Stand numbers (1,
3,
and 5) connecting rods upright and lift
off
the right 1-3-5 crank-
case half.
Li
out
camshaft assembly, fuel pump drive shaft and governor drive gear.
Remove crankshaft assembly with connecting rods, thrust washers and main bearings. Remove
left crankcase from stand.
G.
Remove attaching hardware (47,
48,
49) and remove engine mounts
(66,
67). Remove and
discard o-rings (75, 74). On older model TSIO,
LTSIO-360-E,F engines, remove spacers (91,
92) and discard o-rings (74, 75) used on both sides of spacers.
 Loading...