4-2
Calibration and Circuit Setup
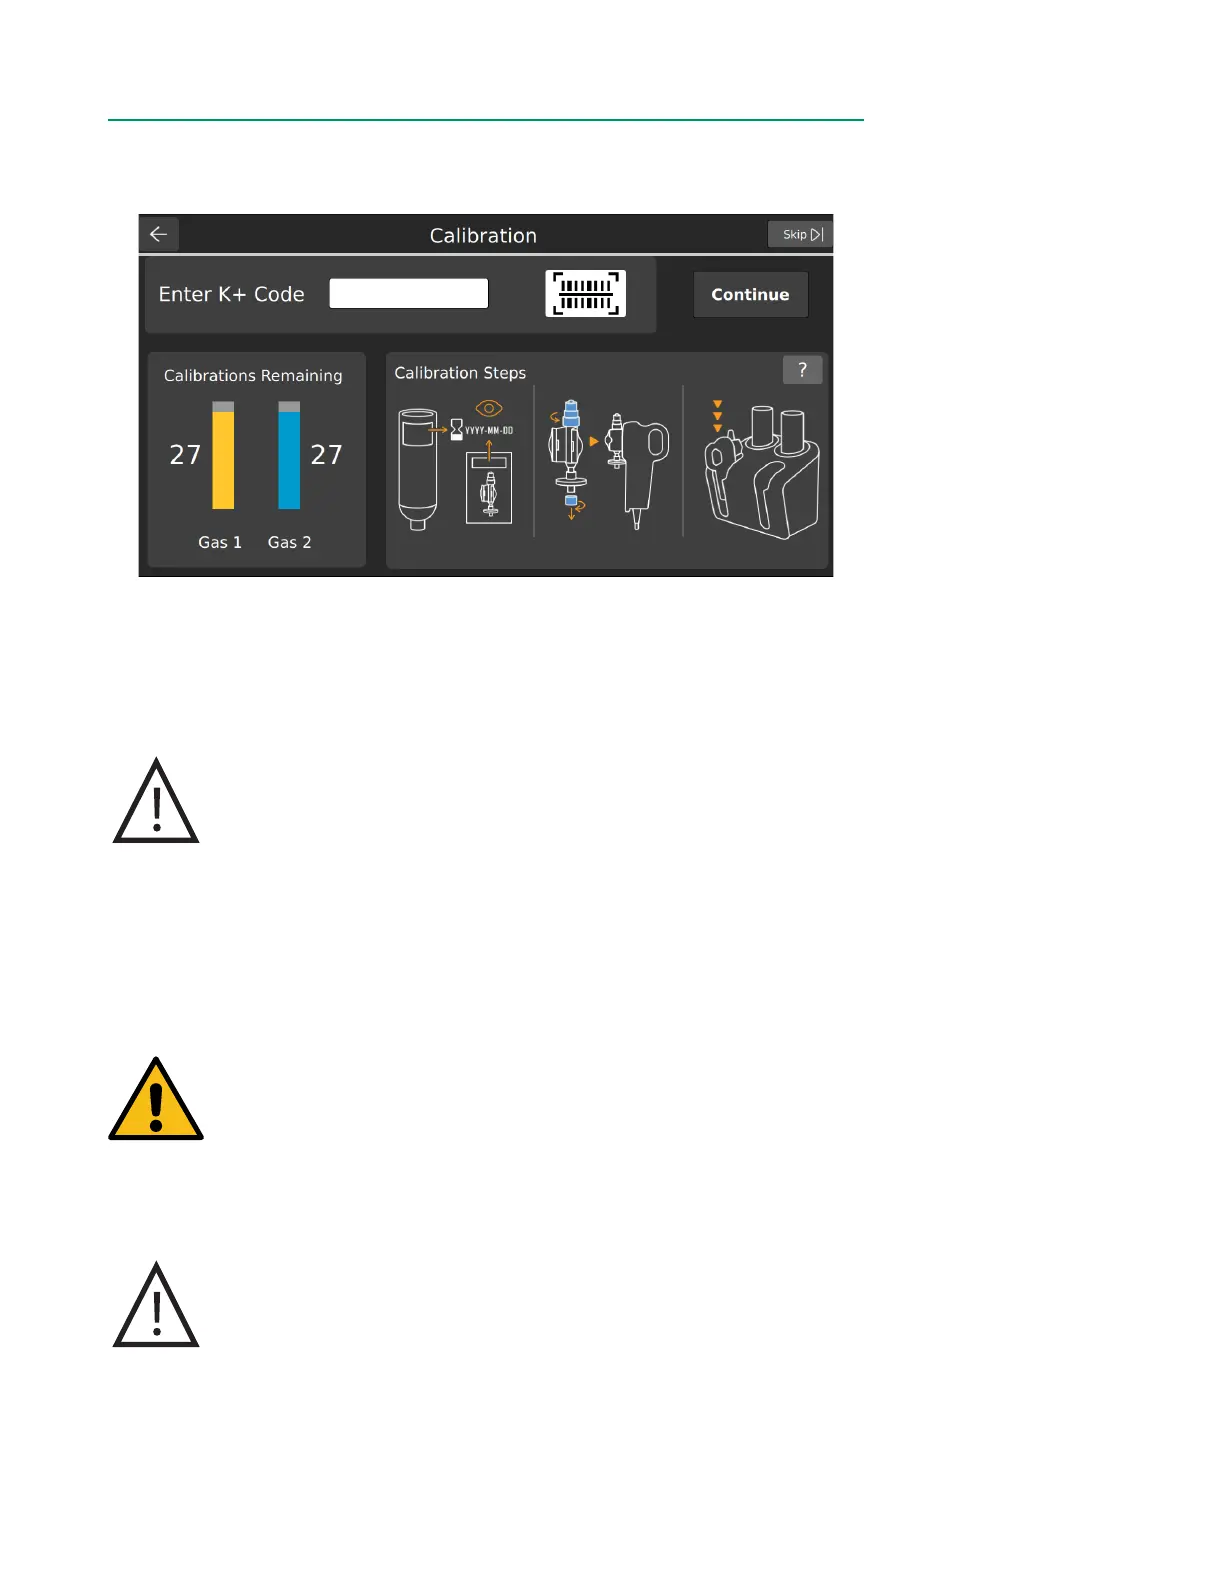
Calibration HomeCalibration Home
First select a case prole, then tap Calibrate from the Home Screen.
Note: Tap Skip at the top right of the calibration screen to skip calibration.
Prepare the BPM AssemblyPrepare the BPM Assembly
1. Open the Shunt Sensor package, remove the sensor, and inspect for damage to
the optical surface of the sensor body.
Caution
Do not open the pouch until the sensor is to be used. Once the
pouch is opened, the sensor must be used within 24 hours or
inaccurate calibration may result.
Do not use the sensor if the foil pouch has been damaged.
Damage to the foil pouch can result in inaccurate calibration
and/or measured parameter values.
2. Check that the sensor contains adequate buffer solution before calibration.
To do this, hold the sensor assembly vertically and ensure the buffer solution
completely covers all four microsensors.
Warning
Avoid touching the optical surfaces of the CDI Shunt Sensor.
Fingerprints on these surfaces can reduce the accuracy of the
system.
Do not add or remove solution in the sensor assemblies. The
composition and volume of the buffer solution has been preset
during manufacturing for optimum calibration time and accuracy.
Caution
Do not use sensor assemblies that are not lled adequately with
buffer solution. Sensor assemblies not lled with adequate buffer
solution may not calibrate properly.
Do not wipe moisture or particulates from the surface of the sensor
assembly that connects to the BPM. Damage to this surface can
result in inaccurate performance.
 Loading...