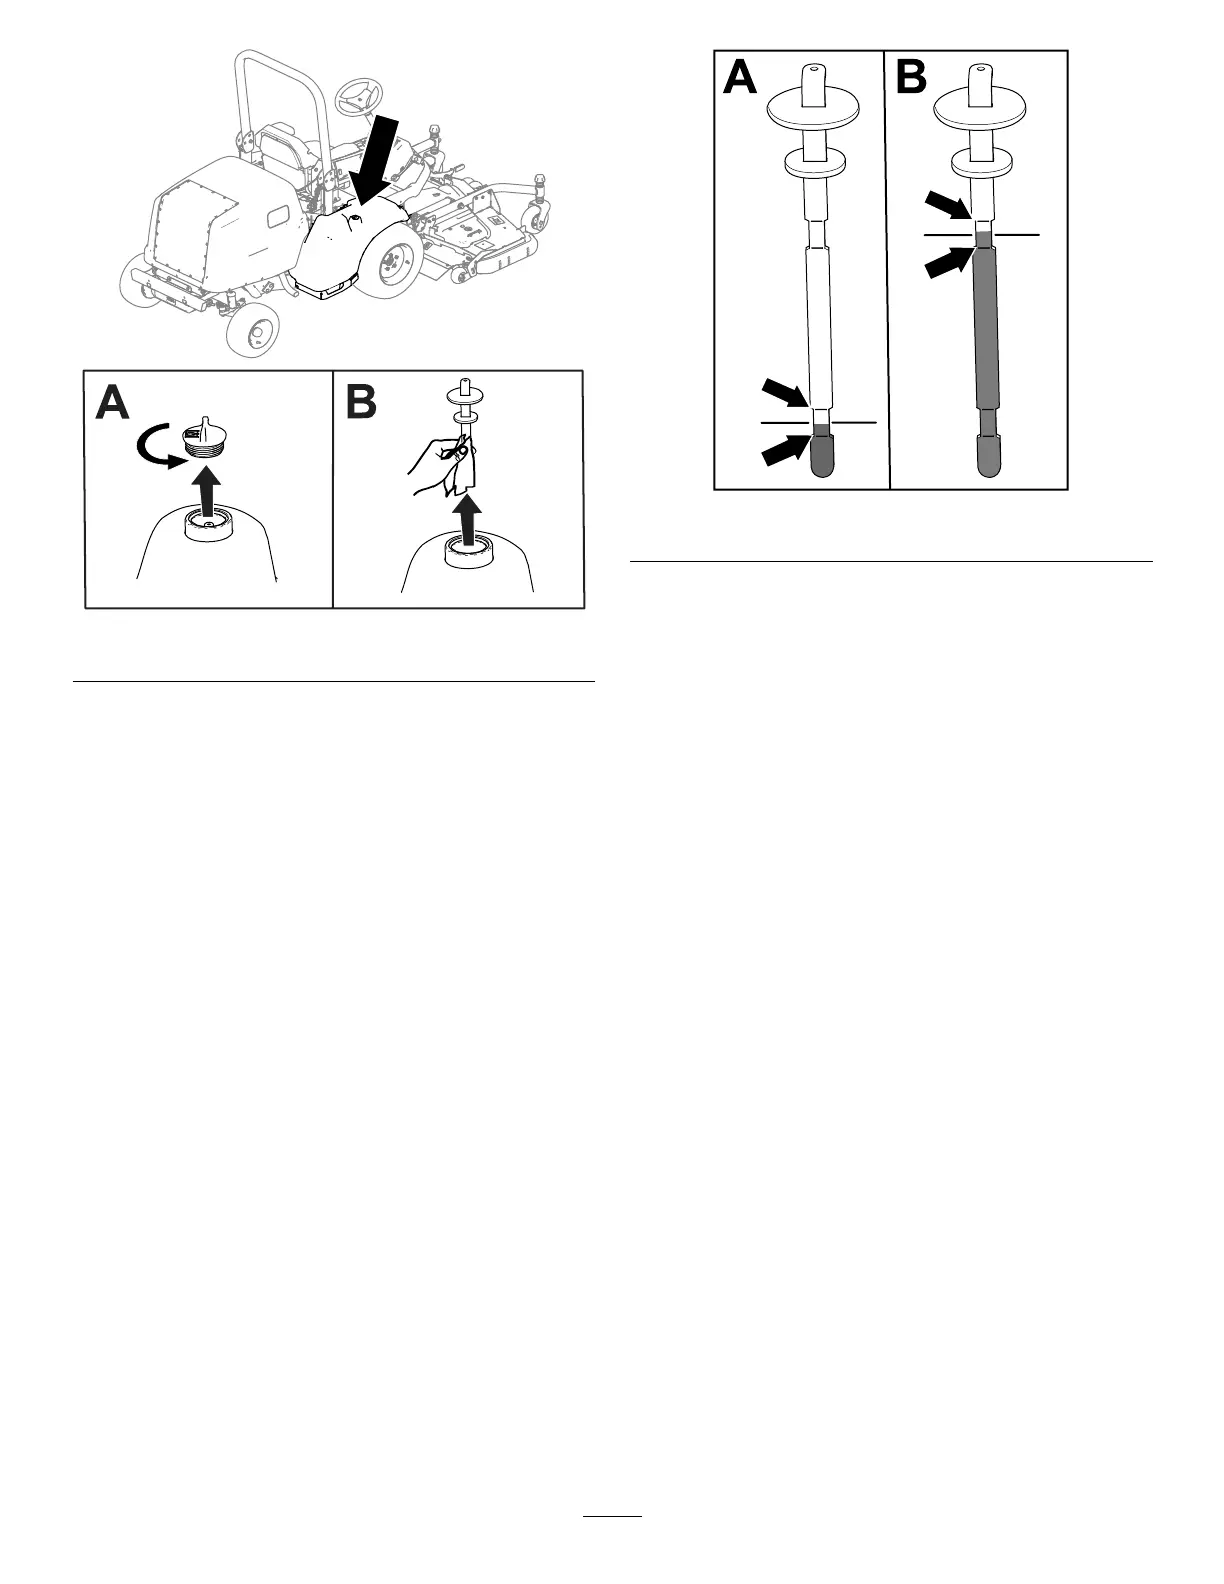
g285821
Figure 83
3. Remove the dipstick from the hydraulic tank and
wipe it with a clean cloth ( Figure 83 ).
4. Insert the dipstick into the hydraulic tank.
5. Remove the dipstick and check the uid level
( Figure 84 ).
• If you have a cutting unit equipped: The
hydraulic-uid level is at the appropriate level
when the uid appears between the lower 2
marks on the dipstick ( A in Figure 84 ). It is
also acceptable for the uid level to be above
the lower marks.
• If you have the Hydraulic Driven
Attachment Hose Kit equipped: The
hydraulic-uid level is at the appropriate level
when the uid appears between the upper 2
marks on the dipstick ( B in Figure 84 ).
g286314
Figure 84
6. If the uid level is below the appropriate lower
mark (per your equipped attachment; refer
to step 5 ) on the dipstick, add the specied
hydraulic uid into the tank. Repeat steps 3
through 5 until the uid level appears between
the appropriate 2 marks on the dipstick.
7. Insert the dipstick and plug into the hydraulic
tank.
8. Hand-tighten the plug.
Important: Do not use a tool to tighten the
plug.
9. Check all hydraulic hoses and ttings for leaks.
Changing the Hydraulic
Fluid and Filters
Service Interval : After the rst 1000 hours —Change
the hydraulic uid and hydraulic
lter .
Every 800 hours —Change the hydraulic lter (if
you are not using the recommended hydraulic
uid or have ever lled the hydraulic tank with
alternative uid).
Every 800 hours —Change the hydraulic uid (if
you are not using the recommended hydraulic
uid or have ever lled the hydraulic tank with
alternative uid).
Every 1,000 hours —Change the hydraulic lter
(if you are using the recommended hydraulic
uid).
Every 2,000 hours —Change the hydraulic uid
(if you are using the recommended hydraulic
uid).
70