Setup
Loose Parts
Use the chart below to verify that all parts have been shipped.
Procedure Description
Qty .
Use
1
No parts required
–
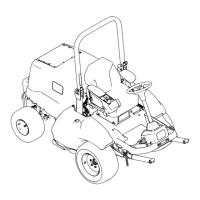
Remove the machine from the shipping
container (Models 31900A, 31901A,
and 31907A only).
Rear wheel 2
Small washer (2-wheel-drive only)
2
Large washer (2-wheel-drive only)
2
Bolt (5/8 x 1-1/4 inch) (2-wheel-drive
only)
2
Dust cap (2-wheel-drive only)
2
Lug nut (4-wheel-drive only)
8
2
Thread-locking compound
Install the rear tires (Models 31900A,
31901A, and 31907A only).
3
No parts required
–
Remove the front tires (Models 31900A,
31901A, and 31907A only).
Right lift arm
1
Left lift arm
1
Large pin 2
Bolt (3/8 x 2-3/4 inches)
2
Nut (3/8 inch)
4
Small pin
2
Bolt (3/8 x 1-1/4 inches)
2
4
Grease tting
2
Install the lift-arm assembly (Models
31900A, 31901A, and 31907A only).
5
No parts required
–
Install the front tires (Models 31900A,
31901A, and 31907A only)
T ie-down bracket 1
Bolt (3/8 x 3-1/4 inches)
2
6
Nut (3/8 inch)
2
Install the tie-down bracket (Models
31900A, 31901A, and 31907A only).
7
Seat Kit (ordered separately; refer to
your authorized T oro distributor)
1
Install the seat (Models 31900A,
31901A, and 31907A only).
Steering wheel
1
8
Cover
1
Install the steering wheel (Models
31900A, 31901A, and 31907A only).
9
Sound decal (Part 144-0512)
1
Install the sound decal (Models 31907A
and 31909A only).
Bumper 1
Bolt (3/8 x 3 inches)
2
Bolt (3/8 x 3-1/4 inches)
4
10
Nut (3/8 inch)
6
Install the bumper (Models 31900A,
31901A, and 31907A only).
1 1
No parts required
–
Adjust the roll-bar position (Models
31900A, 31901A, and 31907A only).
12
No parts required
–
Connecting the battery (Models 31900A,
31901A, and 31907A only).
1 1